Create a Route
This article describes how to create and modify routes. Only authors have the right to create, modify and delete routes. Therefore, authors must be logged in to the AppNavi widget.
Creating a Route
STEP 1: Open AppNavi widget (Avatar)
First, open the application for which you want to create a route. Please note that this application has also been added to the customer portal, and the AppNavi widget appears on the application, widget position can be changed.
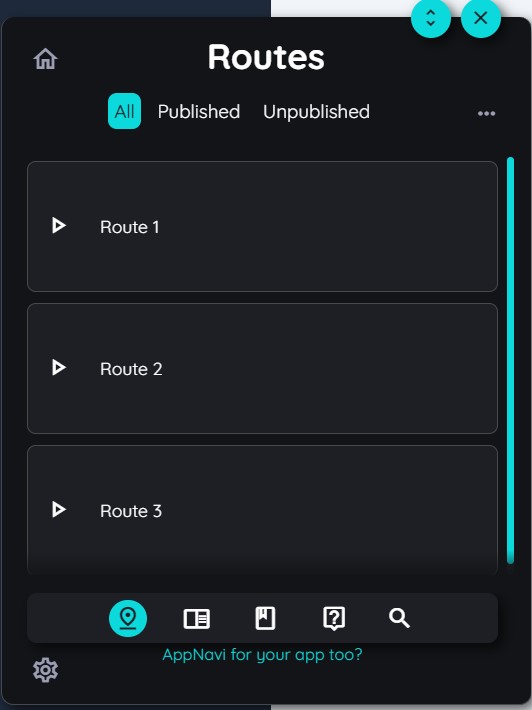
Now click on the AppNavi widget to open the AppNavi menu.

User can register for AppNavi from here: Click on "Appnavi for your app too?". It will take user to AppNavi free trial.
STEP 2: Log in to the widget
- Click on the Guide logo in the opened AppNavi menu.
- To login, click click setting Icon.
- Now click on the "Login" button.
- Enter your login "Email address" and "Password'' in the login screen.
- Confirm with "Login".


STEP 3: Start the route creation
• After you are logged in, click on the route icon in the AppNavi menu bar.
• Now click on the "..." and "+" icons to initiate the route planner.

STEP 4: Fill the route properties
The route planner consists of 3 sections:
- General: Information about the route, such as the Language, Icon, Title, Mode, and publishing status.
- Steps: The sequence of steps with the possibility of Adding, Deleting, or Moving Steps in the sequence.
- Details: To edit the selected step in terms of Headlines, Texts, Images, Videos, links, and Iframes, as well as detailed settings on the step level.

Now fill in the route properties:
- Language: User can select preferred language from language section, so the route will appear in that language (languages are added and selected from portal side according to the requirement of user)
- Icon: Choose a speaking icon for the route.
- Title: Give the route a very short, meaningful title. This title will appear on the front of the route tile.
- Start Mode: User can select mode to play route, by default it will be in learning mode. Learning mode means that user will play route manually and Automation mode means route will be played automatically once done automation setting on each step.
- Publication Status: Routes have two status type i.e. Publish and unpublish, it will be displayed here.
Now give the route a meaningful description. This description appears as soon as a user moves over the route tile (back side of the tile).
STEP 5: Initiate the step recorder
If you want to add steps to your route, you can choose between two step types:
- Capture step:
This step type is bound to an element in your application. The tooltip will be displayed exactly at this element.. - Inform step:
The inform step is not bound to an element. Inform steps are used for example, when you want to provide an explanation or help during a flow. . If you want to add a step with information (without element binding), you can add an Information step by moving the mouse to the line connecting two steps in the "Steps" section, then clicking on the "+" icon that appears and selecting the "Add Inform" step option. The step appears immediately in the step flow and can be edited directly in the "Details" section.
To record a capture step, you need to initiate the step recorder in the "Steps" section of the planner. When starting a route, two standard steps are already listed here: the "Welcome!" step, which is typically used to explain the route. And the "Congratulations!'' step, which celebrates the successful completion of a route.
Move your mouse over the "+" icon between the two steps to which you want to add the capture step.
In the menu that opens, select the "Capture" step option.
Now the step recorder will open in your application.

STEP 6: Select the appropriate type in the step recorder
User can drag-and-drop the step recorder to any place in your application so that it does not interfere with the recording of your route. Select any action type from the menu by clicking on the appropriate step type icon.
- Show:
This highlights an element on the screen to explain it. No direct interaction is made with the application. Via "Next" in the tooltip, the user gets to the next step. - Left Click:
With the "Left Click" option, the user is prompted to perform a left click on the selected element directly within the application in order to proceed to the next step. There is no "Next" option in this case. - Right Click:
Analogous to the "Left Click" option, the "Right Click" option prompts the user to perform a right click on the selected element directly in the application in order to proceed to the next step. There is no "Next" option in this case. - Edit:
The "Edit" option prompts the user to enter an input or make a selection from a list or table. - Press Enter:
The "Enter" option prompts the user to press the "ENTER" key. This may be necessary, for example, after entering a search term in a search field. - Hover:
With the "Hover" option, it is sufficient for a user to hover over an element to get to the next step.

STEP 7: Capture steps
"Capture a step" means that the relevant element to which a step refers is precisely recorded. The intelligent AppNavi algorithm ensures that the element is still found even if the properties of the element change (e.g., the search field is no longer at the top left but at the top right). The maintenance of the routes is thus reduced to an absolute minimum.
Capture element can be done in two different ways: by pressing the CTRL key (default behavior) or by pressing the SHIFT key. The CTRL option directly captures steps without allowing you to fine-tune the captured path. With the SHIFT key, you can fine-tune the captured path as you get a detailed path that you can select from.
-
Capture with CTRL:
Select the step type in the Step Recorder. Move the mouse over the application to the element that needs to be recorded. When the blue highlight frame appears around the desired element, press the CTRL key to capture it.
After capturing, the blue highlight border remains stable and does not move outward. The element boundary stays visually accurate and consistent in Routes and Knowly.
The recorded element appears directly in the Step Recorder. Assign a meaningful title to simplify further editing in the Planner.
-
Capture with SHIFT:
Select the step type in the step recorder.
Move your mouse over the application to the element you want to record.
As soon as the colored frame appears around the desired element, capture the element by pressing the SHIFT key.
A dialog appears with the different elements of the selected area: Select any element that you want to capture.- click on the img tag to capture an img element only, or
- click on the div tag to capture a specific division of that element, or
- click body to select the whole page, or
- click html to select the whole html of that specific page.
- The recorded element now appears directly in the step recorder. Assign a meaningful title to this element directly to simplify editing in the planner.

STEP 8: Cancel step capturing
You can cancel the creation or modification of a route at any time. The changes or additions made will then not be saved.
Initiate the step recorder as described above.
Select a step type.
Move your mouse to the element of your application you want to capture.
A colored border appears. If you want to cancel the capture, press the ESC key.
AppNavi returns to the step recorder without capturing the element.
STEP 9: Save or discard steps
As soon as you have captured a step with the step recorder, it appears in the step recorder. With the option "Apply" you can take over the captured steps. The route planner appears and shows these steps. If you want to discard the captured steps, click on the "Cancel" button.
STEP 10: Adding more steps and editing
There are numerous ways to customize a route: steps can be added, tested, modified, deleted, and changed in sequence in both the step recorder and the route planner.
Add Steps
- To add a step in the route planner
- Move the mouse over the line connecting two steps until the "+" sign appears
- Click on the "+" sign
- Select the option "Capture step" or "Inform step", depending on your needs
- If you select "Inform step", the step will be added, and an empty tooltip will appear in the "Details" section; if you select "Capture step", the step recorder will open and allow you to create a step as described above
Edit in step recorder
- Left-click on the mouse button on the desired step in the step recorder
- Select one of the options that appear, or just edit the step content (text and formatting, images, videos, links, iframes, and connected routes)
- Click on the tick mark icon to save the changes. The Step can also be further edited from the route planner under the "Steps" section by left-clicking on the mouse on the desired step and then editing from the "Details" section.
Step options
-Live Edit:
It will display the step in the play mode, so the user may edit it similarly to how it's done in the route planner.
- Copy step:
It will copy each detail of that step, including text, images, videos, links, connected routes, etc. It will also copy it in all the selected languages. - Delete step:
The step can be deleted. Please note that the step is deleted directly after selecting the delete option without a confirmation prompt. - Move up:
To change the order of the steps, the selected step can be moved upward. - Move down:
To change the order of the steps, the selected step can be moved downward. - Test route:
This step allows to run the captured steps that are created in the route. The step and the corresponding tooltip will be displayed in the application. The "x" close icon can be used to cancel the test, and AppNavi returns to the step recorder. - Test Automation:
This step allows to run the captured steps that are created in the route with automation mode. The step and the corresponding tooltip will be displayed in the application. The "x" close icon can be used to cancel the test, and AppNavi returns to the step recorder.


STEP 11: Details Section
In the route planner, under the "Details" section, there are four tabs: "Content" (default), "Settings", “Search” and “Automation”.
Content: The Content tab is intended for the comprehensive design of the tooltips. Tooltip Details
Settings: Detailed settings can be made in the "Settings" tab. Setting Tab
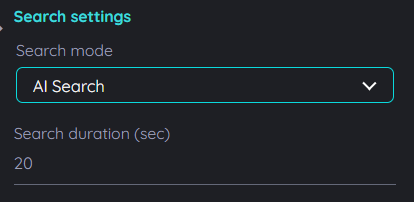
Search
There are two search modes:
- AI Search AI Search Details
- Fuzzy Search
• Search Duration:
There is an option to set the search duration for any step when an element is not found for some reason. The user can set this duration within the range of 5s to 30s; search will continue for this duration. If an element is found, it will show the element; if not, the search will complete, and a message telling that the element was not found will appear.
If an alternate step is active, the search duration will be overruled by the alternative step search duration. For example, if the search Duration is 15s and the alternative step search duration is 5s, search will happen for 5s.
• Active Alternative Step:
There's also an option to activate an alternate step in case any step is not found while playing the route. The user can activate this feature and select an alternative step to replace the unfound step. The user can also set a search duration in seconds for the search of the step, and if it is not found within that duration, then the alternate step is played.
• Captures:
It shows the path of the captured elements; here you can add or recapture the elements. Capture Details
STEP 12: Step settings
In the right area of the route planner "Details" there are two tabs: “Content” (default) and “Settings”. While the Content tab is intended for the comprehensive design of the tooltips, detailed settings can be made in the "Settings" tab. Click on the "Settings" tab to make these detailed settings refer to the Step Settings
There's also an option to "Test step" to see check if the step is correct in the application (see also next step).

STEP 13: Step search
There are two search modes,
- AI Search
- Fuzzy Search
Captures: It shows the path of the captured elements, here you can add or recapture the elements.
There's also an option to "Test step" to see check if the step is correct in the application (see also next step).
STEP 14: Step Automation Switch "On" if you want to use automation in this step. If it is an input field, you can provide a pre-defined value. If a user uses the "Speed mode" when executing the route, automated steps will be executed automatically by AppNavi without user interaction.

STEP 15: Search DurationThere is an option to set search duration for any step when element is not being found due to some reason. User can set this duration within the range of 5s to 30s, search will continue for this duration. If element is found it will show the element, if not than search will complete and a message telling that element not found will appear.
In case if alternate step is active, the search duration will be overruled by alternative step search duration. For example: If search Duration is 15s and Alternative step search duration is 5s, search will happen for 5s.
STEP 16: Activate Alternative StepThere's also an option to activate an alternate step in case any step is not found while playing the route. The user can activate this feature and select an alternative step ( disabled step can be selected as well ) to replace the unfound step and also the user can set a search duration in milliseconds for the searching of the step and if it is not found in that duration then the alternate step is played.

There's also an option to "Test Automation" and the user can input a delay in milliseconds to play all steps in automation mode.
STEP 17: Play route or test step
After the route has been created completely or partially, it can be tested before or after saving. The test can be performed on the entire route - or only on the selected step.
- Test Step:
"Test Step" allows testing the currently selected step in the "Flow" section. - Test Route:
"Test Route" allows testing the entire route including all steps. To do this, click the "Play" icon in the "Flow" section.

STEP 18: Save or discard route (changes)
Once all or part of the route has been created, it can be saved. Depending on the selected model, this content is stored in the AppNavi Cloud (SaaS) - or in the customer's own data center (hybride OnPremise). By saving, the route becomes visible and modifiable for other authors of the same subscription. For end users, the route becomes visible only after publishing.
You can save a route by clicking on the "Upload" icon in the upper right corner of the route planner.
If you want to cancel the route creation or discard the changes, you can click on the "x" icon.
A confirmation popup will appear asking to save or discard changes
On selecting "Save" it will save the whole content.
On selecting "Discard" it will discard all changes and will not save them.

Now it is a good time to publish your route ...
Publish, republish or unpublish a route
Updated 3 months ago