ChatGPT
ChatGPT is an AI language model developed by OpenAI. It’s designed to understand and generate human-like text based on the input it receives. It can be used for a variety of tasks like answering questions, providing explanations, and assisting with creative writing. ChatGPT is built on the GPT (Generative Pre-trained Transformer) architecture and is continuously updated to improve its capabilities
How to enable ChatGPT in AppNavi
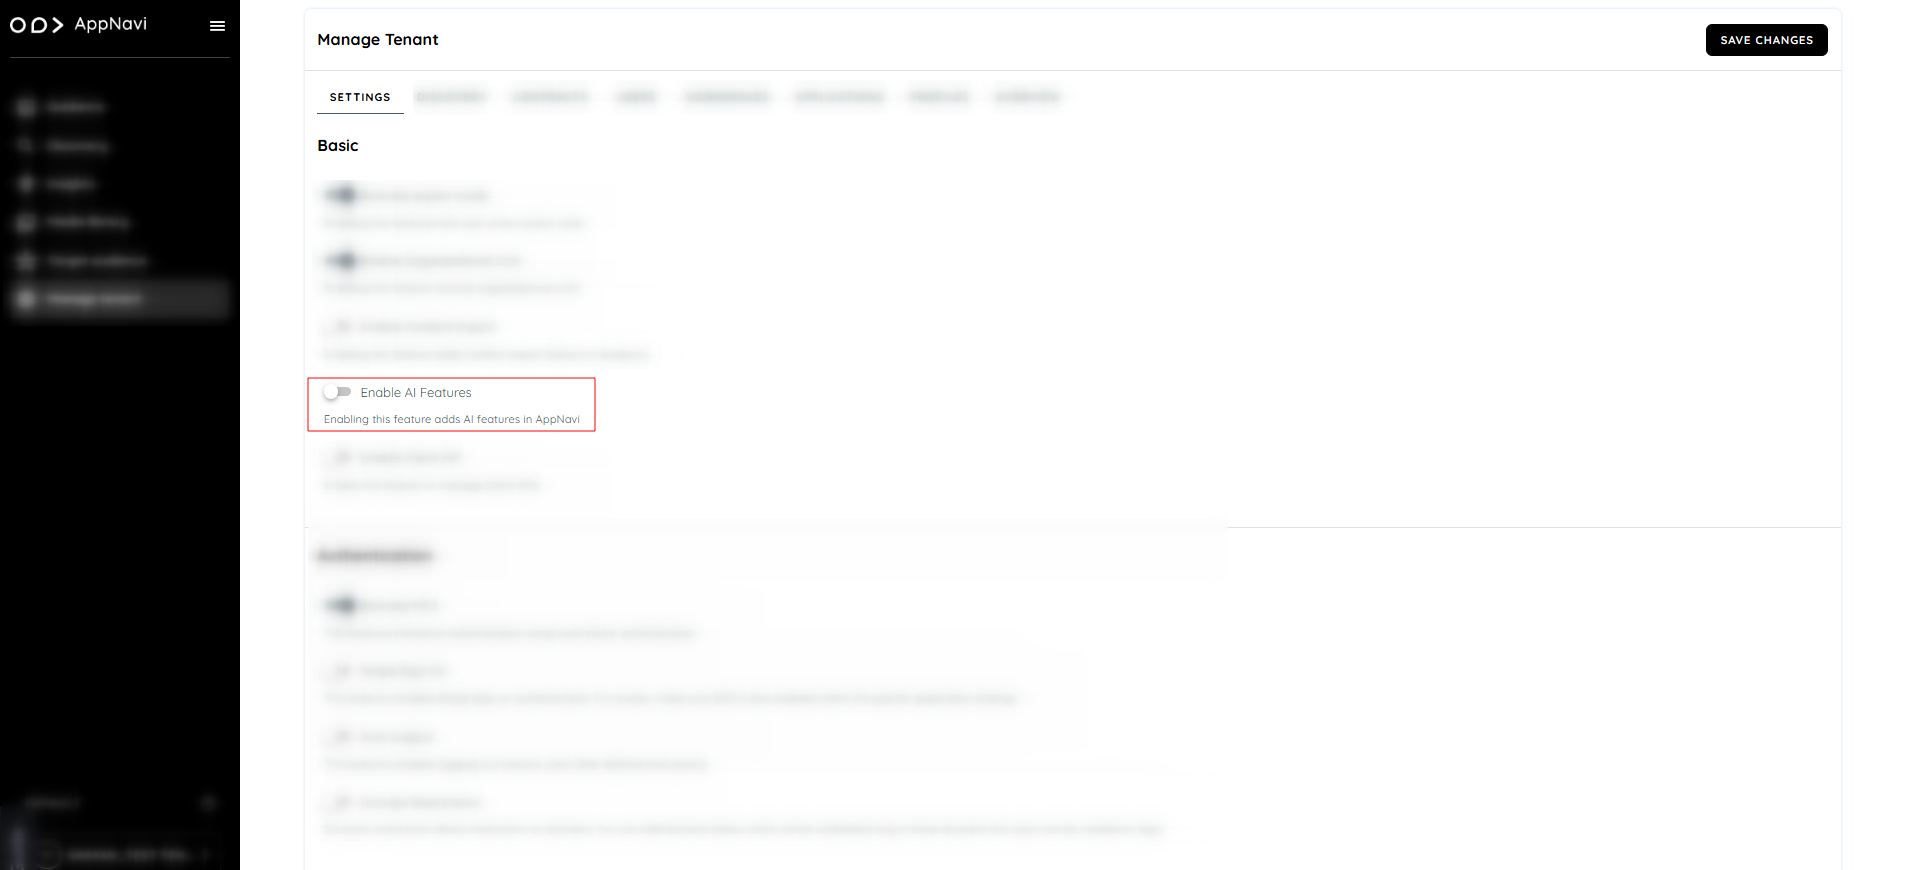
Steps to enable ChatGPT in AppNavi
- Go to Manage Tenant Settings.
- Enable the AI Feature toggle button.
- The AI Settings tab will appear.
- Navigate to the AI Settings tab and enable the ChatGPT integration button.
- Paste the API key of your ChatGPT account to enable the ChatGPT feature in your application
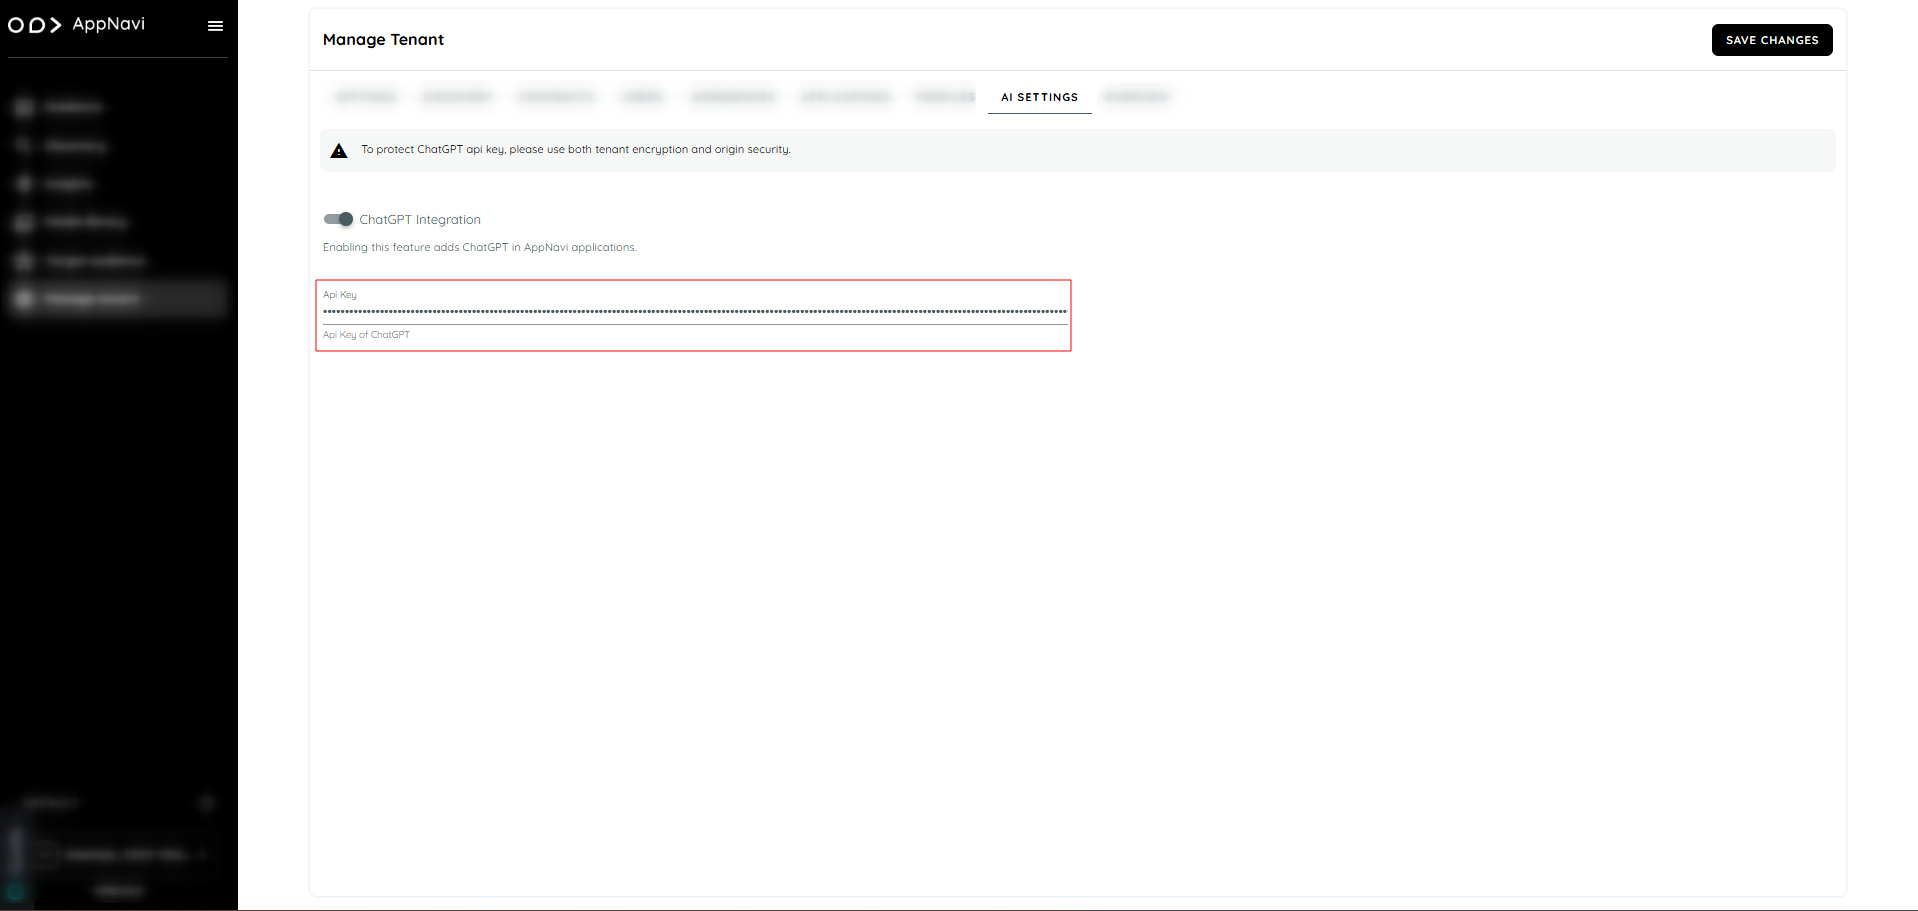
How to Use ChatGPT in AppNavi Application
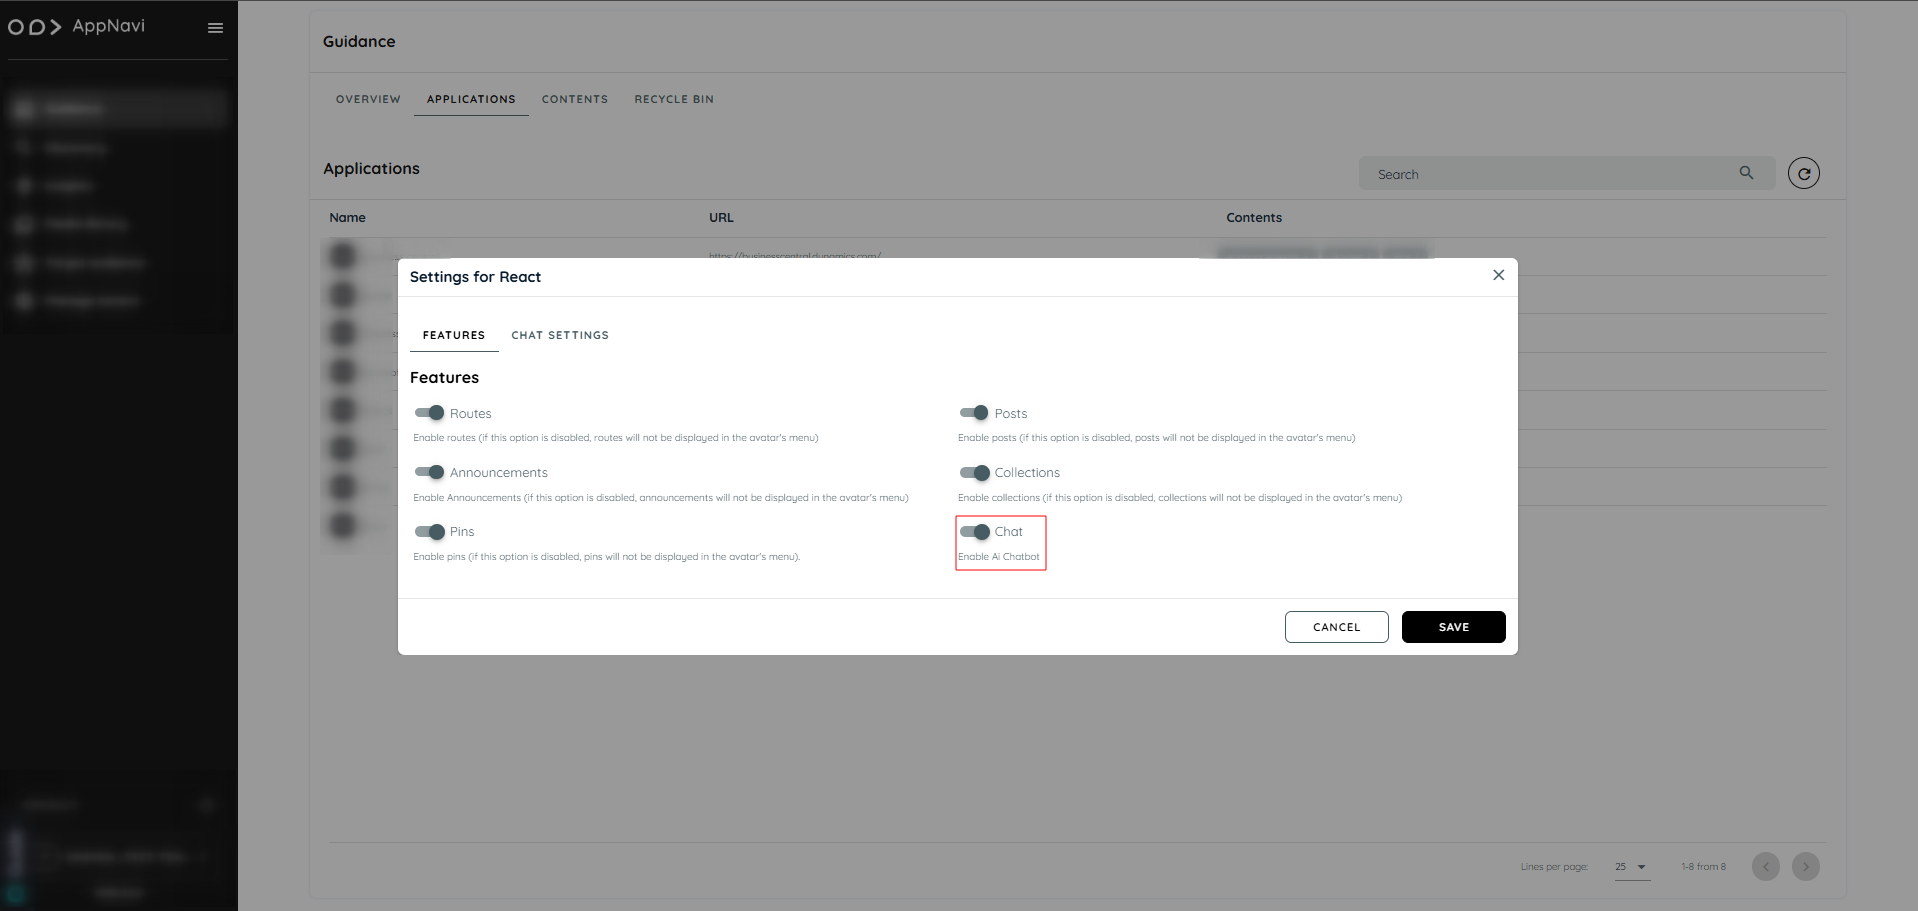
After enabling the AI Feature follow this step to use the GPT on Appnavi applications
- Go to Guidance Application Settings
- Enable a chat Toggle button
- The chat Settings tap will appear
- Navigate to the chat Settings tab and select the GPT Assistant from the drop down
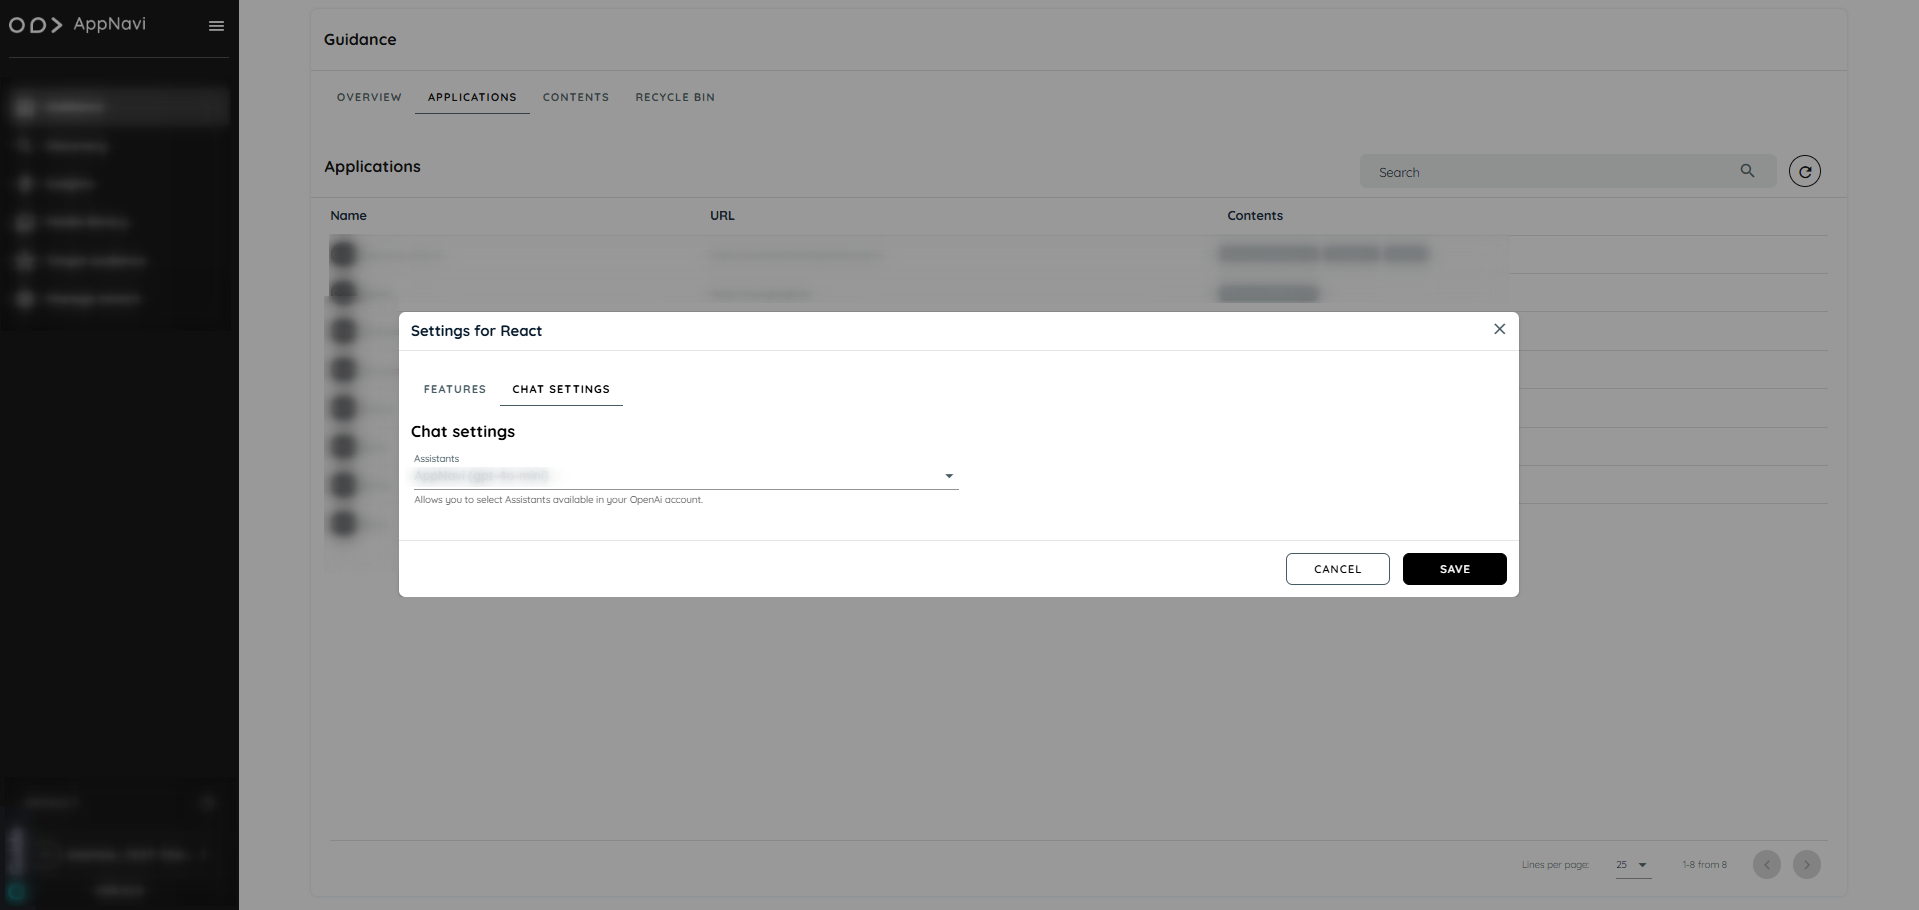
ChatGPT on Avatar
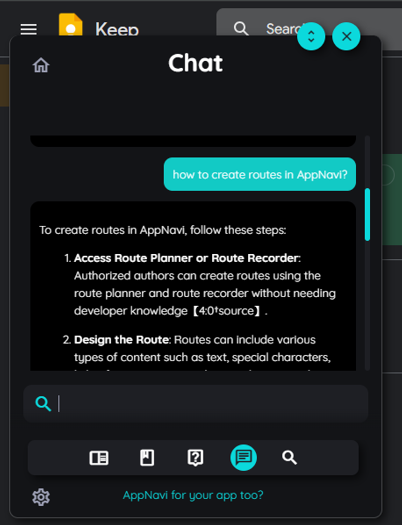
Once configured, ChatGPT will appear as an interactive chat widget on the avatar, accessible within designated AppNavi applications. Users can engage with ChatGPT by entering queries or prompts directly in the chat interface, which will respond with relevant information or guidance based on the selected model.
How to Create a Api key
- Sign In to OpenAI
- Go to the OpenAI website and log in to your account.
- Navigate to API Keys
- Click on your profile or account settings.
- Find and select the “API Keys” section.
- Generate a New Key
- Click the “Create API Key” button.
- Name your key for easy reference and click “Generate.”
- Copy the API key and store it securely (you won’t be able to view it again).
How to create an Assistant
Access the Assistant Setup
- Go to the OpenAI dashboard.
- Select the "Assistants" or similar section from the menu.
Create a New Assistant
- Click “Create New Assistant.
- Choose a model (e.g., GPT-4) that suits your needs.
Configure the Assistant
- Name your assistant and customize any settings or behaviors as needed.
- Save the configuration.
Integrate with appNavi
- Return to your appNavi project.
- In the Guidance application settings, enable the assistant selection.
- Select your newly created assistant from the input field.
Updated 4 months ago