Target Audience
Overview
The Target Audience feature in AppNavi allows content to be selectively shown to users based on defined conditions. These conditions are grouped into target audiences, which are then applied to content such as posts, announcements, routes, pins, collections, or insights.
With this feature, organizations can tailor experiences by ensuring that users only see the information relevant to them—based on rules such as labels, countries, query parameters, and Identity Provider (OIDC).
Purpose of Target Audience
The main goal is to control visibility of content for a specific set of users. Only users who match the conditions defined in a target group will be able to see the associated content.
Functions of Target Audience
There is a new menu item "Target Audience" in the portal. If the user clicks on this, a list of all target groups for this subscription will be displayed. Following are the basic functions of the target audience.
- Create a new Target Audience
- Simulate Target Audience
- Edit a Target Audience
- Delete a Target Audience
- Copy a Target Audience
Setup Target Audience for client side
Users can set up a target audience by following the step defined below:
- Create Target Audience
- Publish it, in the required contents through the portal
- Input API in the custom code of the required application
- Set up Time zone if required
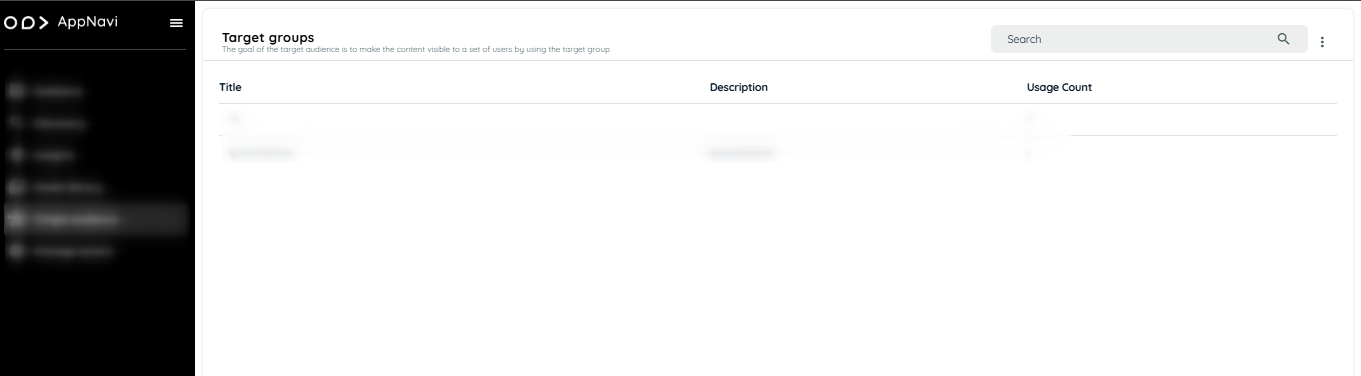
Navigating to Target Audience
To view and manage all target audiences:
- Navigate to the Target Audience section from the left-side menu.
- The Target Audience page will open, displaying a list of all created target groups.
- Each entry includes the Title, Description, and Usage Count to indicate how frequently the target audience is being utilized.
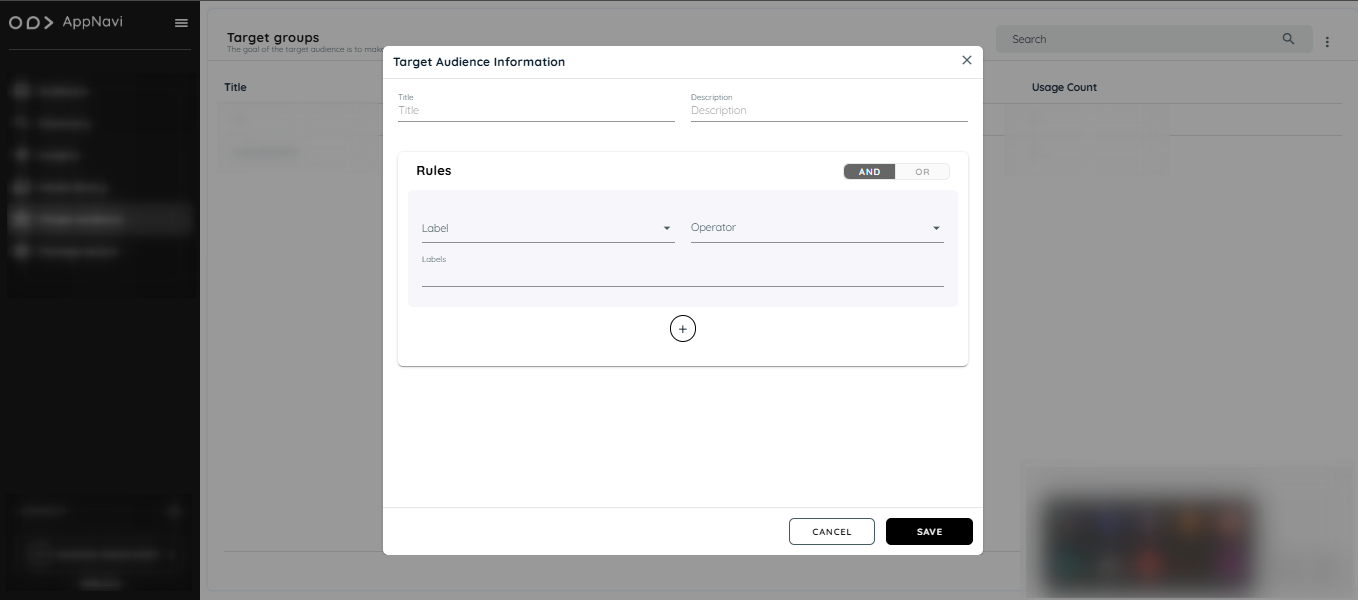
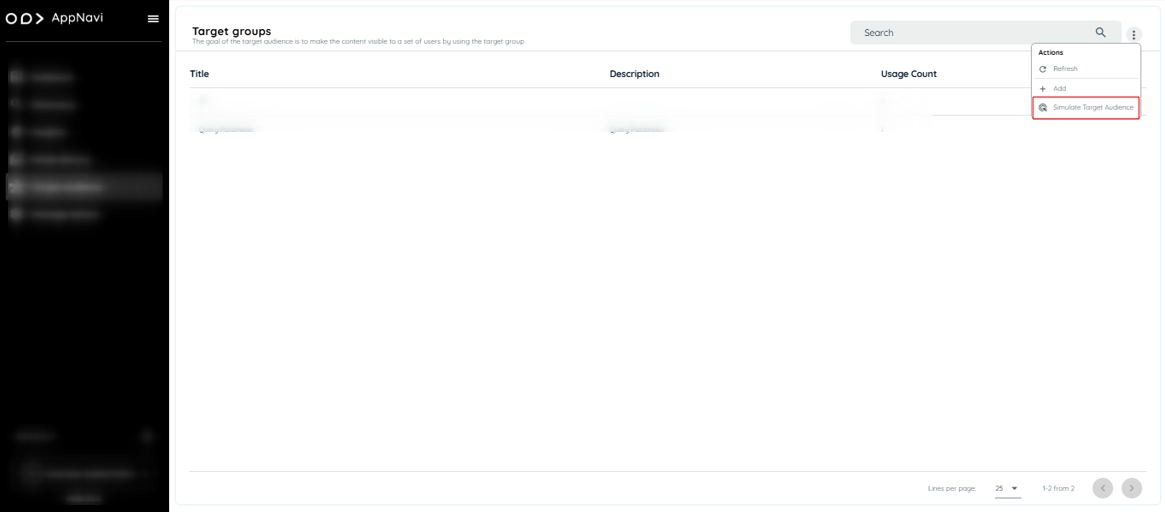
Create Target Audience
- Click on the three dot icon.
- Click the + icon.
- Enter the Title and Description.
- Select a Logical Operator (AND / OR).
- Add Rules using Labels, Countries, Query Parameters and Identity Connect.
- Save the Target Audience.
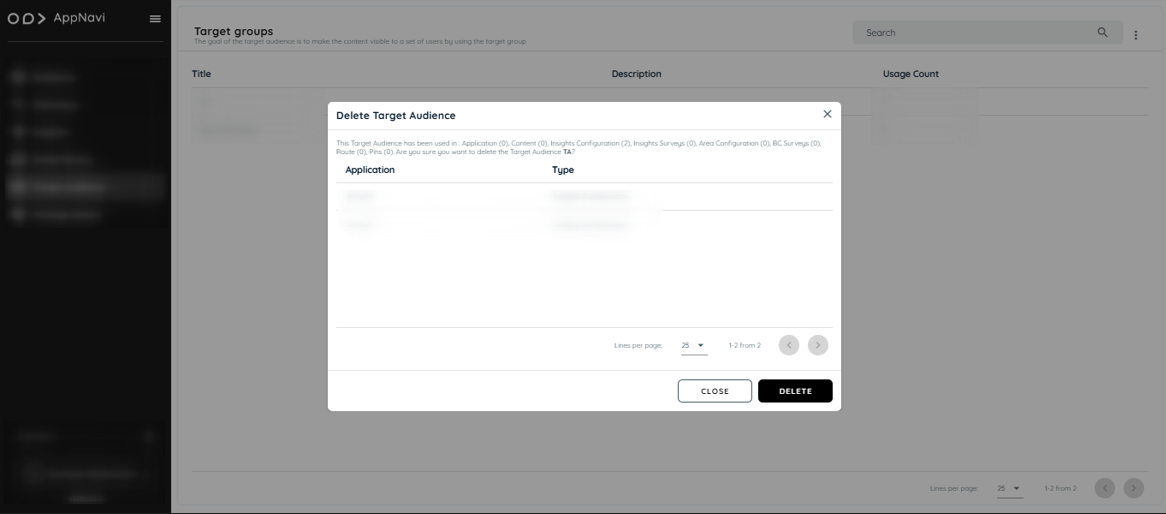
Deleting a Target Audience
When attempting to delete a Target Audience, a confirmation dialog is displayed showing a summary of where the Target Audience is currently in use. This helps prevent accidental removal of active configurations. The dialog displays usage counts across various modules:
Example:
This Target Audience has been used in:
Application (0), Content (0), Insights Configuration (), Insights Surveys (0), Area Configuration (0), BC Surveys (0), Route (0), Pins (0).Are you sure you want to delete the Target Audience "TA"?
Rule Types in Target Audience
Target Audiences support multiple rule types (maximum of 5 rules per group):
Supported Rule Types
- Labels
- Countries
- Query Parameters
- Identity Provider (IDP)
Each rule supports up to 6 operators:
- Equal
- Not Equal
- Contains
- Does Not Contain
- Starts With
- Ends With
Logical Operators
- AND: All rules must be true.
- OR: At least one rule must be true.
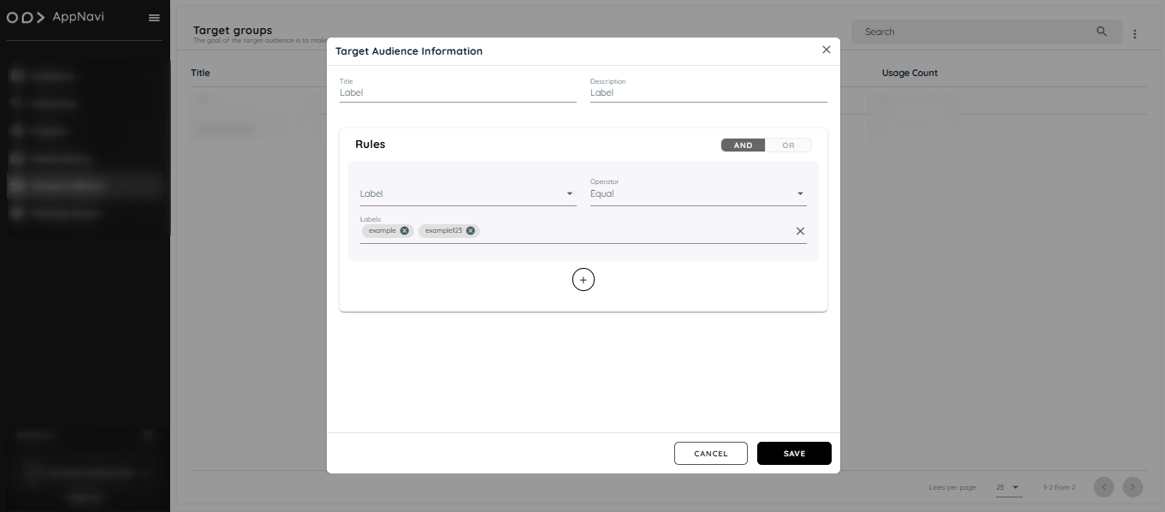
Lables
Target audiences can include labels as rule conditions. Labels must match corresponding values in the custom code configuration.
Labels are custom tags used to group users or applications logically. They are defined within your AppNavi setup and can be used to control content visibility.
Use Case Example:
Show a specific route only to users who have the label “FinanceTeam.”
Steps:
- Navigate to Target Audience.
- Create a new audience group.
- Provide a Title and Description.
- Select a logical operator.
- In the rule section, choose Label.
- Select one of the six available operators.
- Enter one or more label values.
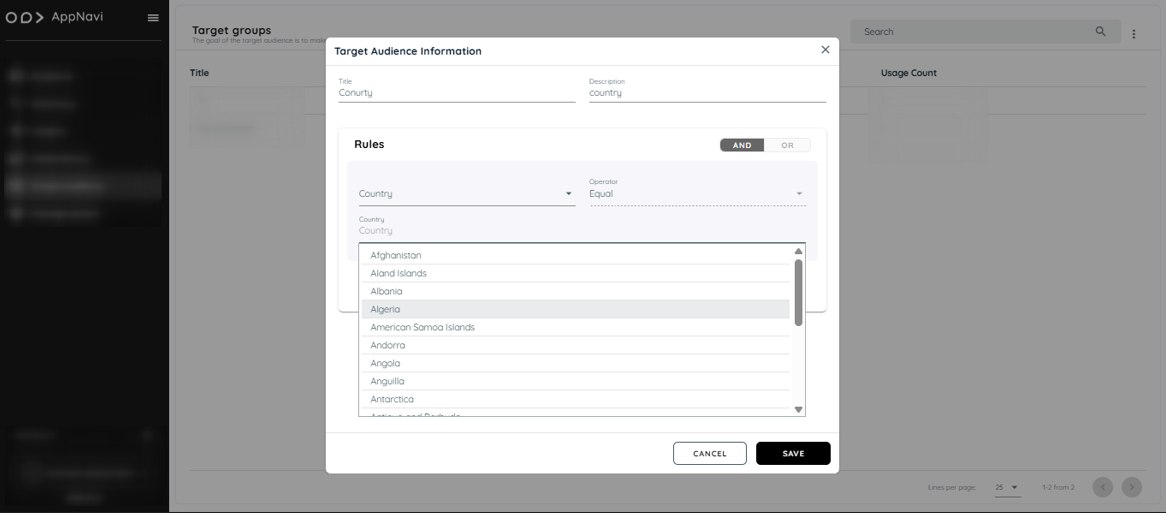
Country
The Country rule allows content to be shown only to users from specific regions. It helps you localize experiences or announcements.
Use Case Example:
Display a regional campaign only to users from Germany or France.
Steps:
- Navigate to Target Audience.
- Create a new audience group.
- Provide a Title and Description.
- Select a logical operator.
- In the rule section, choose Country.
- Select countries from the dropdown list.
Ensure the selected time zone in the client side aligns with the country used in the rule.
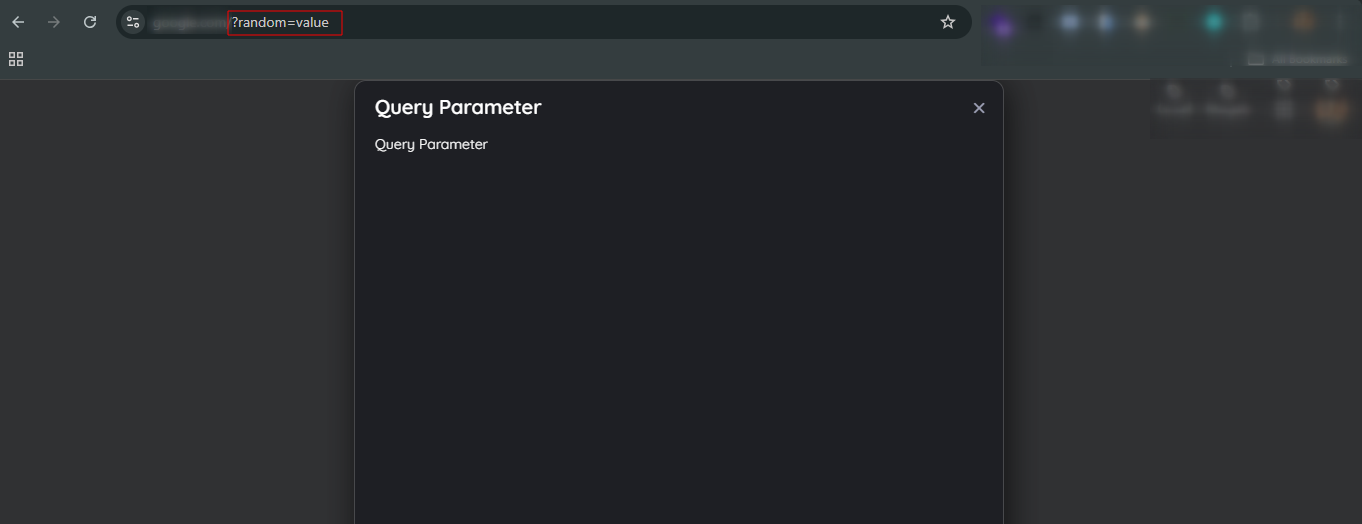
Query Parameters
This rule uses URL parameters to determine which users can access content. It’s useful for deep linking or campaign-specific pages.
Use Case Example:
Show a post only when the URL contains ?region=EU.
Steps:
- Create a new Target Audience.
- In the rule section, select Query Parameter from the dropdown.
- In the Query Parameter field, provide a key (e.g., random).
- In the Value field, provide a value (e.g., value).
- Save the target audience.

Usage in URL:The content will only appear when the following pattern is matched:
https://www.example.com/?random=value
This method enables deep linking and conditional content visibility based on dynamic URLs.
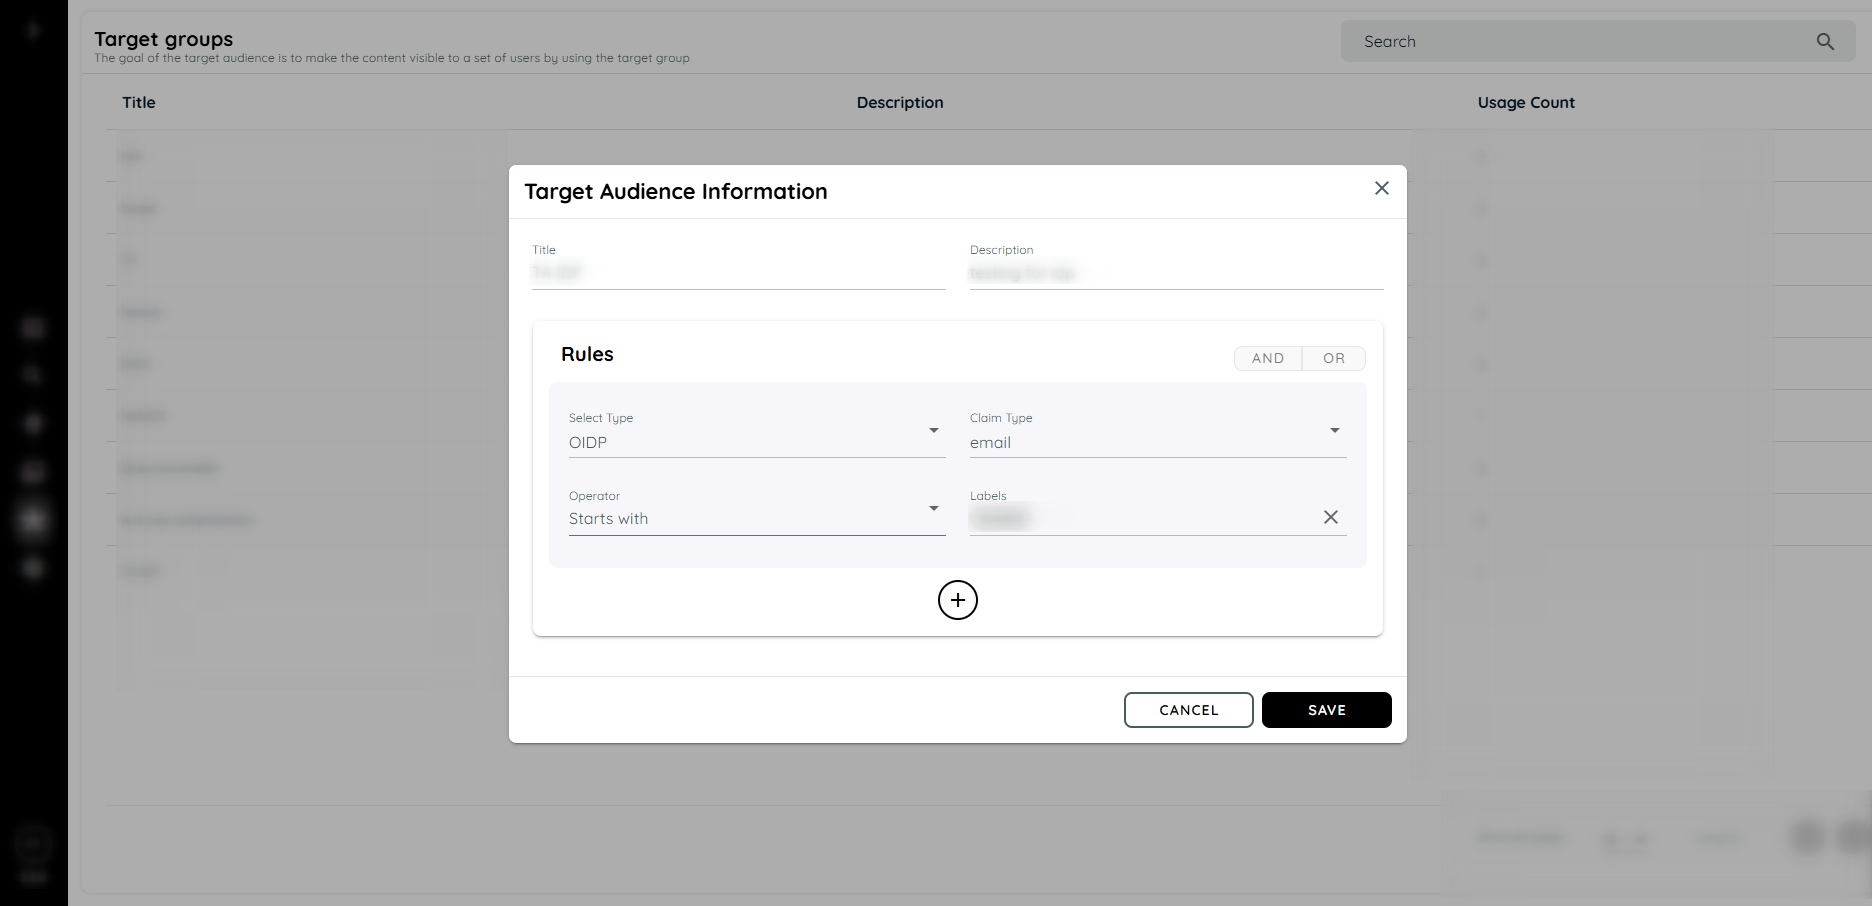
Identity Provider (IDP)
This is the most dynamic rule type built to integrate with Identity Providers (IdP) such as Azure AD, Okta, or other SSO systems via Identity Connect. OIDC rules use Claim Fields, which are user attributes fetched directly from the IdP enabling automatic targeting without manual tagging.
Purpose:
To personalize content based on user identity information such as department, role, or email. Once the IdP is connected, its claims can be used in Target Audience rules for smart, identity-driven control.
How It Works:
- Ensure Identity Connect (IdP) is properly configured in the portal.
- Once connected, available claim fields (like department, email, username, etc.) will appear.
- These claim fields can then be used to build Target Audience rules.
- Common Claim Fields:
- department
- name
- family_name
- username
Use Case Examples:
- Show onboarding content only to users from the HR department.
- Hide an internal post if email domain doesn’t match your company’s.
- Display a route only for username = demouser.
Steps:
- Create a new Target Audience.
- Enter a Title and Description.
- In the rule section
- Select Type → OIDC (visible only when identity connect is connected).
- Select Claim Type, e.g., department, username, email.
- Choose the Operator (equals, starts with, contains).
- Enter the Value (e.g., demoUser, HR, Finance).
- Click Save to create the Target Audience.
- To verify, click the three dots again and choose Simulate Target Audience to test the configured conditions.
Setup API in Custom Code
You may find some more information regarding API setup in custom code, under the heading:
setTargetAudienceConditions : method
https://docs.appnavi.eu/docs/custom-code
Setup Time Zone
- Go to the “Time Zone” setting on your PC.
- Select the time zone of the country that the user has selected in the target audience.
- Go to Avatar.
- Check the route list, that route will be present in the list.

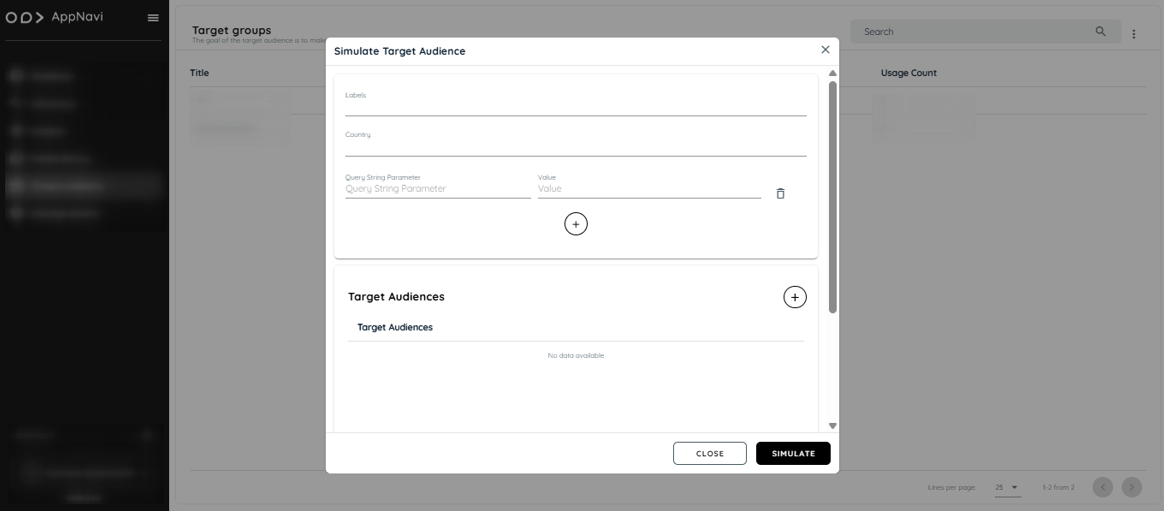
Simulate Target Audience
The user can simulate the target audience, to check its behavior for the content it is assigned to. Firstly, users add target audiences and input a given label/country, then users simulate the given target audiences. In the simulation, the user can know whether a target audience is true, meaning if it turns "green", the content will be shown to the user on the client side(Avatar) and if it turns "red", the content will not be shown.
How to use simulate Target Audience
Below are the steps to simulate the target audience.
- Select one or multiple Labels.
- Select one or multiple Countries
- Select one or multiple Query parameters
- Select one or multiple identity connect
- Click the "+" Icon and select one or multiple Target Audience, the maximum limit is 10.
- Fill the Title field
- Select Target Audience
- Click "Add"
- Click "simulate"
Deleting a Target Audience
When attempting to delete a Target Audience, a confirmation dialog is displayed showing a summary of where the Target Audience is currently in use. This helps prevent accidental removal of active configurations. The dialog displays usage counts across various modules:
Example:
This Target Audience has been used in:
Application (0), Content (0), Insights Configuration (), Insights Surveys (0), Area Configuration (0), BC Surveys (0), Route (0), Pins (0).Are you sure you want to delete the Target Audience "TA"?
Deleting Target audience
Summary
The Target Audience feature in AppNavi enables precise control over content visibility by defining rules based on labels, countries, and query parameters. These rules group users into audiences that can be applied to announcements, routes, pins, and insights.
Target audiences are easily created, managed, and simulated within the portal. The addition of query parameter support allows content to be dynamically shown based on specific URLs. Business teams benefit by delivering tailored experiences, ensuring content reaches only the intended users—enhancing personalization, reducing confusion, and improving engagement across applications.
Updated 8 months ago