
Content Language Translation
AppNavi provides content such as routes, posts, pins and announcements in different languages and dialects. Each user sees the content in the language that suits them best, as long as that language is supported. You can translate content manually or use automatic translation, which is available for many languages.
Use content language translation when your users work in more than one language, or when you want to offer regional variants of the same language (for example, German for Germany and German for Switzerland).
Prerequisites
Make sure the content you want to translate already exists and that you can open it for editing in the AppNavi portal. Check that the language you need is listed in Supported Content Languages.
Add a language to your content
Follow these steps to add a new language to a route, post, pin or announcement.
- Open the content you want to translate.
- Click New Language.
- In Select language, choose the language you want to add.
- Optional: in Language region, choose a dialect (regional variant) for that language.
- Choose how the new language should be filled: Empty, Copy or Translate Automatically. Each option is described below.
- Click Apply.
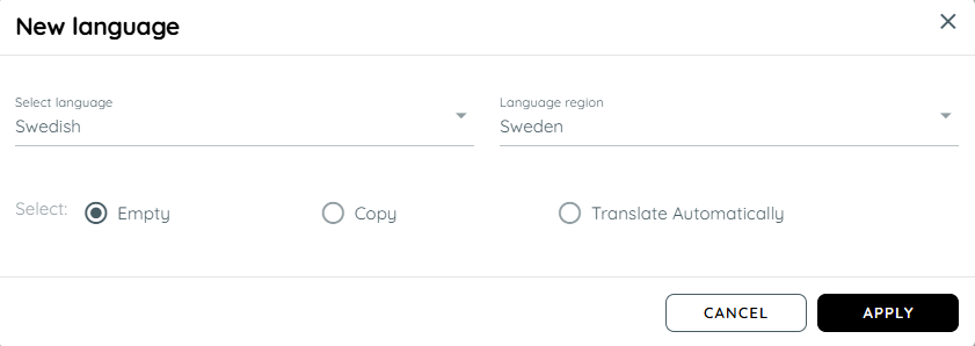
The New language dialog
Choose how the new language is filled
The option you select in step 5 decides what the new language contains when it is created.
Empty: The new language is created with no content, so you can write the translation yourself.
Copy: The content is copied from the primary language. Use this when you want to start from the same content and adjust it later.
Translate Automatically: The whole content is translated automatically from the primary language into the new language.
Expected result
The new language appears as a tab next to the primary language at the top of the content editor. Select the tab to view or edit the content in that language.
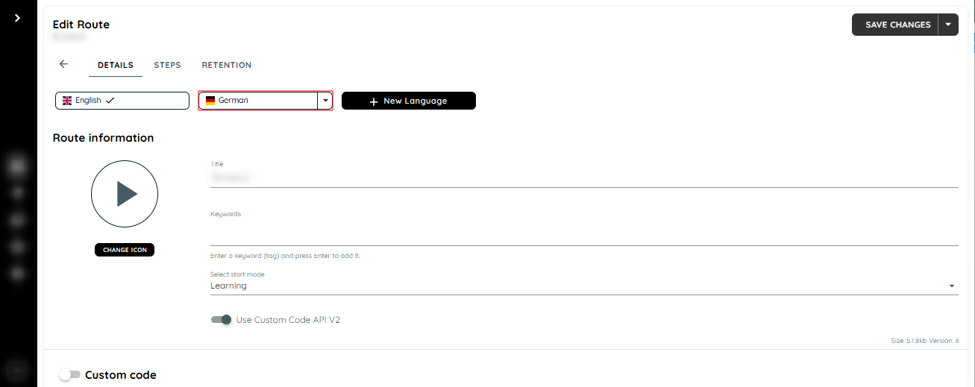
A route with English as the primary language and German added as a second language.
Manage an existing language
Each added language has a dropdown menu with three options. Open the menu by clicking the arrow next to the language name.
- Set as primary language: Makes this language the primary language of the content.
- Translate: Translates the content of this language from the primary language.
- Delete: Removes this language from the content.
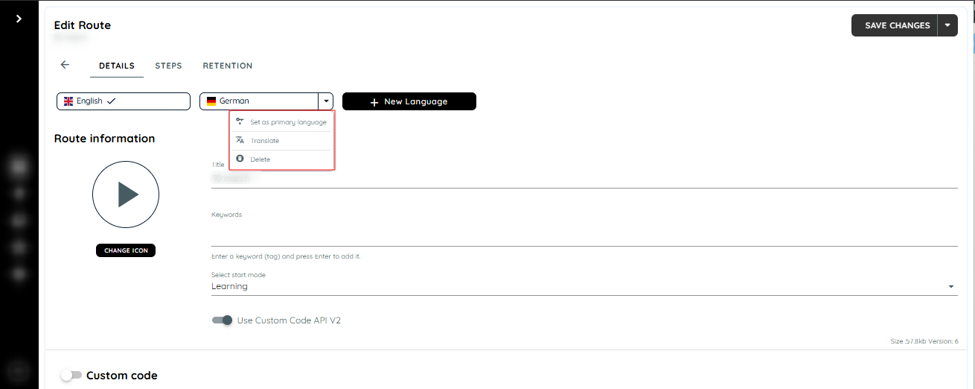
The language dropdown menu with the options Set as primary language, Translate and Delete.
Primary language
The primary language is the language in which the content was originally created. Other languages are translated or copied from it. You can change the primary language of any route, post or pin in the portal, as often as you need.
Change the primary language
- Open the dropdown menu of the language you want to make primary.
- Click Set as primary language.
- In the dialog that appears, click Apply.
Result: the selected language becomes the new primary language and is marked with a check.
Limitations
The primary language cannot be deleted. To remove it, first set another language as primary, then delete the old one.
Only supported languages can be added. Automatic translation is available for many, but not necessarily all, supported languages.
Content created with Copy stays in the primary language until you edit it, so remember to translate it before your users rely on it.
Review automatically translated content before publishing, especially product names and terminology specific to your organization.
Updated 12 days ago