Announcements
Announcements offer a user-friendly way to communicate important updates to users through a modal dialogue. These messages are informative posts that appear on-screen, helping teams to share news, updates, or alerts within the application environment.
Overview of Announcements
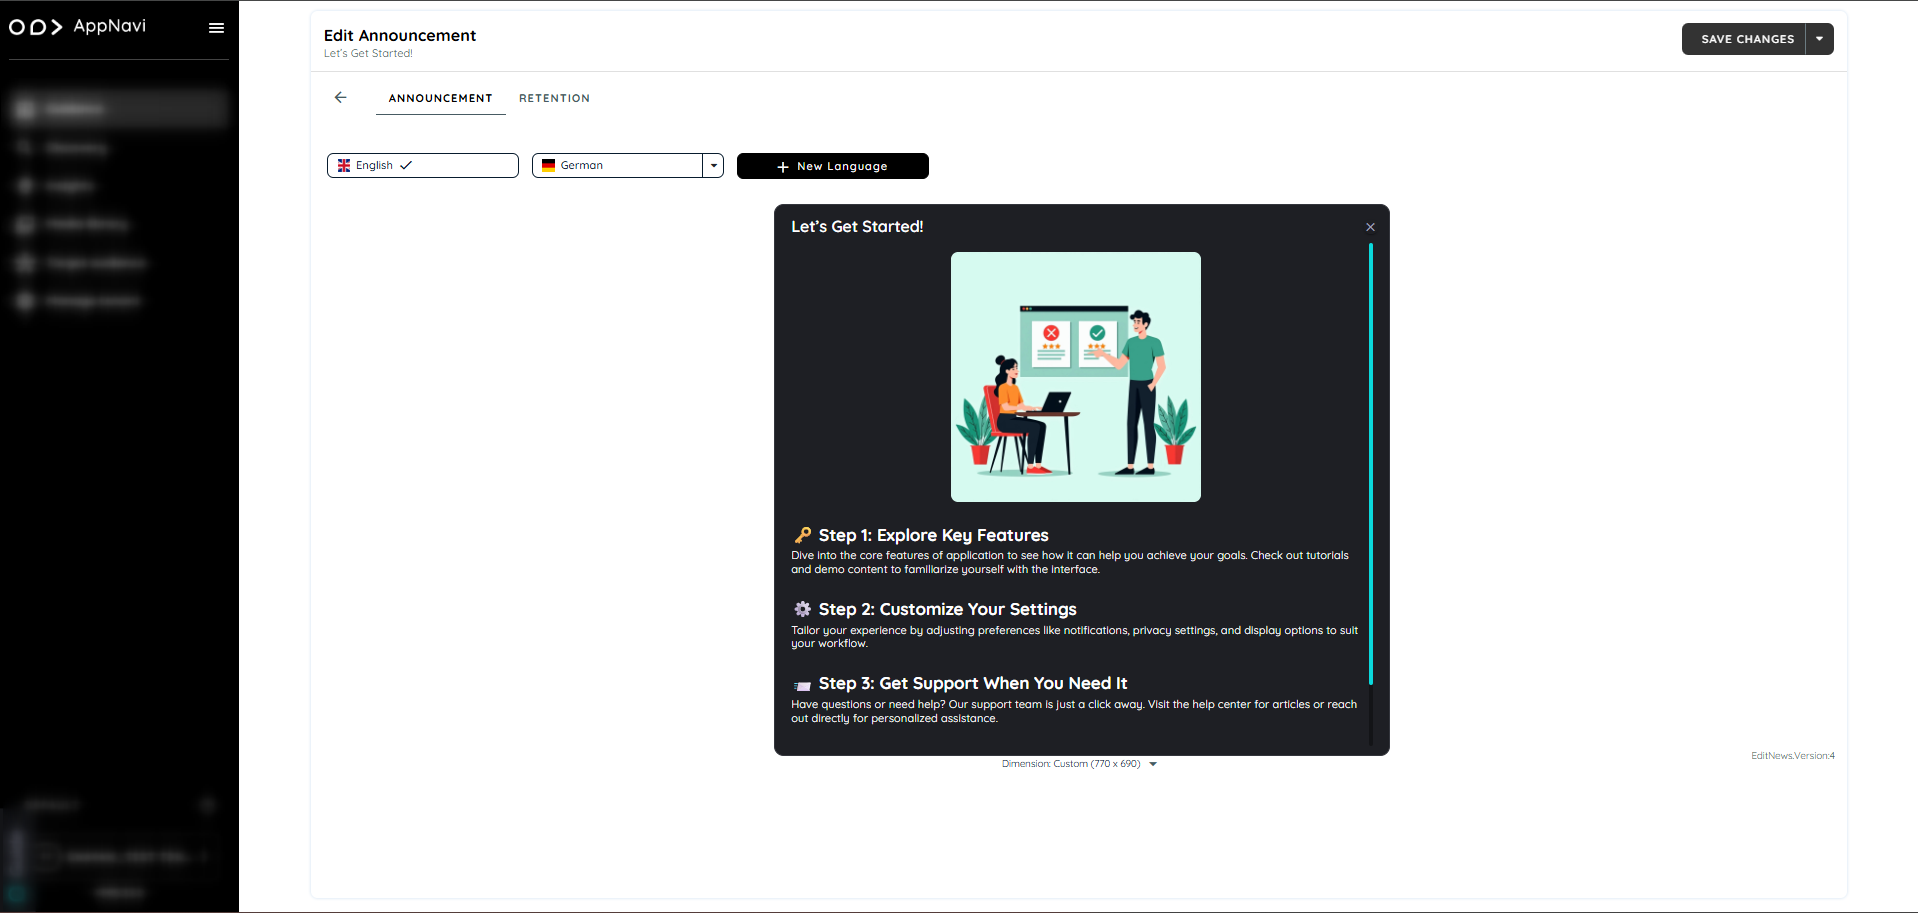
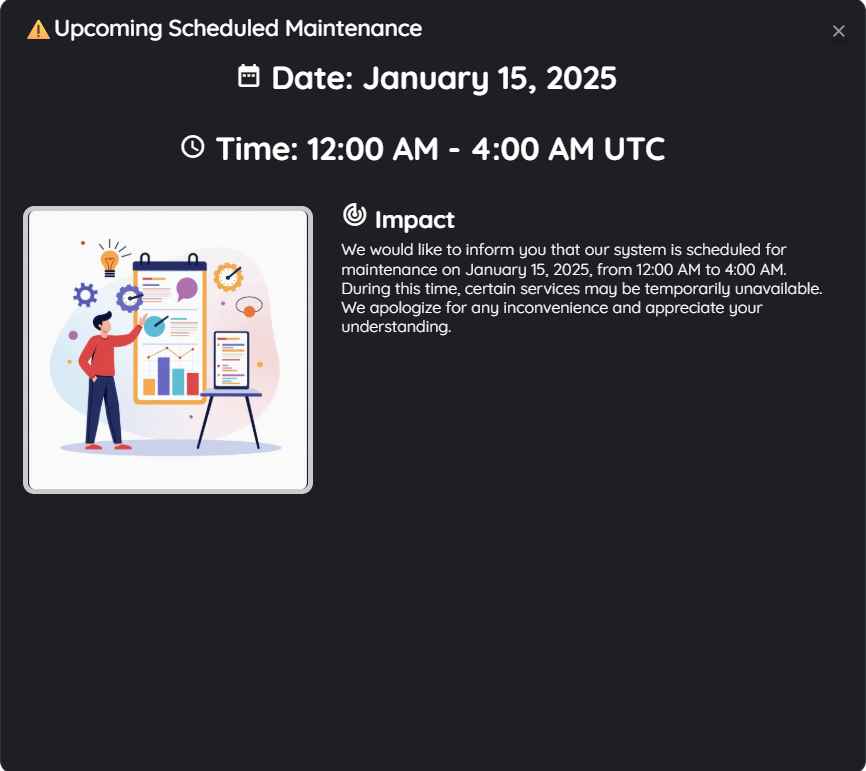
Announcements are displayed as modal windows and serve as short, informative messages or updates. They are visible only once per user by default, but this behavior can be adjusted through the Manage Content Settings to one of the following:
- Once
- Every time
- Daily (once per day)
- Weekly (once per week)
- API call through custom code
When multiple announcements are available, they appear side by side within the same modal window.
Steps To change the visibility of the content
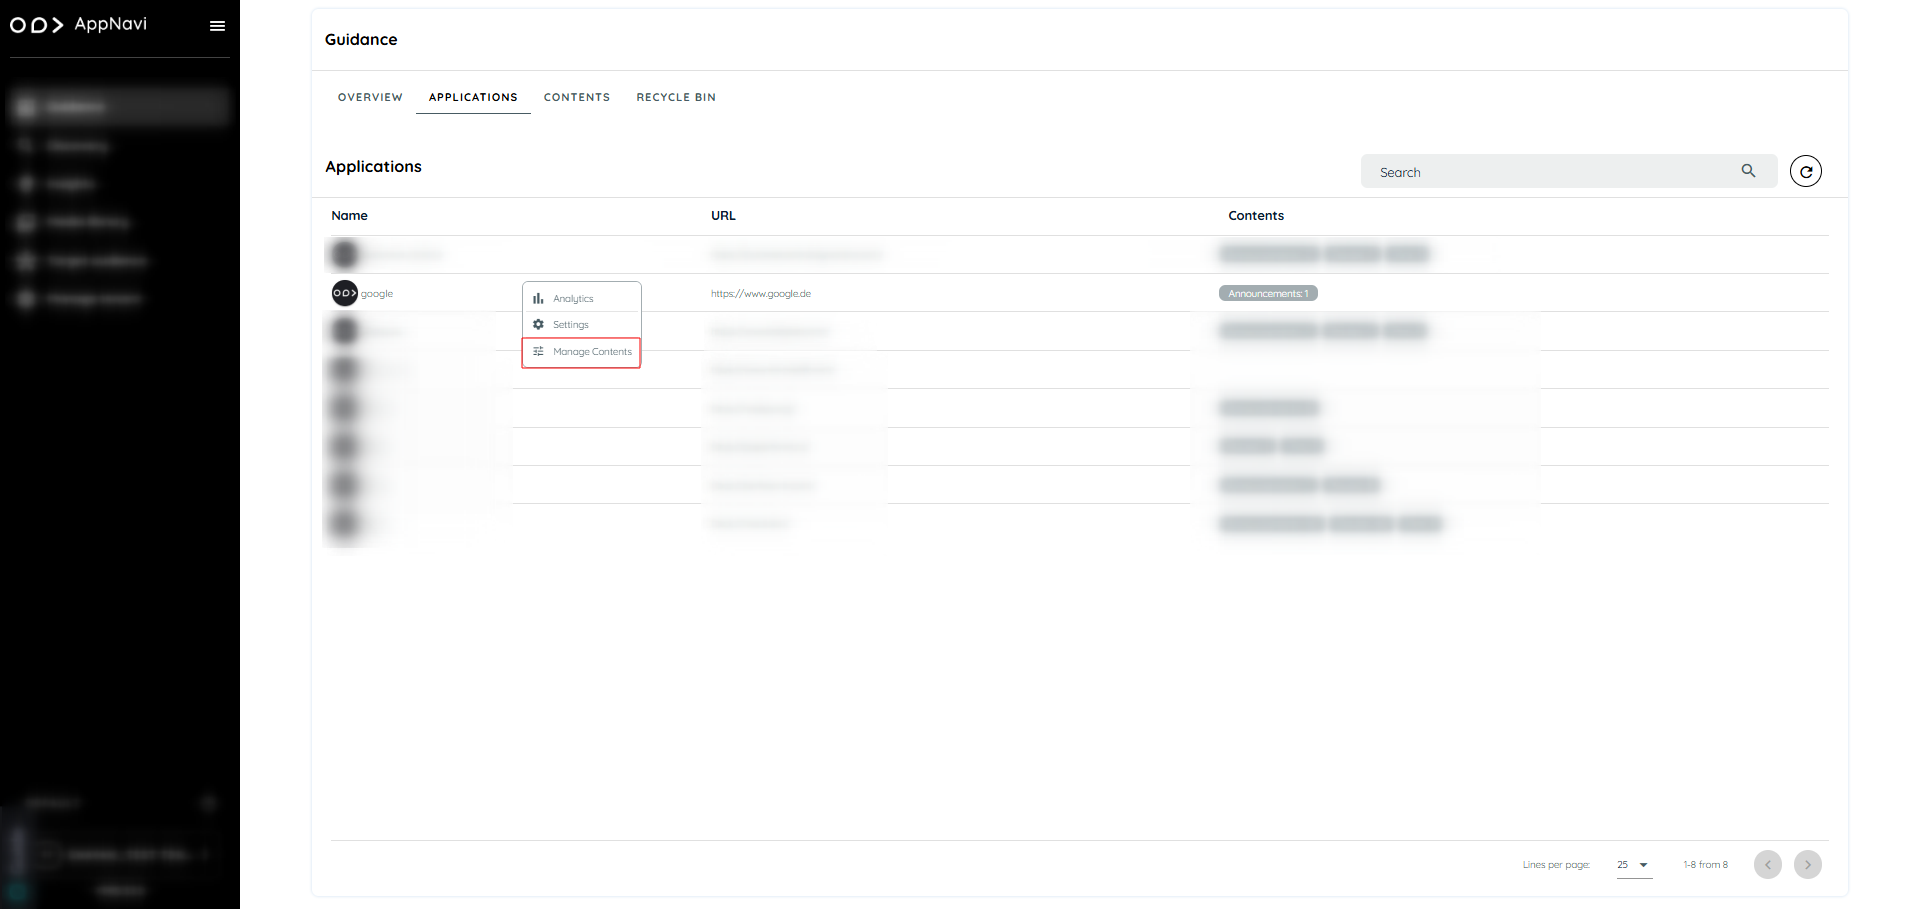
- Go to guidance tab
- Navigate to applications tab
- Select the specific application and click on manage content
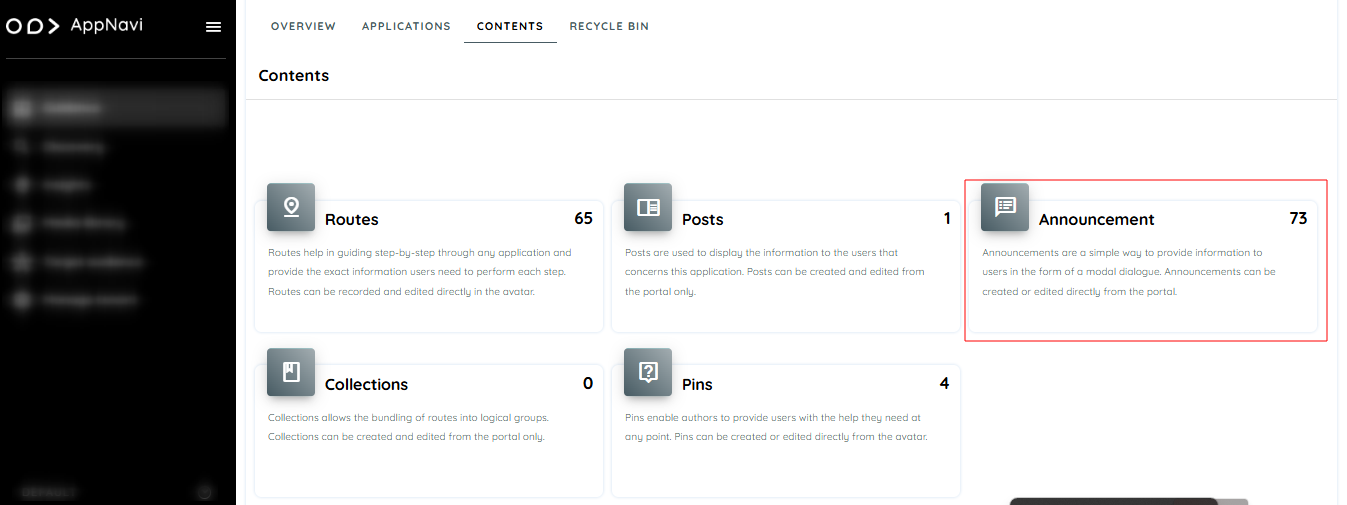
- In the manage content all the section displayed e.g. routes, post, pins, Announcement
- Select the content and click on the republished
- In the dialogue change the display rules.

When is an announcement considered read?
AppNavi has an intelligent mechanism that registers when a user reads an announcement entry. If it is considered read, it is not displayed to the user again (exception is that a new version has been created). An announcement is considered read when a user has displayed the text of a post item for at least 1 second in the visible area of the announcement window.
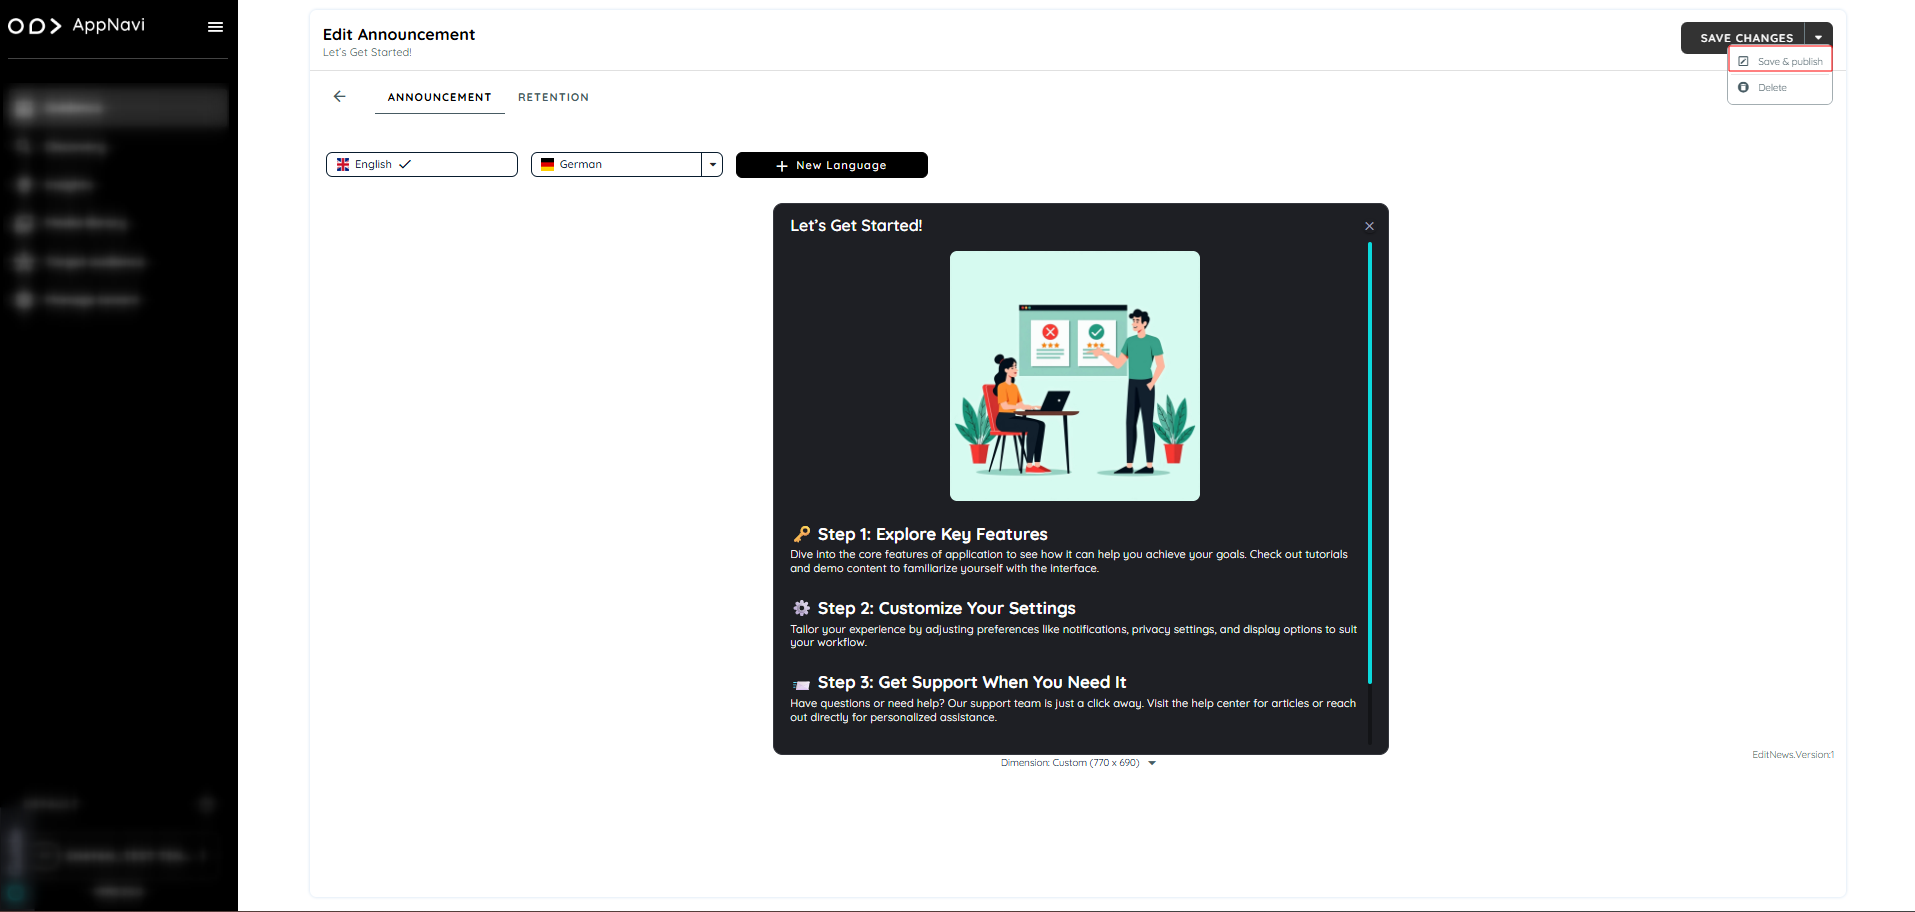
Create Announcement
Announcement is created via portal, user can add a new announcement or assign already created announcement to an application.
Here are the steps to create a new announcement
- Login to portal.
- Navigate to the Guidance tab.
- Go to content tab under guidance.
- Click on Announcement card will open a announcement page
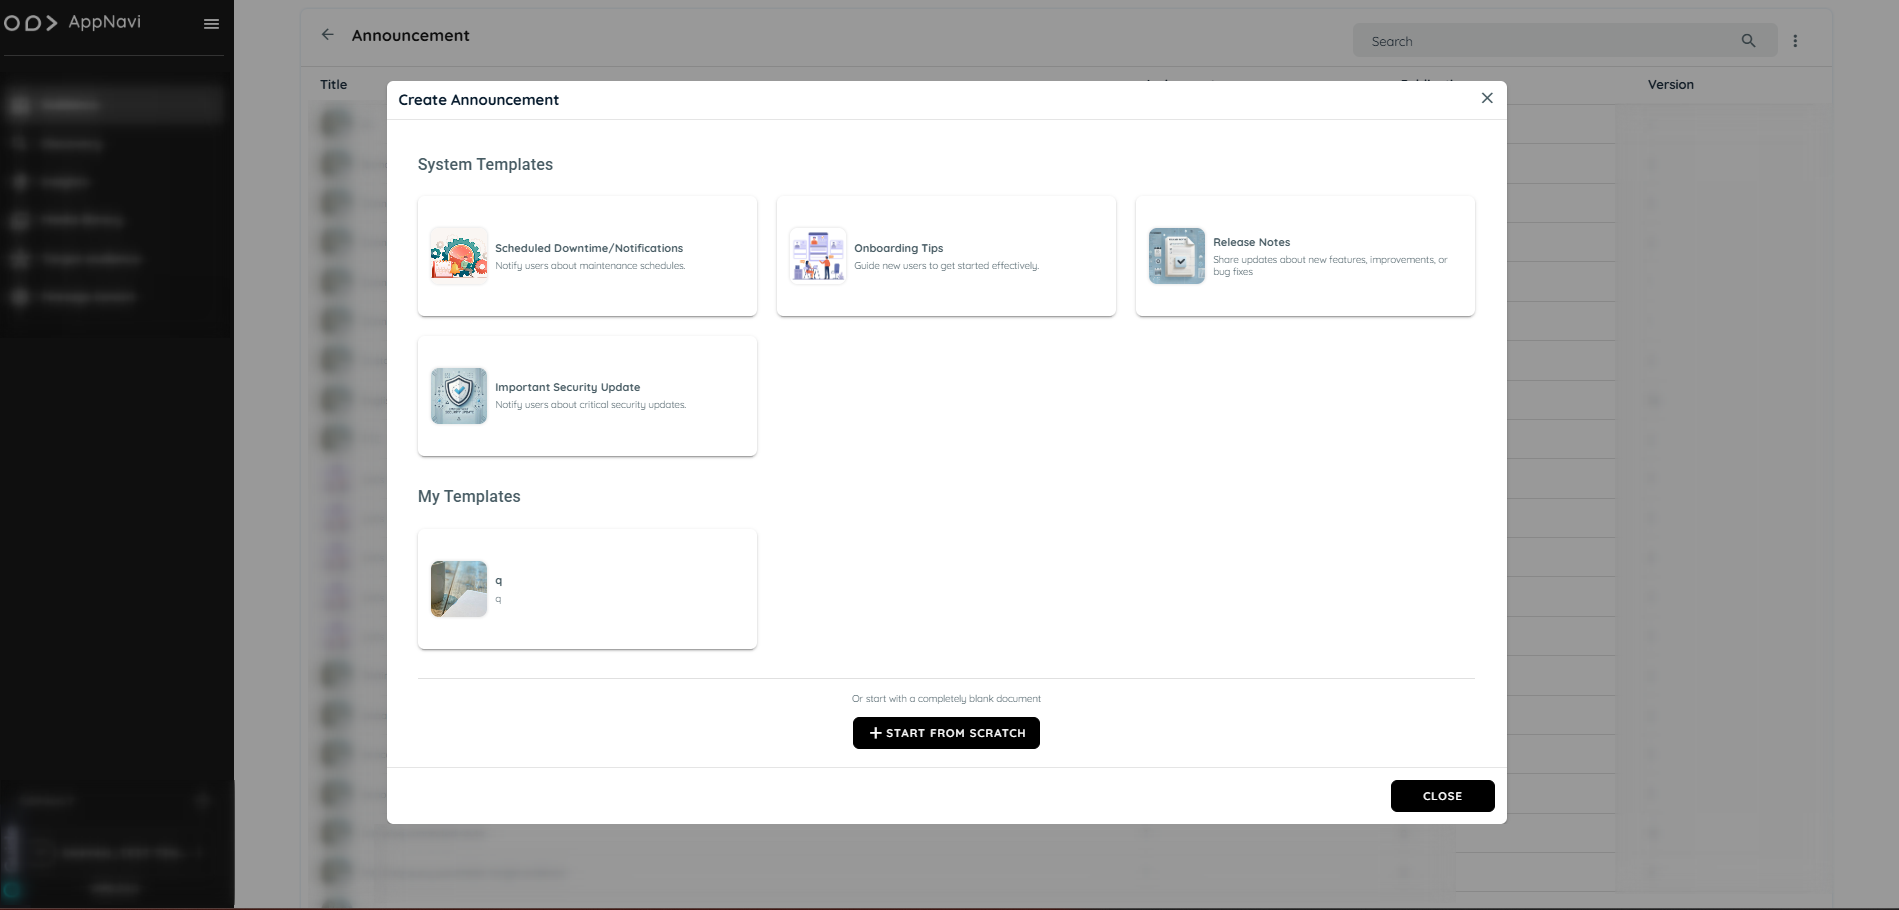
- Click on plus icon present on top right.

- Hover to the tile the plus icon will appear click on the icon will open the dialogue to create announcement instantly

- In the dialogue User can create the announcement with the system design templates or create with scratch
- Add content of your announcement and click save changes.
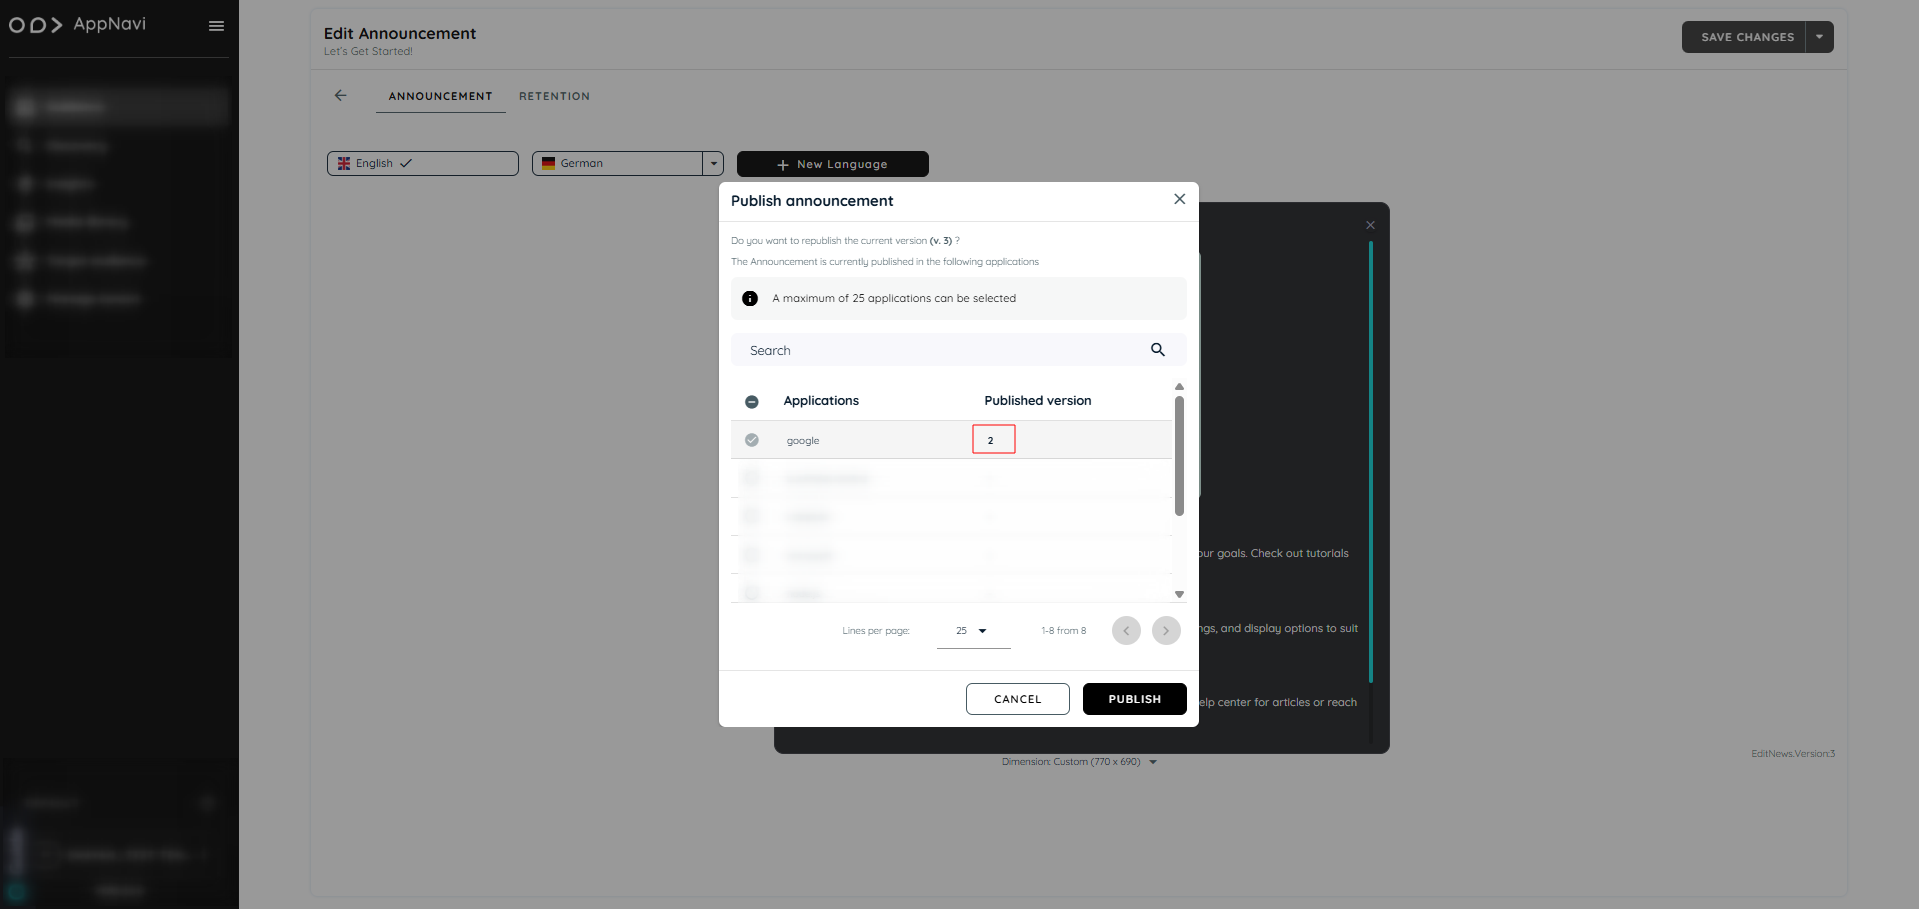
- Click on drop down arrow present on save changes button.
- Select save and publish.
- Select applications where User want to publish the announcement.
Announcement View
When announcement is assigned to an application, it should now display on application side.
- Open application
- The announcement published will be displayed
Republishing Announcements
It is possible to make changes to existing announcements. When announcement item is republished a new version is created. If the user has already viewed the original announcement, the change will still be displayed again with new version.
Connected Routes in Announcements
Connected routes can be used to connect routes with each other. Within each step the author can integrate possible connections to other existing routes. End users get the option to select from one or more routes they can jump to. Doing so it is not only possible to connect routes from within the same application – users can also jump to routes within other systems. This allows to provide a set of sub routines which can be combined in an intelligent way. AppNavi has created the possibility to create announcements including connected routes.
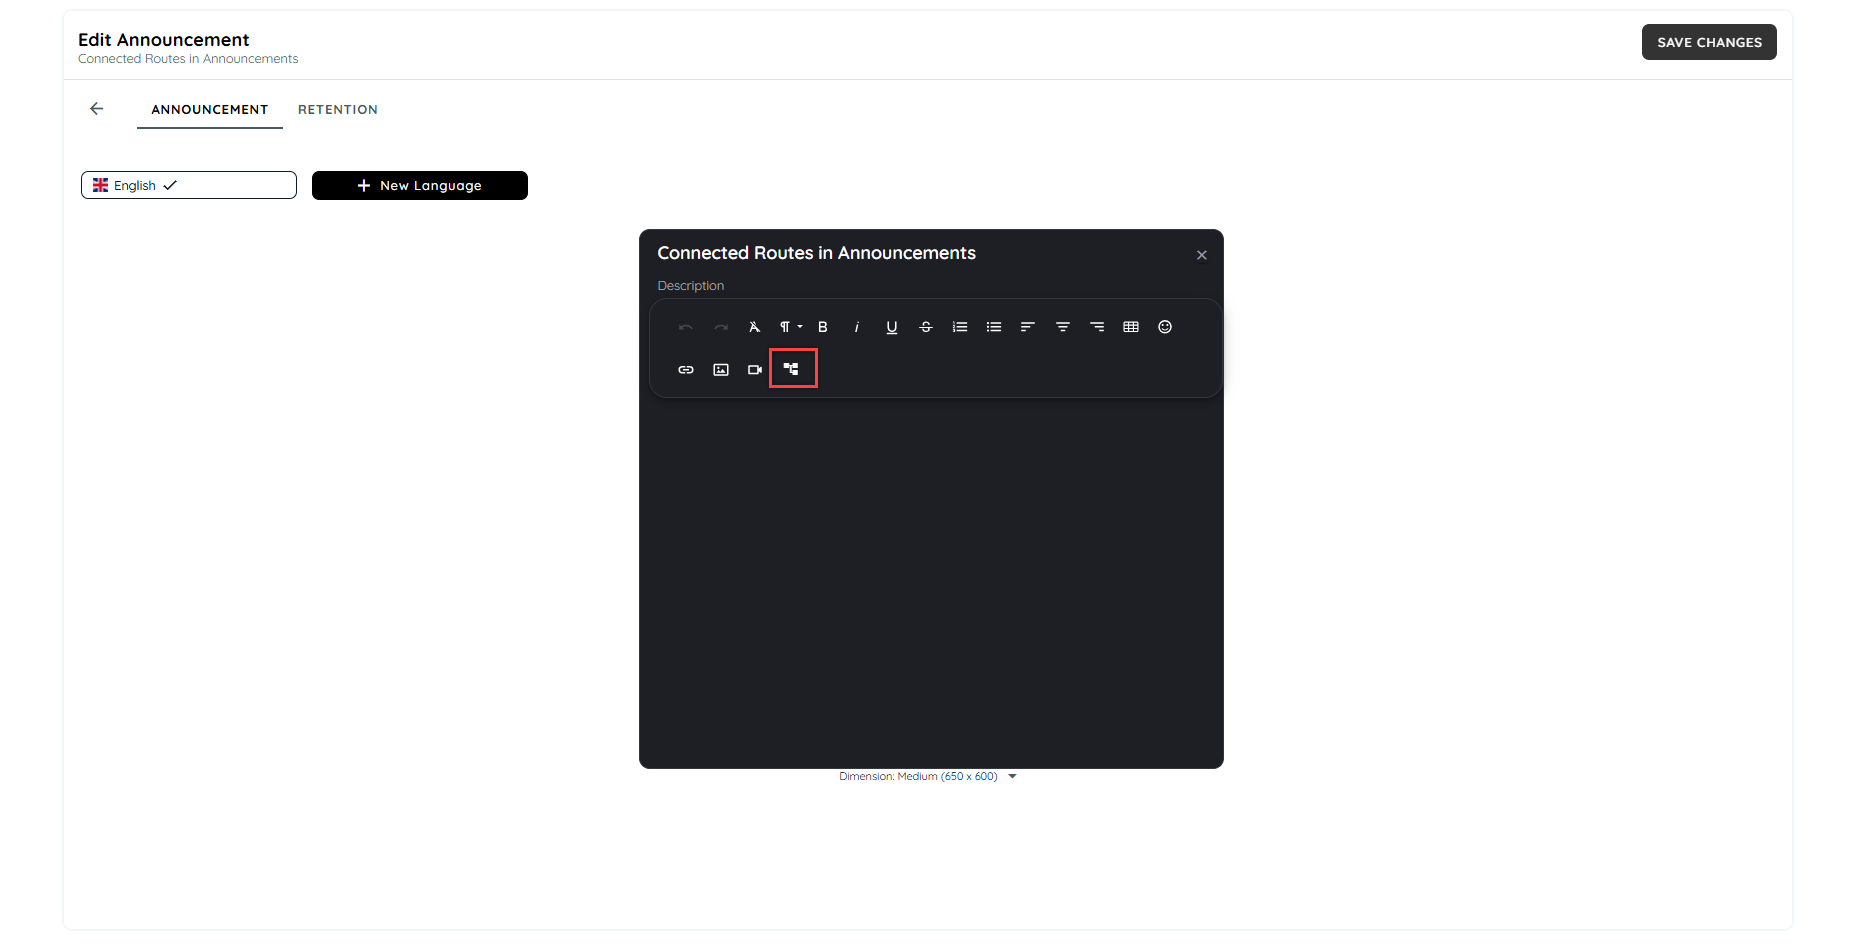
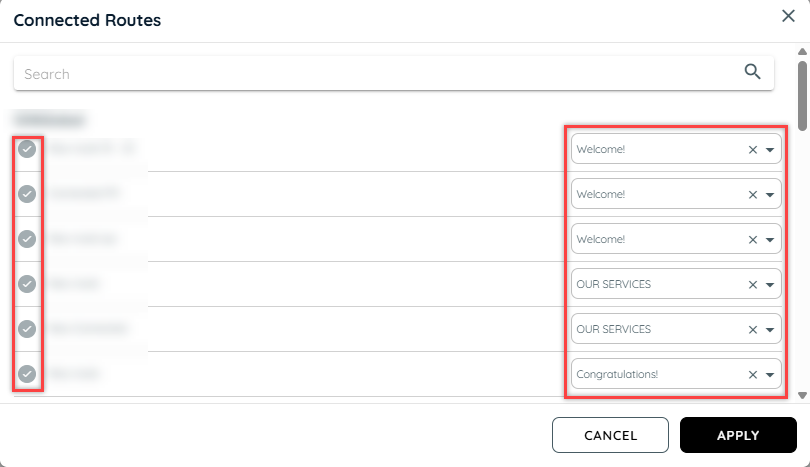
On clicking the connected route icon, a dialogue will appear to select the routes available on the tenant. Users can select multiple routes to add in the announcement.
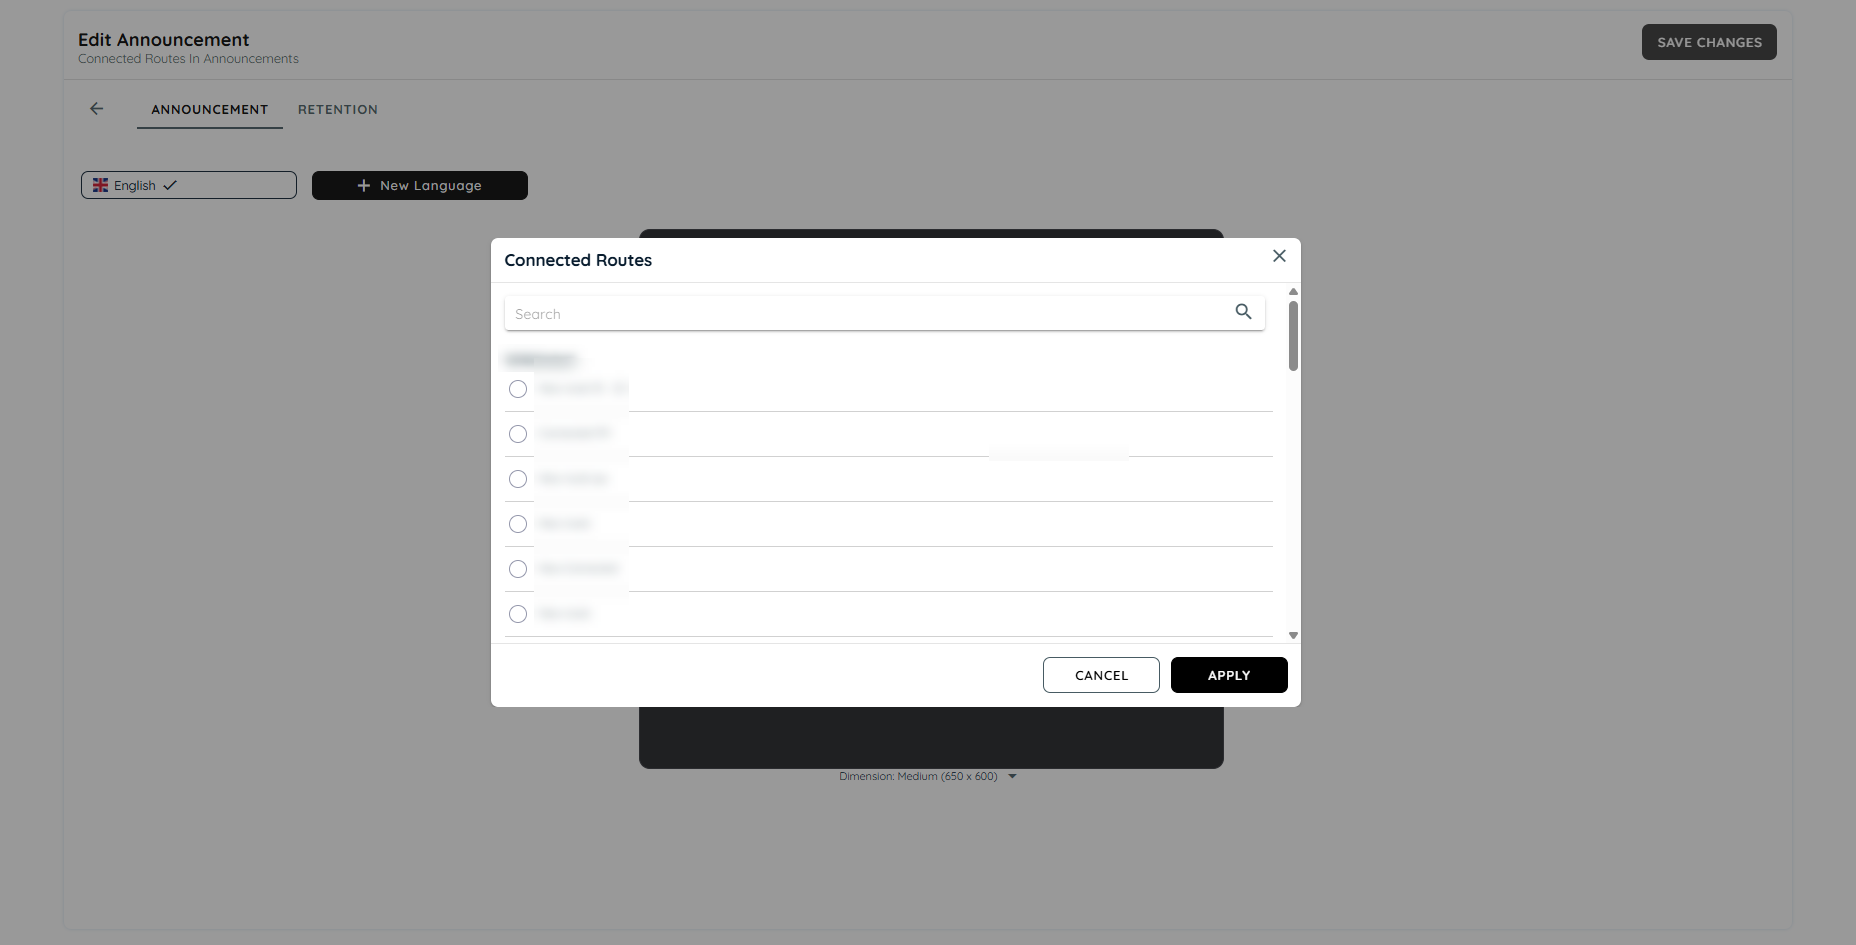
On selecting the routes, the steps can be selected from drop downs. Users can select from which step the route has to be started.
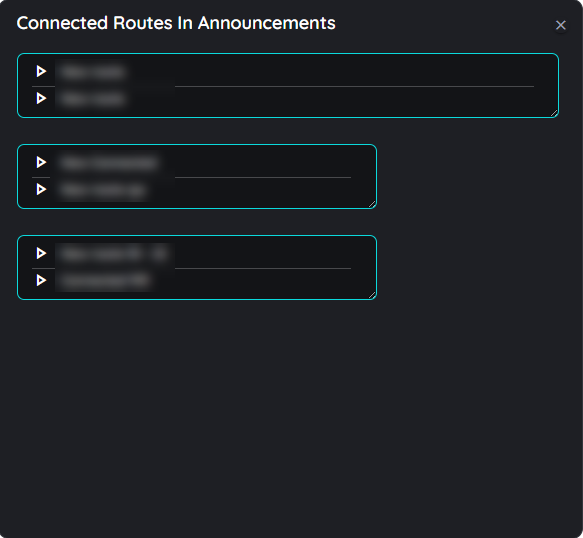
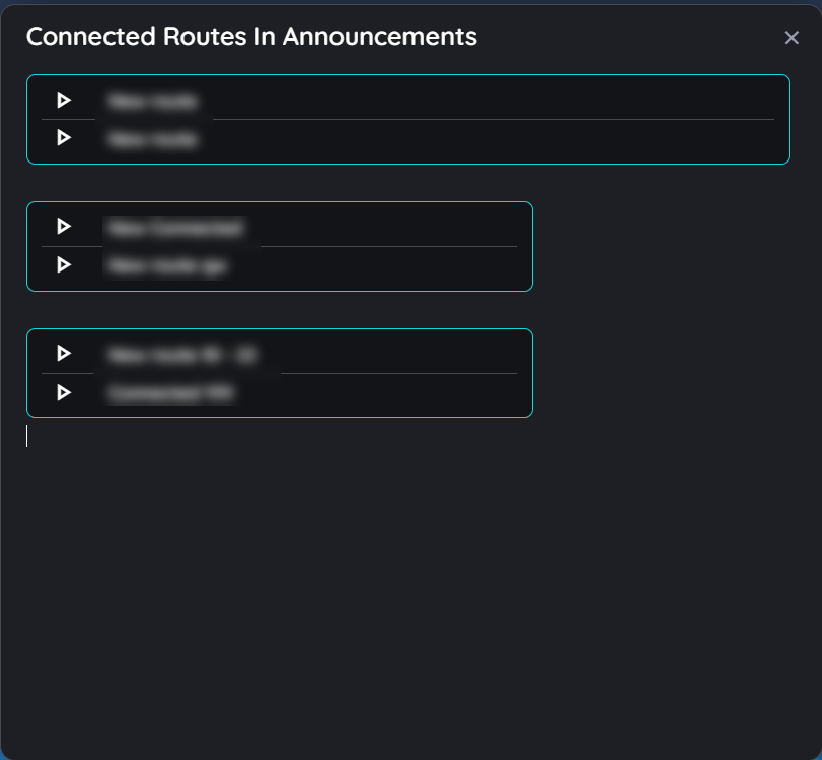
Preview of Announcements with Connected Routes
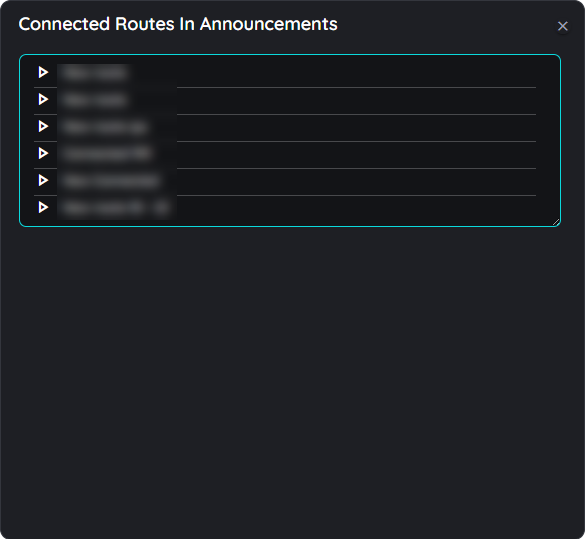
The routes added in the announcement will be added in dialogues. The routes can be sorted using drag and drop. The routes can be separated from the dialogue as well. The user can also change the width of the dialogues as per their design requirements.
Add / Remove Connected Routes
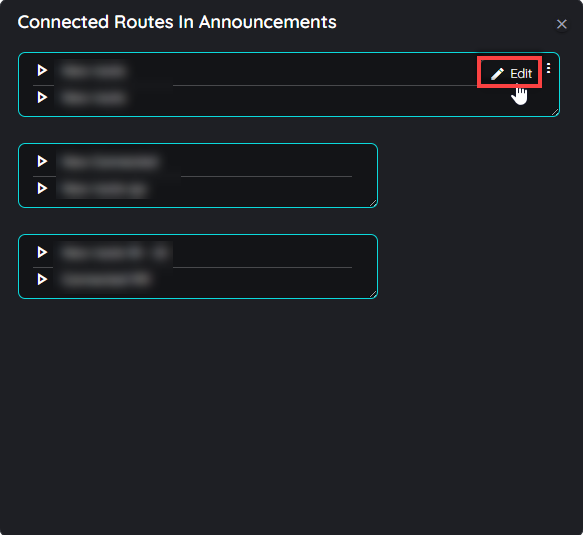
In order to add or remove any connected route from the announcement preview, users can hover on the dialogue top right and a context menu will appear with a edit button. On clicking the edit button, the add connected route dialogue will open in which users can select or deselect the connected routes to add or remove the routes.
Announcement on client side
Check out more details for connected routes here.
Working with connected routes
Add connected routes to a step
Connected routes can be used to connect routes with each other. Within each step the author can integrate possible connections to other existing routes.
End users get the option to select from one or more routes they can jump to. Doing so it is not only possible to connect routes from within the same application – users can also jump to routes within other systems. This allows to provide a set of sub routines which can be combined in an intelligent way.
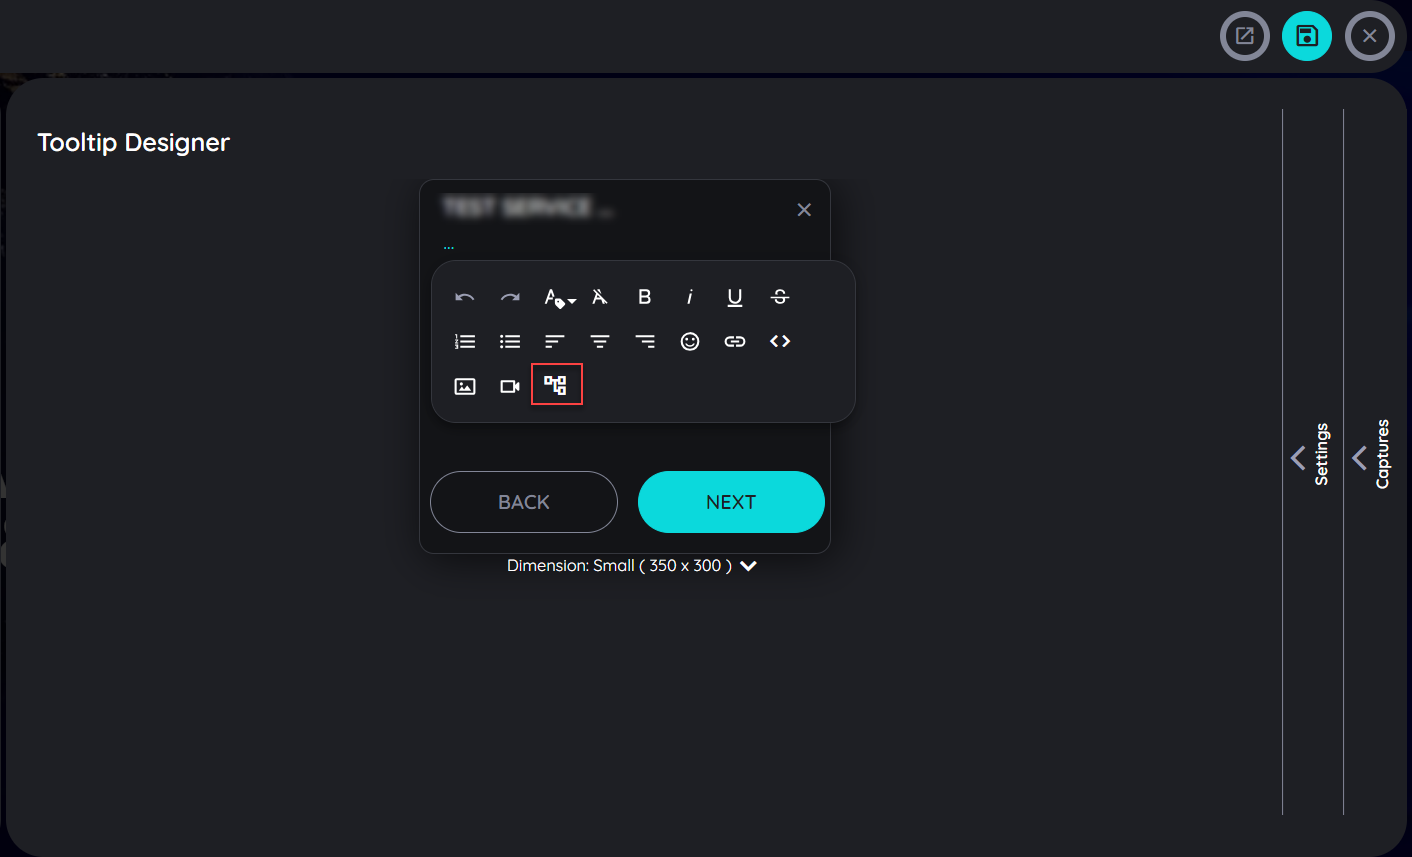
- Open the respective route in edit mode by hovering the route tile and clicking on the "Edit" icon
- Select any of the steps
- Click in the tool tip text area of this step in the "Details" tab
- Now click on the option "Connected routes"
- In the dialog that opens, the available routes are now displayed (grouped into the available apps).
- Select one or more routes. You can recognise the selected routes by the coloured "Check" icons.
- Click on "OK" if all appropriate routes are selected - or cancel the process by clicking on the "x" icon.
Open the dialog for connected routes
Select appropriate connected routes

Connected routes are displayed to end users

Sorting order for Connected Routes
The routes can be sorted according to any order using the drag and drop function present in the planner view above. Once the user has added the connected routes in a listing manner then they can drag and drop the connected routes in any order in the planner view and the same order will be displayed to end users once the route has been published.
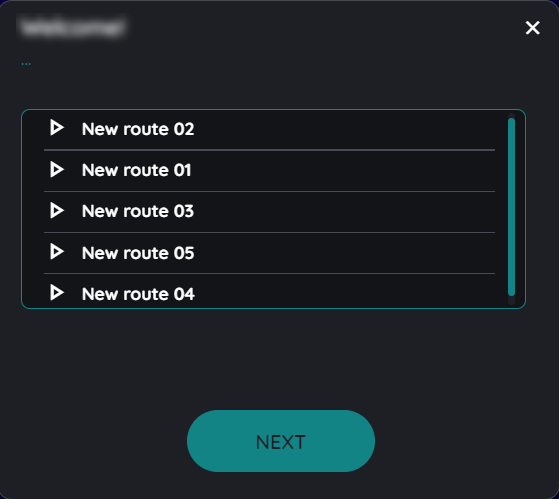
For example the above connected routes added in this dialogue can be saved as New route 01 to New route 05 in ascending or descending order just by dragging the connected route upwards or downwards according to the users requirement of sorting.
Updated 3 months ago