
AppNavi Avatar
AppNavi Avatar
The AppNavi Avatar is the main navigation and guidance interface that appears inside a configured application. It provides users with access to AppNavi features such as routes, pins, collections, posts, announcements, and other available guidance content.
The Avatar can be configured for each application to control where it appears, who can see it, how it looks, and how it behaves for end users.
Note: Avatar settings are configured at the application level. Changes made to one application do not automatically apply to other applications.
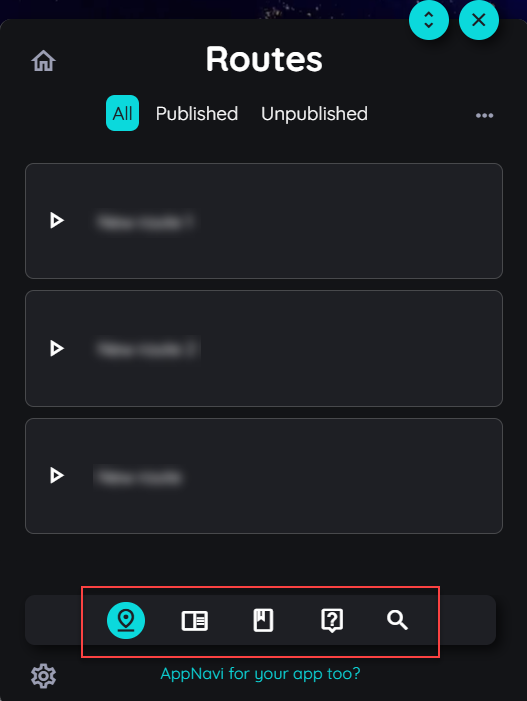
AppNavi Avatar
Avatar Position and Visibility
Avatar position and visibility are configured when creating or editing an application.
Configure Avatar Position
To change the Avatar position:
- Log in to the AppNavi Portal.
- Go to Manage Tenant.
- Open Applications.
- Find the application you want to configure.
- Click the three-dot menu and select Edit.
- Locate Avatar Position.
- Select the required position.
- Save the changes.
- Open the application and verify the Avatar position.
The selected position determines where the AppNavi Avatar is displayed within the target application. The default position is Bottom Left.
Learn More : Avatar Position and Visibility
Configure Avatar Visibility
The Avatar Visibility setting determines whether the Avatar is available to users of the application.
Two modes are available:
| Mode | Description |
|---|---|
| Visible | The Avatar is displayed to users when the application's URL pattern matches. |
| Restricted Mode | The Avatar is initially hidden and is displayed only when the configured restriction conditions are met. |
Restricted Mode is useful when testing AppNavi or gradually introducing AppNavi to a specific group of users.
To configure the visibility mode:
- Open Manage Tenant → Applications.
- Select the application.
- Click the three-dot menu and select Edit.
- Locate Avatar Visibility.
- Select Visible or Restricted Mode.
- If using Restricted Mode, configure the required target audience or restriction conditions.
- Click Save Changes.
- Open the target application and verify the expected Avatar visibility.
Important: Restricted Mode controls the visibility of the Avatar. It does not necessarily disable other AppNavi functionality. For example, analytics recording and configured custom code can continue to operate while the Avatar is hidden.
Avatar Customizing
The default AppNavi Avatar uses the GUIDE label together with an icon. The Avatar can be customized to better match the application's branding.
Customization can include:
- Replacing the default Avatar icon with an image.
- Replacing the GUIDE text with custom text.
- Replacing both the icon and text with a single image.
- Applying a custom theme.
- Adding custom CSS for additional styling.
Learn More : Avatar Customizing
Custom Theming
AppNavi can be adapted to an organization's corporate design using Custom Design.
Custom theming is configured individually for each application.
- Enable Custom Design
- Log in to the AppNavi Portal.
- Go to Manage Tenant.
- Open Applications.
- Find the application you want to customize.
- Click the three-dot menu and select Edit.
- Enable Custom Design.
- Open the Design tab.
Once Custom Design is enabled, the available design settings can be configured for the application.
Learn More : Custom theming
Avatar Behavior for End Users
Once the application has been configured, the Avatar becomes the main entry point for AppNavi guidance.
Depending on the application's configuration and enabled modules, users can use the Avatar to access available AppNavi functionality, including:
- Routes and guided navigation.
- Pins.
- Collections.
- Posts and announcements.
- Other guidance content configured for the application.
The Avatar is displayed according to the application's URL pattern, visibility mode, and position settings.
If the application uses Restricted Mode, users who do not meet the configured restriction conditions will not see the Avatar. Users who meet the conditions can access the Avatar normally.
Cache and Debugging
Users can directly clear any cache stored in the local storage used by AppNavi.
This can be useful when troubleshooting configuration or content changes that are not immediately reflected in the application.
Users can also enable:
- Global Debug Mode
- Insights Events Debug Mode
Debug information can be viewed in the browser console while performing activities in the application.
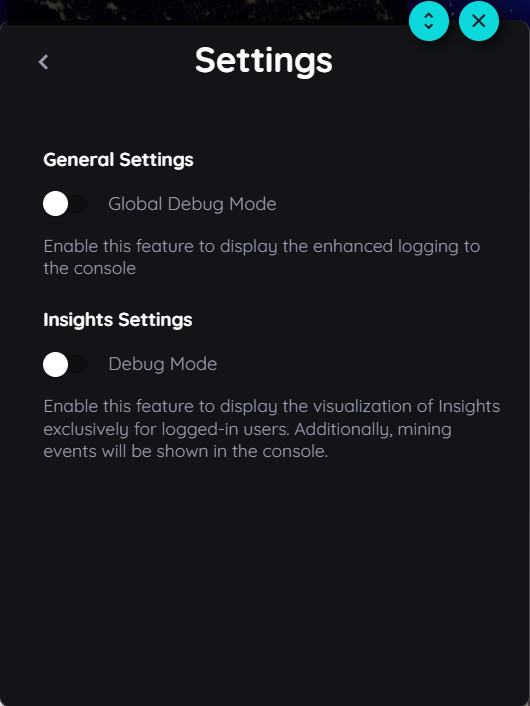
The users can enable global debug mode and the the debug mode for insights events which can be viewed in the console while doing any sort of activity
Users can directly clear any cache stored in the local storage used by AppNavi
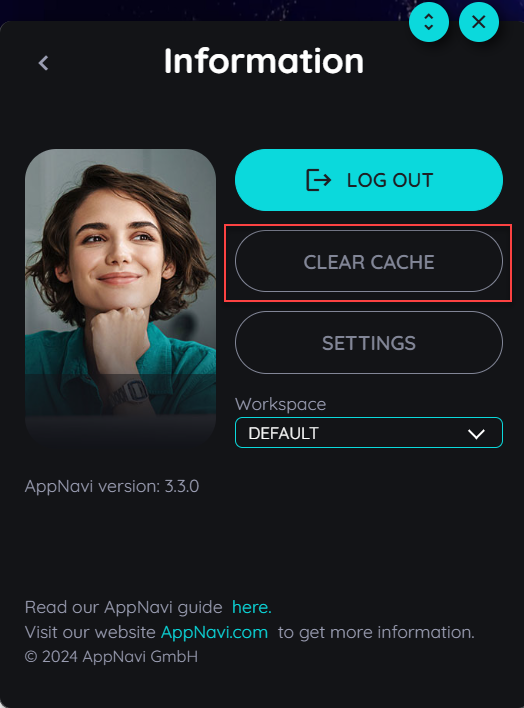
Clear Cache
Updated 6 days ago