Insights Mass Export
Introduction
The Insights Mass Export feature helps users export data from multiple applications from Insights within a specific date range, facilitating the generation of multiple export files as needed in JSON or CSV format. The maximum limit for mass export is 10,000,000 data entries.
The data to be exported can be found on the Insights Mass Export tab. Following are the steps to add an export data request.
Step 1: Select Applications
The user can export data from more than one application by selecting the given application. A maximum of 10 applications can be selected at a time.
It verifies the presence of the insights license feature, and as a result, only applications with an active insights license will appear here. Users can select the desired applications and click the export button given in the context menu on the right side.
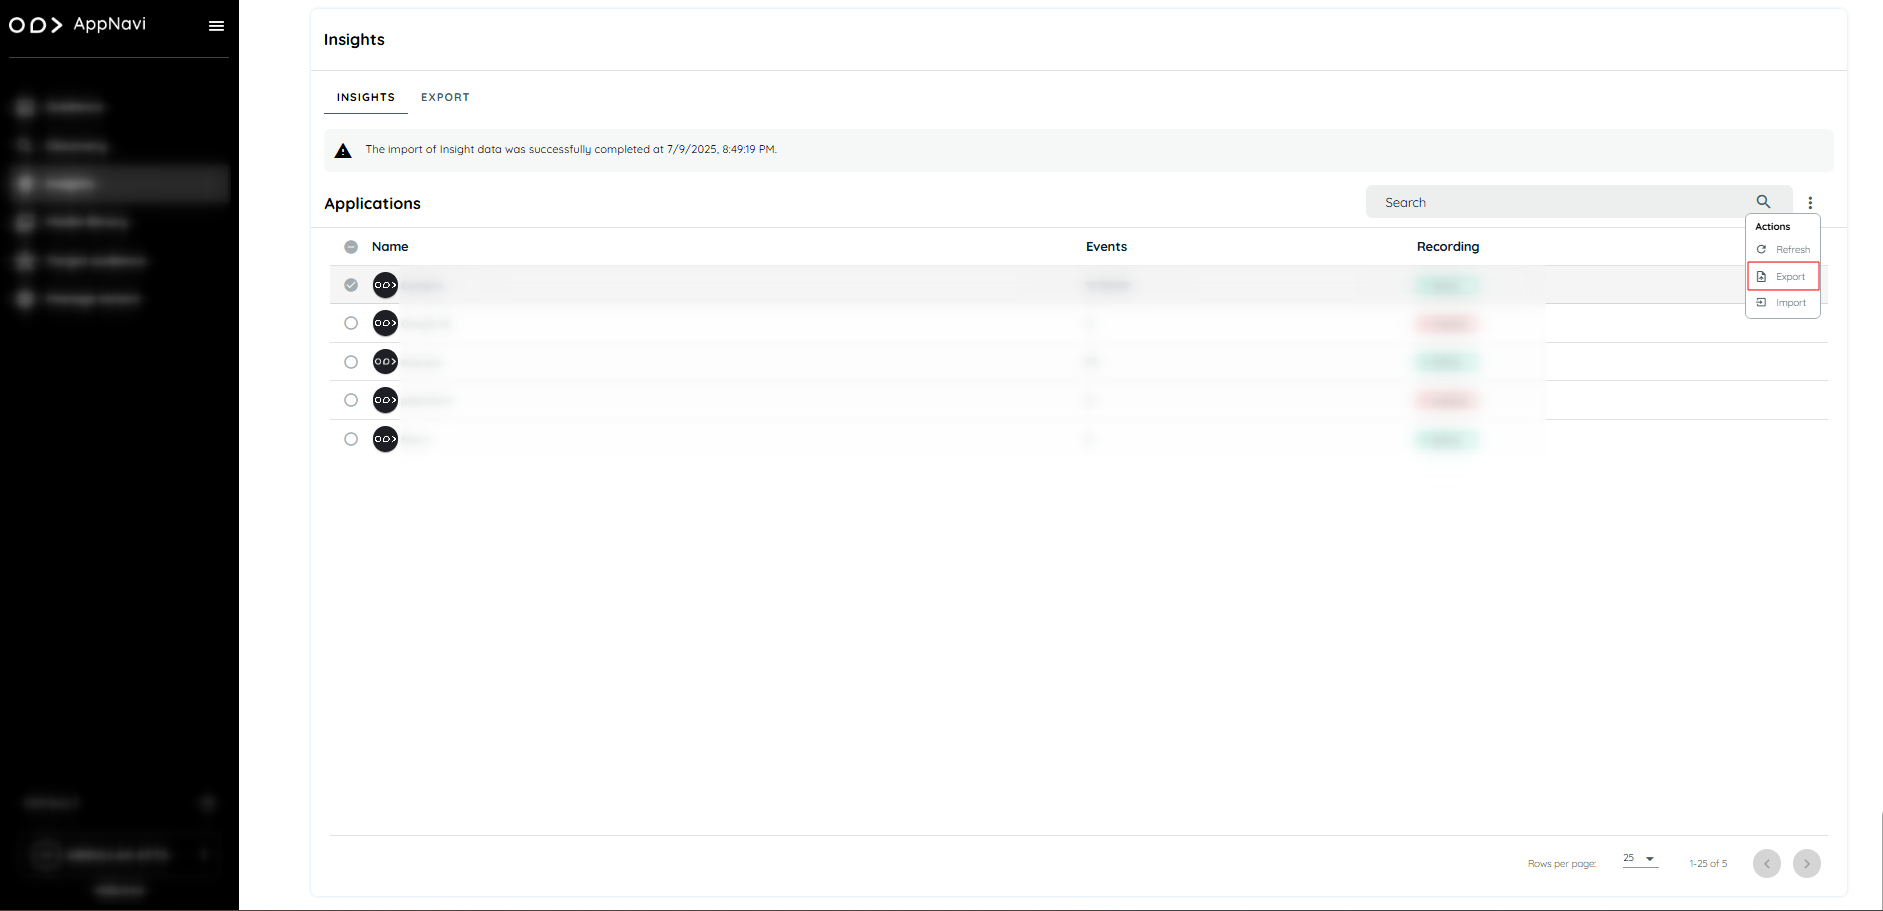
Insight Applications
Step 2: Open Export Data Request Dialogue
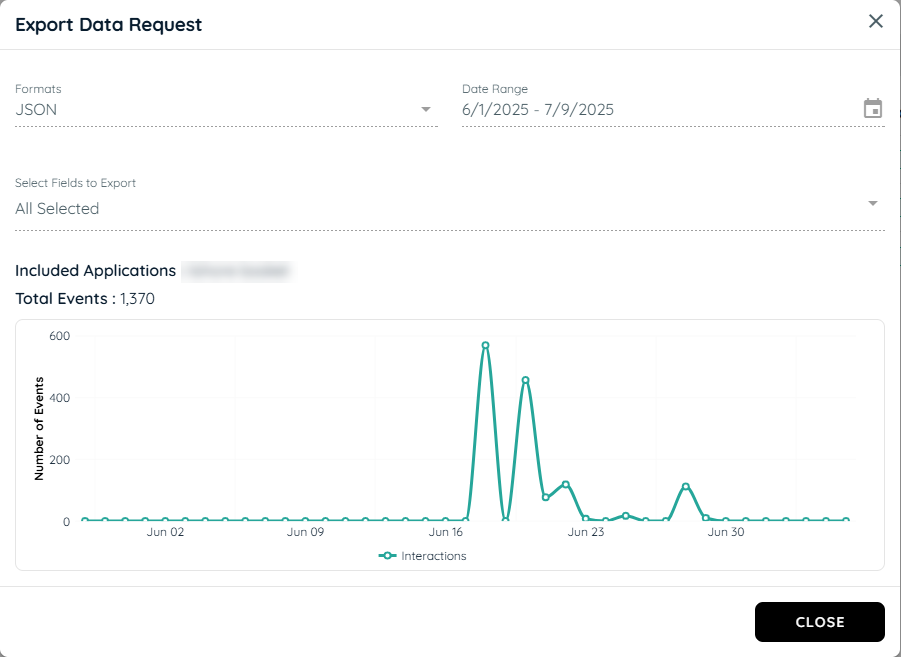
On clicking the export button, the export data request dialogue will appear for that particular application.
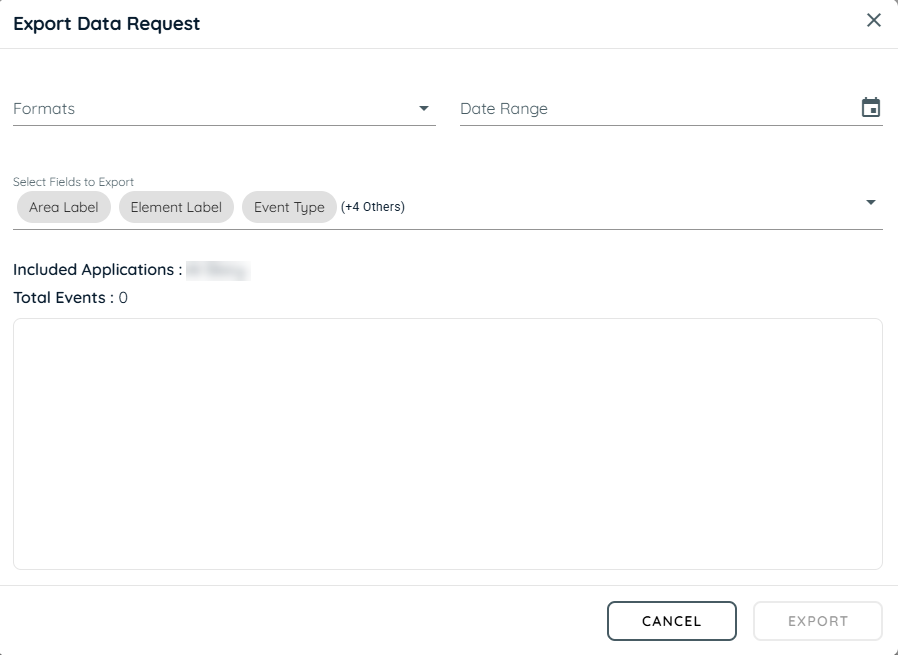
Export Dialogue
In the export data request dialog, Users can choose the file format for exporting data in (JSON or CSV), and users have the option to select the desired date range (from and to) and the fields to export in this dialogue. The export button will be enabled only when selected applications and selected date ranges have data in them.
Interactions:It will show Interactions with all events like Page visits (pages being loaded for specific applications) and activity start, activity end, mouse over, left click, and right click are recorded on any application with Insights enabled that has a configured JSON. Activity start and activity end are recorded irrespective of any trackable area defined in the JSON, but mouse over, left click, and right click are specifically recorded on the trackable area pages. Total Events is the count of interactions plus page visits of all selected applications.

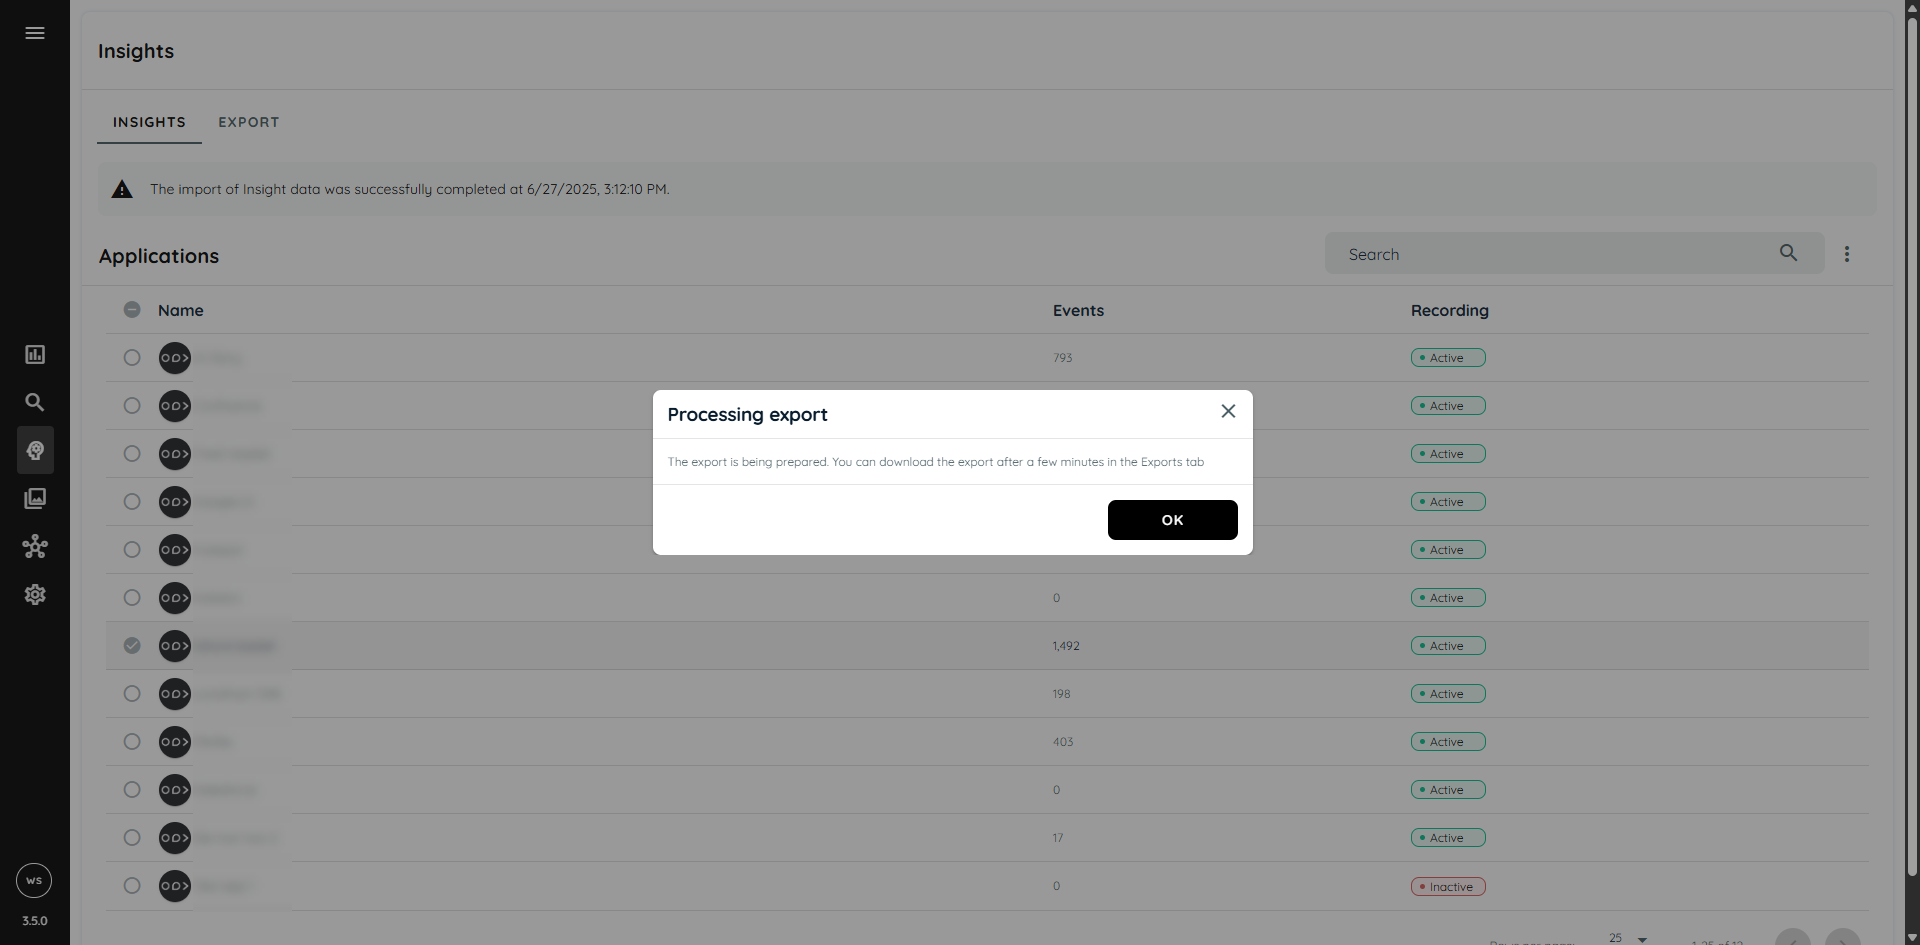
Once user has clicked on the export button, the export will start processing and it will be available in the export tab.
Fields to Export
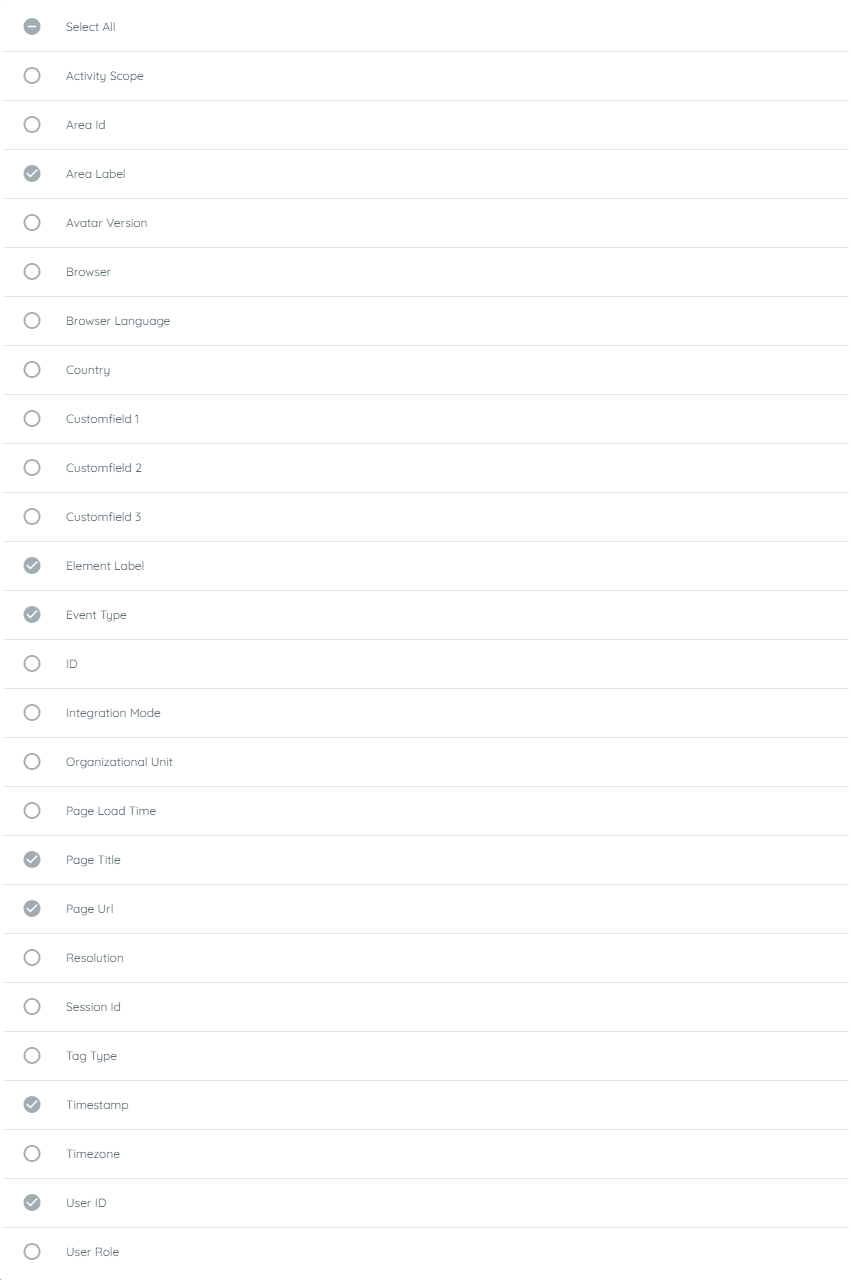
The fields to export include activity scope, area id, area label, avatar version, browser, browser language, country, custom fields, element label, event type, id, integration mode, organizational unit, page load time, page title, page url, resolution, session id, tag type, timestamp, timezone, user id and user role. Users can select any of the above to add in the export in the JSON or CSV file. Area label, element label, event type, page title, page url, timestamp and user id are pre selected by default for making basic exports.
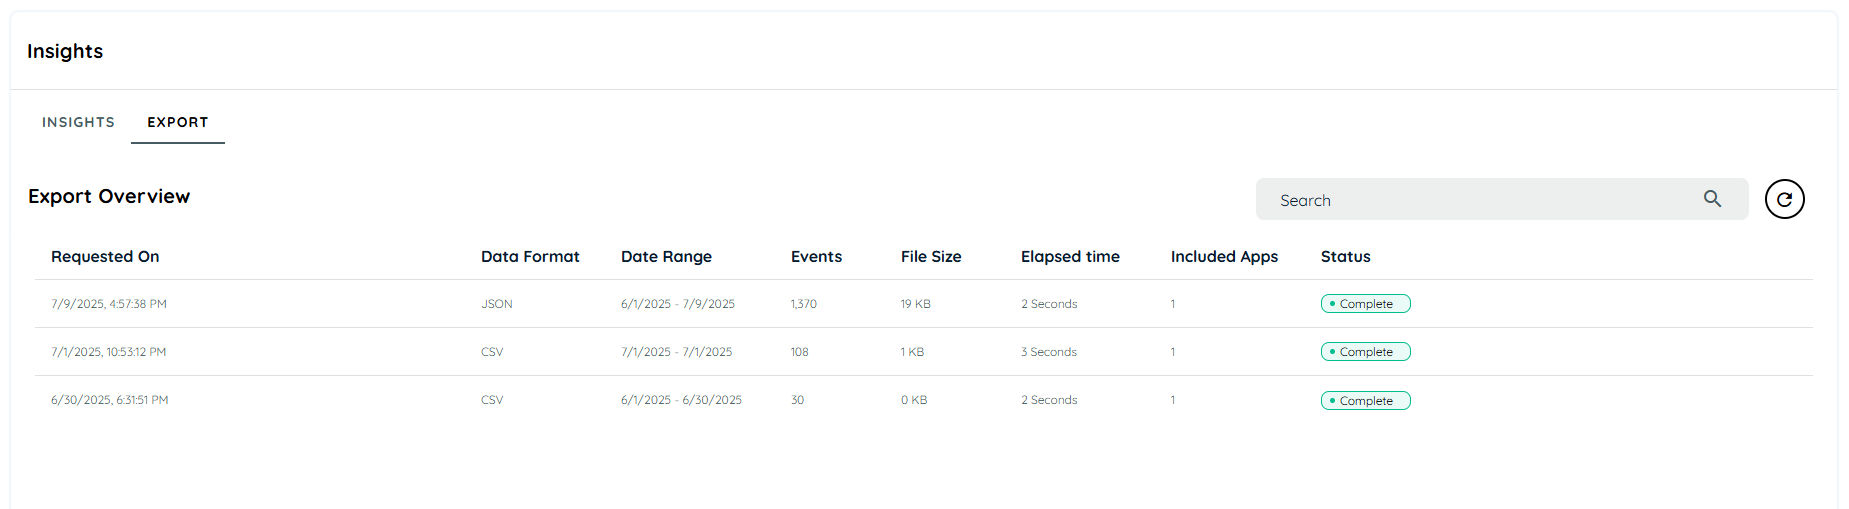
Step 3: View Insights Export Data Detail
All the exports that have been requested will be available in the export tab
The user can view the details of the request, like the date range, format, graph, and included applications. The details will be in read-only mode.

Step 4: Download Export Request
The user can download the file after successfully creating a request. A dialog message will appear with the text: "The export is being prepared. You can download the export after a few minutes in the Exports tab." The user can then navigate to the Exports tab and select the requested application to download it and can also delete the request if it is not required anymore.
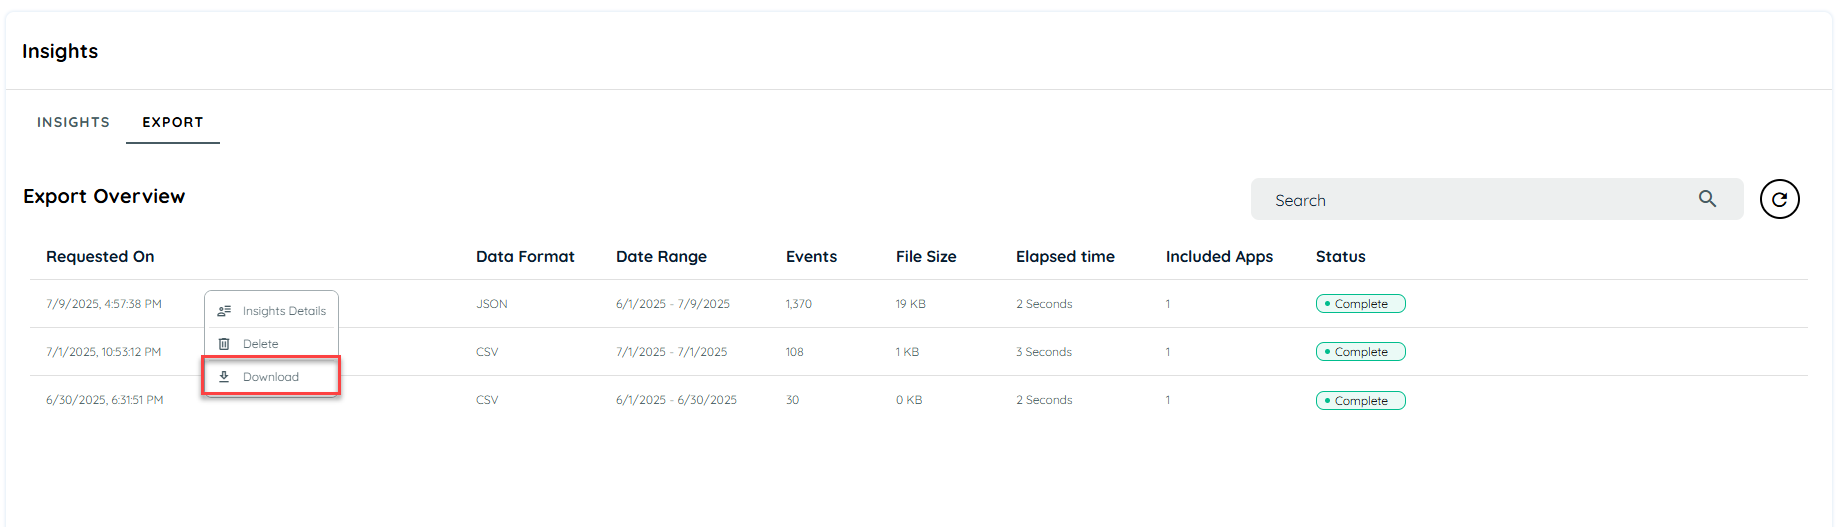
Delete Insights Data
Users can delete Insights data for individual applications using a context menu integrated into the applications listed in the export table. By selecting a specific application and utilizing the context menu, they can effortlessly remove all Insights export data associated with that particular application.

Insights Mass Export Table
This table contains all the information about the data that has been exported. Following are the columns mentioned in this table:
- Requested On: The date on which the Export data request is created or sent.
- Data Format: There are two types of data formats.
- CSV
- JSON
- Date range : The range of dates for which the data is required.
- Events: All the events that happened on the selected application, including Page Visits, and interactions.
- File Size: Size of the file of exported data for all selected applications.
- Elapsed Time: Total time spent on the selected applications.
- Included Apps: Total number of applications in a single export.
- Status: There are three statuses for the request.
- Pending: The yellow pending chip indicates that the export is in progress.
- Failed: The red chip indicates that the export was unsuccessful.
- Completed: The green completed chip indicates that the export was made successfully.
Updated 9 months ago