Distribute AppNavi Chrome Extension in Enterprises
AppNavi Chrome Extension provides an easy way to integrate AppNavi into existing systems without the need to customize the application. Compared to private use or use in smaller companies, where a Chrome Extension can simply be downloaded from the store and configured directly, this is often not possible in larger companies. For this reason, we designed our AppNavi Chrome Extension to be distributed and centrally configured via softer distribution systems or directly via policies.
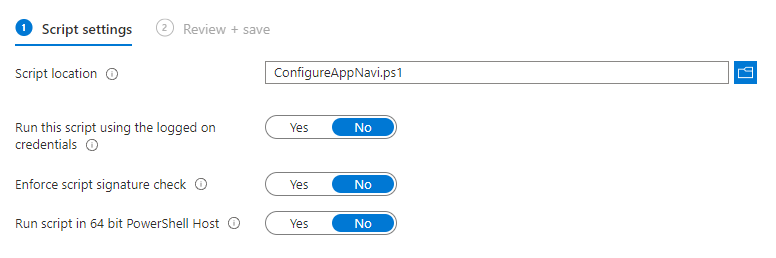
The central configuration of the AppNavi Chrome Extension can be done via a GPO, which is deployed to the registry. In this guide, we describe the forced installation method via PowerShell. With the procedure described here, the extension is automatically installed and configured for the user. A manual deinstallation by the user is then no longer possible.
The AppNavi Chrome Extension can be obtained from the Chrome Store here.
Configuration for Google Chrome
In order to set up the AppNavi Chrome extension, you need to follow the following steps according to the Operating System you want to configure it for.
For Windows
To deploy the AppNavi Chrome Extension, execute the following two PowerShell commands. The first line adds the Chrome Extension to the user's Chrome browser. Please note that the numeric value 1 in the first command line may need to be replaced with a different numeric value if other Chrome Extensions have already been deployed via the ForcedInstallPolicy.
The second command configures the target tenant so that it does not need to be configured by the user. In this line, the value 00000000 must be replaced by your target tenant ID.
reg add HKLM\SOFTWARE\Policies\Google\Chrome\ExtensionInstallForcelist /v 1 /t REG_SZ /d gldjdbpbhhpcpimpiicmglaeeehegflh /f
reg add HKLM\SOFTWARE\Policies\Google\Chrome\3rdparty\extensions\gldjdbpbhhpcpimpiicmglaeeehegflh\policy /v DefaultTenant /t REG_SZ /d 00000000 /f
After the policy has been executed, the Chrome Extension overview page (chrome://extensions) can be used to check whether the extension has been added successfully.

The successful configuration of the default tenant ID can be checked via the policy overview page (chrome://policy).

More information about the Force Install Policy can be found here.
If you need more general information for Chrome Extensions distribution in your company, this article can be a good place to start.
Some information on distributing extensions in general can be found here:
Guide for Chrome
For MacOS
This method writes directly into Chrome’s managed preferences for the extension IDgldjdbpbhhpcpimpiicmglaeeehegflh. For this, you have to create a bash file and paste the given code. You must replace the {<tenant-id>} with your Tenant ID.
#!/bin/bash
# AppNavi Chrome Extension Policy Deployment Script for macOS

POLICY_DIR="/Library/Managed Preferences"
POLICY_FILE="$POLICY_DIR/com.google.Chrome.plist"

mkdir -p "$POLICY_DIR"

# Write forced extension install policy
/usr/libexec/PlistBuddy -c "Add :ExtensionInstallForcelist array" "$POLICY_FILE" 2>/dev/null
/usr/libexec/PlistBuddy -c "Add :ExtensionInstallForcelist:0 string gldjdbpbhhpcpimpiicmglaeeehegflh;https://clients2.google.com/service/update2/crx" "$POLICY_FILE" 2>/dev/null

# Write extension policy block
/usr/libexec/PlistBuddy -c "Add :ExtensionSettings dict" "$POLICY_FILE" 2>/dev/null
/usr/libexec/PlistBuddy -c "Add :ExtensionSettings:gldjdbpbhhpcpimpiicmglaeeehegflh dict" "$POLICY_FILE" 2>/dev/null
/usr/libexec/PlistBuddy -c "Add :ExtensionSettings:gldjdbpbhhpcpimpiicmglaeeehegflh:DefaultTenant string {<tenant-id>}" "$POLICY_FILE" 2>/dev/null

chmod 644 "$POLICY_FILE"
chown root:wheel "$POLICY_FILE"

echo "Chrome policy configured at $POLICY_FILE"
Now, after you have created this file, follow the given steps:
- In Intune Admin Center → Devices → macOS → Shell scripts → + Add
- Upload the chrome-policy-setup.sh script.
- Run script as:
- Root
- Frequency: Every 1 hour (for persistence)
- Assign to your macOS device group
Validating Mac Config
After deployment, confirm the policy is active and the extension is installed:
- Verify on Disk
Run the following command to verify the installation.
defaults read /Library/Managed\ Preferences/com.google.ChromeYou should see:
{
    ExtensionInstallForcelist = (
        "gldjdbpbhhpcpimpiicmglaeeehegflh;https://clients2.google.com/service/update2/crx"
    );
    ExtensionSettings = {
        gldjdbpbhhpcpimpiicmglaeeehegflh = {
            DefaultTenant = {<tenant-id>};
        };
    };
}
- Verify in Chrome
Open a new tab in Chrome and navigate to:
chrome://policyYou must see the Tenant ID here.
Configuration for Microsoft Edge Chromium
To deploy the AppNavi Chrome Extension, execute the following two PowerShell commands. The first line adds the Chrome Extension to the user's Edge Chromium browser. Please note that the numeric value 1 in the first command line may need to be replaced with a different numeric value if other Chrome Extensions have already been deployed via the ForcedInstallPolicy.
The second command configures the target tenant so that it does not need to be configured by the user. In this line, the value 00000000 must be replaced by your target tenant ID.
reg add HKLM\SOFTWARE\Policies\Microsoft\Edge\ExtensionInstallForcelist /v 1 /t REG_SZ /d "gldjdbpbhhpcpimpiicmglaeeehegflh;https://clients2.google.com/service/update2/crx" /f
reg add HKLM\SOFTWARE\Policies\Microsoft\Edge\3rdparty\extensions\gldjdbpbhhpcpimpiicmglaeeehegflh\policy /v DefaultTenant /t REG_SZ /d 00000000 /f
After the policy has been executed, the Edge Chromium Extension overview page (edge://extensions) can be used to check whether the extension has been added successfully.

In Microsoft Edge Chromium, Custom Policy settings are not displayed on the overview page. The easiest way to check if the default tenant ID is applied is to open the AppNavi Chrome Extension.

Some information on distributing extensions in general can be found here:
Guide for Edge.
Notice: The article demonstrates how to add an extension from the Microsoft Store. Since the AppNavi extension can only be obtained via the Chrome Store, the update URL must be changed from https://edge.microsoft.com/extensionwebstorebase/v1/crx to https://clients2.google.com/service/update2/crx accordingly.
Issues updating the policy
Depending on the system configuration and environment, it can take from a few minutes to several hours for the devices to apply the new policy and thus for the AppNavi Extension with tenant configuration to become visible on the clients. In this case, it can be helpful to force the policy retrieval with the gpupdate command.
gpupdate /forceManage the AppNavi Chrome Extension with MS Intune CSP
The AppNavi Chrome Extension can be configured using a CSP (Configuration Service Provider) in Microsoft Intune. For this purpose, either a new configuration profile with the corresponding extension configurations can be created or an existing one can be modified. For whitelisting or forced installation, the following extension ID must be specified: gldjdbpbhhpcpimpiicmglaeeehegflh. It makes sense to manage the AppNavi Tenant ID centrally so that not every user in the company has to enter it manually in the AppNavi Extension. Unfortunately, a central administration via browser CSP is not yet implemented by Microsoft in Intune, so the configuration has to be done once. These are the standard extension policies that can be stored in the registry.
Configuration features for Chrome
For Windows
In order to configure the standard tenant for the AppNavi Extension, the script listed below must first be saved as a PowerShell script. The stored standard tenant ID (00000000) must be replaced by the tenant ID provided by AppNavi.
reg add HKLM\SOFTWARE\Policies\Google\Chrome\3rdparty\extensions\gldjdbpbhhpcpimpiicmglaeeehegflh\policy /v DefaultTenant /t REG_SZ /d 00000000 /fA PowerShell configuration script must then be created and rolled out for the desired users or device target group.
To remove the AppNavi Extension configuration key from the registry, you can proceed according to the principle described above. The following PowerShell script is used for this purpose.
reg delete HKLM\SOFTWARE\Policies\Google\Chrome\3rdparty\extensions\gldjdbpbhhpcpimpiicmglaeeehegflhConfiguration features for Edge Chromium
The AppNavi Chrome Extension is currently only available in the Chrome Store. For this reason, it is necessary to configure the Chrome Store as a permitted source for extensions. This can be done using the Configure default state of Allow extensions from other stores setting policy.
In order to configure the standard tenant for the AppNavi Extension, the script listed below must first be saved as a PowerShell script. The stored standard tenant ID (00000000) must be replaced by the tenant ID provided by AppNavi.
reg add HKLM\SOFTWARE\Policies\Microsoft\Edge\3rdparty\extensions\gldjdbpbhhpcpimpiicmglaeeehegflh\policy /v DefaultTenant /t REG_SZ /d 00000000 /fA PowerShell configuration script must then be created and rolled out for the desired users or device target group.

To remove the AppNavi Extension configuration key from the registry, you can proceed according to the principle described above. The following PowerShell script is used for this purpose.
reg delete HKLM\SOFTWARE\Policies\Microsoft\Edge\3rdparty\extensions\gldjdbpbhhpcpimpiicmglaeeehegflhFor MacOS
Create a configuration file with the name ChromeExtensionPolicy.mobileconfig and paste the given code, which will configure it for the extension ID gldjdbpbhhpcpimpiicmglaeeehegflh. In code update bothPayloadUUID with a different and unique UUID which can be generated from here. In place of {<tenant-id>}, you must give the Tenant ID.
<?xml version="1.0" encoding="UTF-8"?>
<!DOCTYPE plist PUBLIC "-//Apple//DTD PLIST 1.0//EN"
  "http://www.apple.com/DTDs/PropertyList-1.0.dtd">
<plist version="1.0">
<dict>
  <key>PayloadContent</key>
  <array>
    <dict>
      <key>PayloadType</key>
      <string>com.google.Chrome</string>
      <key>PayloadVersion</key>
      <integer>1</integer>
      <key>PayloadIdentifier</key>
      <string>com.appnavi.chrome.policy</string>
      <key>PayloadUUID</key>
      <string>7ec4b70c-ab99-459d-8124-6ad378019337</string>
      <key>PayloadDisplayName</key>
      <string>AppNavi Chrome Policy</string>
      <key>PayloadEnabled</key>
      <true/>

      <key>ExtensionInstallForcelist</key>
      <array>
        <string>gldjdbpbhhpcpimpiicmglaeeehegflh;https://clients2.google.com/service/update2/crx</string>
      </array>

      <key>ExtensionSettings</key>
      <dict>
        <key>gldjdbpbhhpcpimpiicmglaeeehegflh</key>
        <dict>
          <key>DefaultTenant</key>
          <string>{<tenant-id>}</string>
        </dict>
      </dict>
    </dict>
  </array>

  <key>PayloadType</key>
  <string>Configuration</string>
  <key>PayloadVersion</key>
  <integer>1</integer>
  <key>PayloadIdentifier</key>
  <string>com.appnavi.chrome.masterpolicy</string>
  <key>PayloadUUID</key>
  <string>f2590004-1830-4f16-a6c0-b662e6747bd2</string>
  <key>PayloadDisplayName</key>
  <string>AppNavi Chrome Managed Policy</string>
  <key>PayloadDescription</key>
  <string>Deploys AppNavi Chrome extension and applies managed policies via Intune for macOS.</string>
</dict>
</plist>
Now, after you have created this file, follow the given steps:
- Go to Intune Admin Center → Devices → macOS → Configuration profiles → + Create profile
- Select:
- Platform: macOS
- Profile type: Custom
- Upload the above
.mobileconfigfile. - Assign it to your target device or user group
- Save & deploy
Validating Mac Config
After deployment, confirm the policy is active and the extension is installed:
- Verify on Disk
Run the following command to verify the installation.
defaults read /Library/Managed\ Preferences/com.google.ChromeYou should see:
{
    ExtensionInstallForcelist = (
        "gldjdbpbhhpcpimpiicmglaeeehegflh;https://clients2.google.com/service/update2/crx"
    );
    ExtensionSettings = {
        gldjdbpbhhpcpimpiicmglaeeehegflh = {
            DefaultTenant = {<tenant-id>};
        };
    };
}
- Verify in Chrome
Open a new tab in Chrome and navigate to:
chrome://policyYou must see the Tenant ID here.
Necessary permissions of the Chrome Extension
When installing the AppNavi Chrome Extension, the following four permissions are requested:
- webRequest
- tabs
- storage
- scripting
Since the requested permissions are statically stored in the so-called manifest of the Chrome Extension, it is possible that the Chrome Extension requests permissions that are not used in the feature configuration of AppNavi, which has to be done in the AppNavi Portal.
| Permission | Description |
|---|---|
| webRequest | The webRequest permission is needed to check if the so-called custom code, which can be configured in the AppNavi portal and executed on a web page, is allowed by the page. Without this check, errors would occur in the application in case the web page prohibits the execution of code. However, the AppNavi Chrome Extension does not make any changes to the content of the page itself, which requires the webRequest permission. |
| tabs | The tabs permission is required to reload AppNavi when the extension is updated or reloaded. |
| storage | The storage permission is required to store or cache some frequently queried data. |
| scripting | The scripting permission is required to reload AppNavi when the extension is updated or reloaded. |
Is the AppNavi extension active on every page?
Basically, the AppNavi Chrome Extension is active for all pages once it is installed. This is due to the fact that the URLs for which a Chrome Extension is enabled are governed by the manifest, and for security reasons, this can no longer be changed after the installation of the extension.
However, on which pages the AppNavi help and its contents are active is configured in the portal. For this purpose, a so-called application with a URL pattern is created in the portal. This URL pattern is then loaded into the Chrome Extension and cached so that this content does not have to be retrieved for every request.
The Chrome Extension then checks whether the URL requested by the user corresponds to an application created in the portal. Only then is the actual AppNavi content loaded into the page, and AppNavi is active. For applications that are not identified by AppNavi, AppNavi does not make any changes to the web application itself.
This ensures that URLs requested by the user do not have to be transferred to the server, since the evaluation of whether AppNavi is active for an application or not takes place exclusively in the user's browser.
Updated 8 months ago