
2 Factor Authentication
Overview
2-Factor Authentication (2FA) adds an additional verification step when users sign in to AppNavi. After entering their email address and password, users enter a time-sensitive verification code from an authenticator app.
2FA must be enabled at the tenant level before it can be enabled for individual users.
Prerequisites
Before setting up 2FA:
- You must have permission to manage the tenant and users.
- MFA must be enabled at the tenant level before it can be enabled for individual users.
- Users must have an authenticator app, such as Microsoft Authenticator, installed on their mobile device.
- The user must be able to access their AppNavi account.
Important: Enabling MFA for the tenant does not automatically enable it for every user. It makes MFA available for individual user accounts.
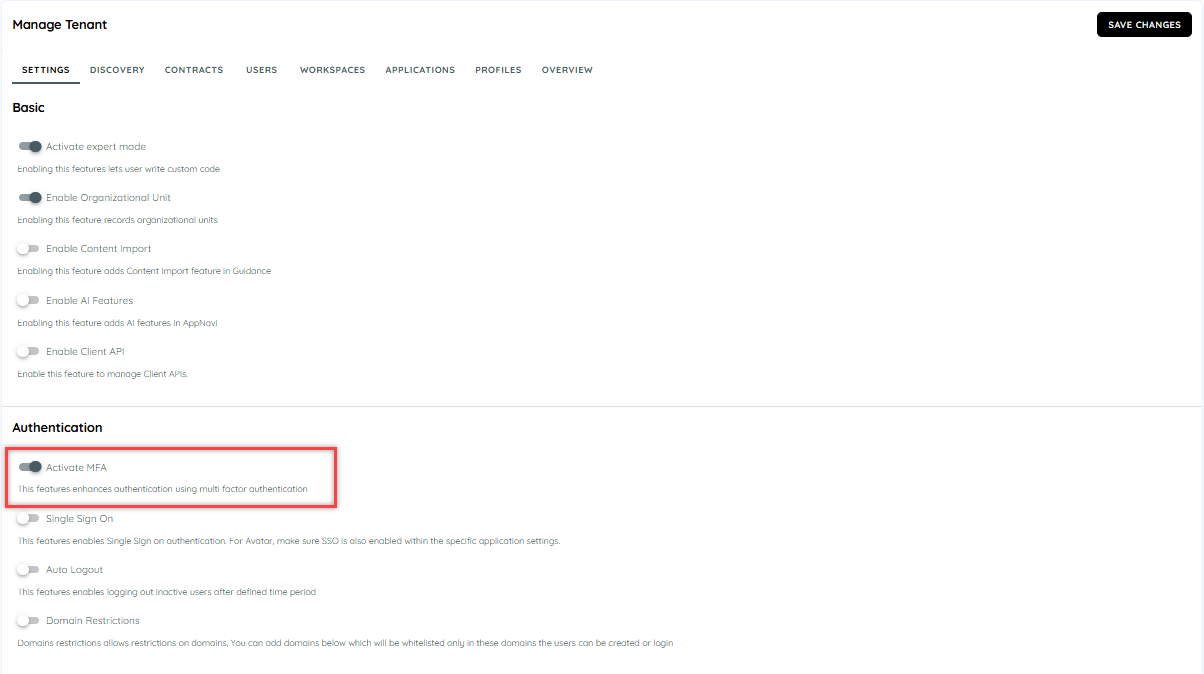
Step 1: Enable MFA for the Tenant
- Go to Manage Tenant.
- Find Enable MFA.
- Turn on the toggle.
- Click Activate in the confirmation dialog.
After activation, MFA options become available when managing individual users.
Step 2: Enable MFA for a User
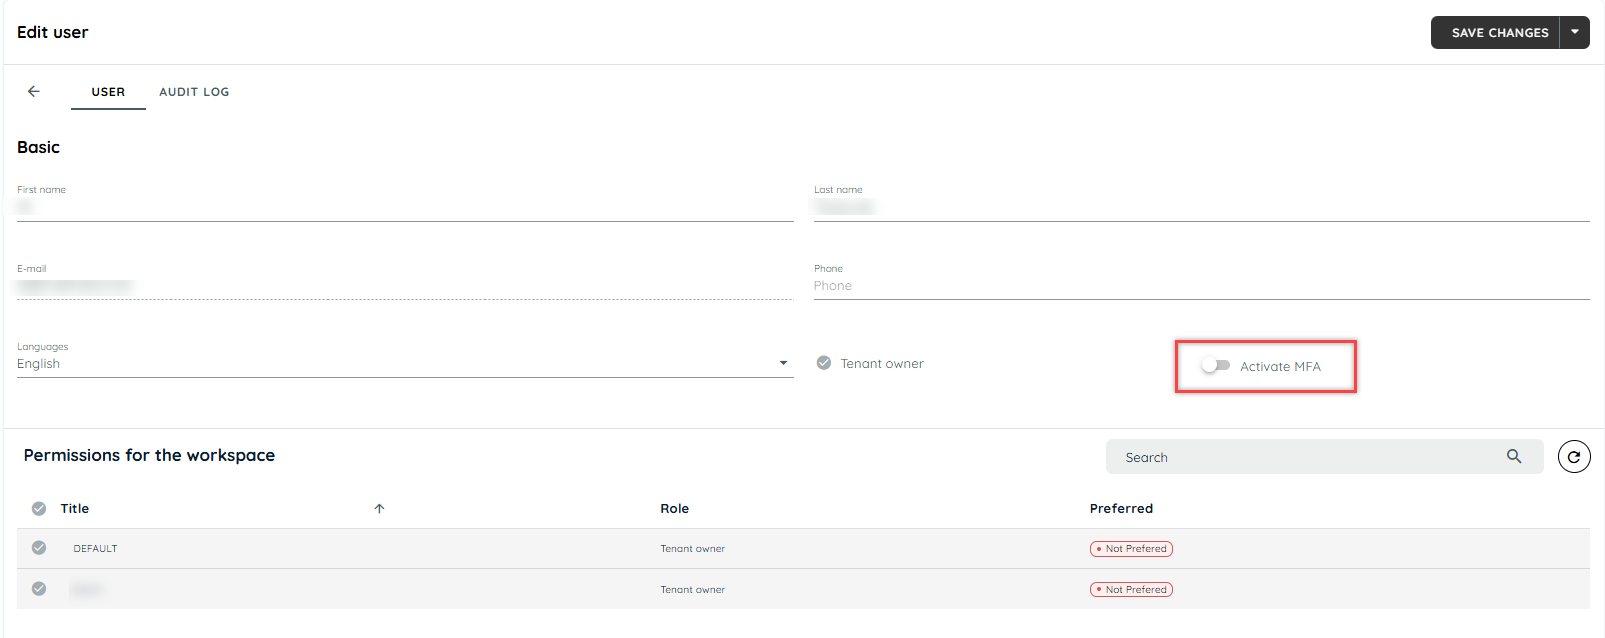
After tenant-level MFA is enabled, activate MFA for each user who requires it.
Option 1: Edit User
- Go to Users.
- Select the user and click Edit User.
- Enable Enable MFA.
- Save the user.
Option 2: Context Menu
- Go to Users.
- Open the user's context menu.
- Select Activate MFA.
Once enabled, that user must complete MFA when signing in through the applicable authentication flow.
User Setup and Login
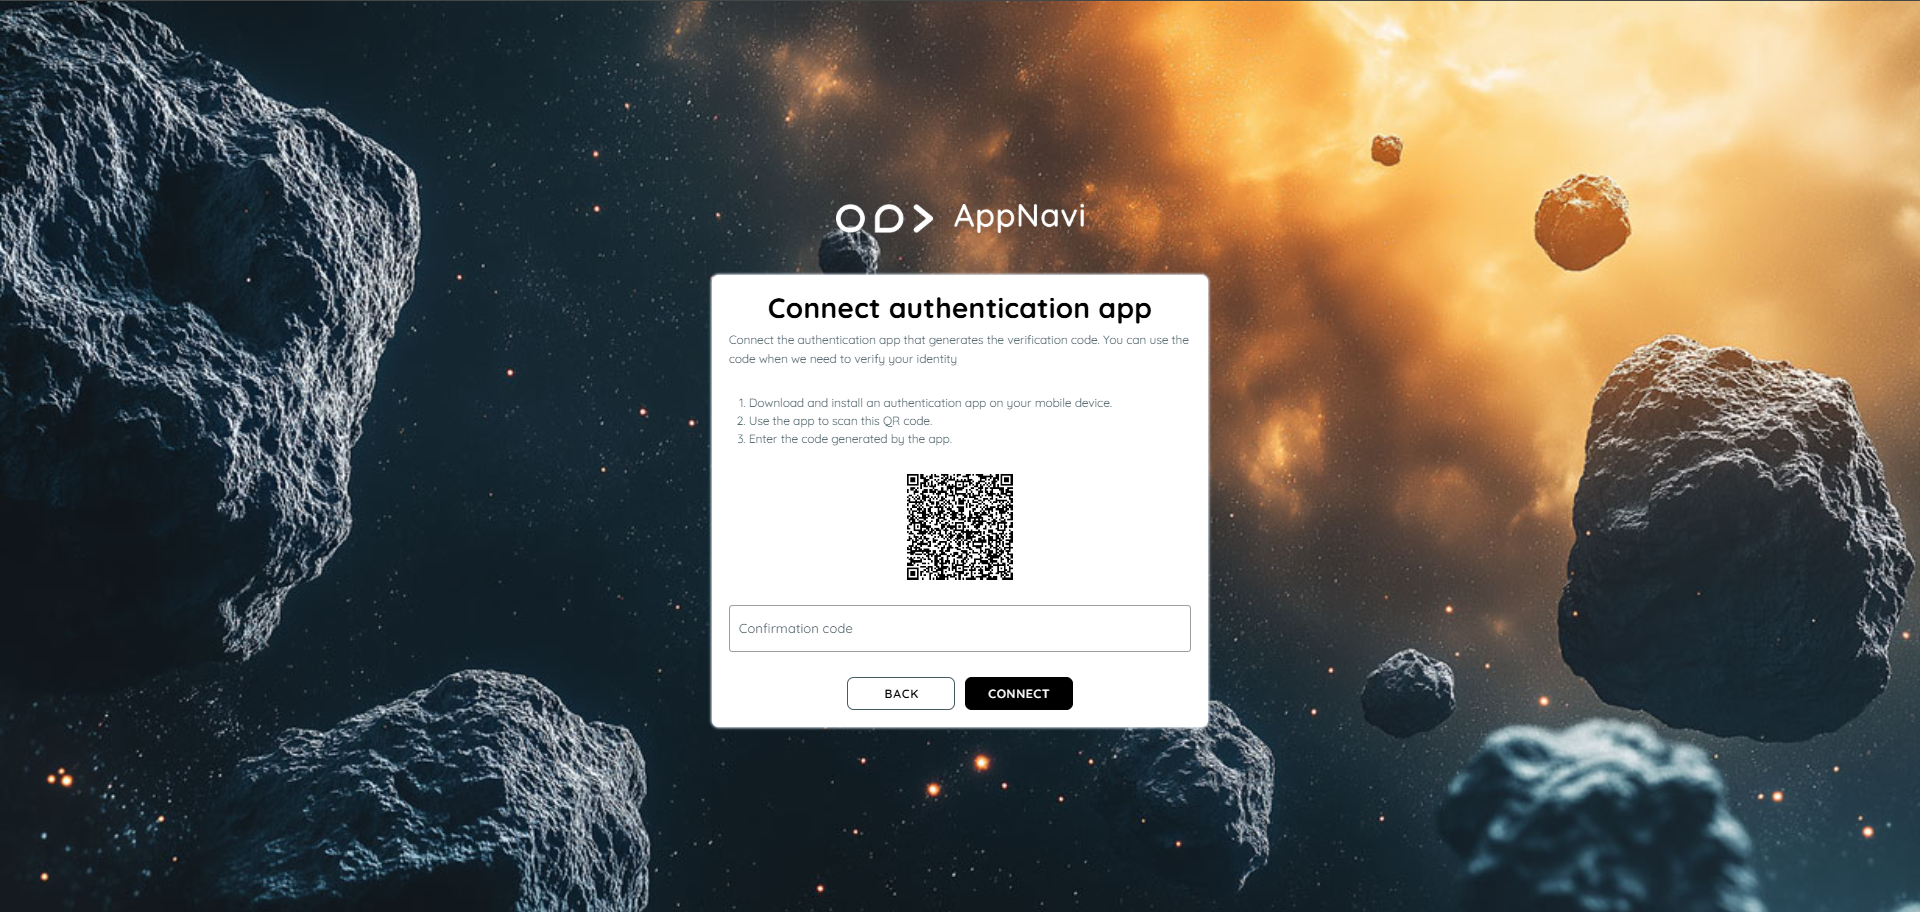
When MFA is enabled for a user, the user needs an authenticator application such as Microsoft Authenticator.
For the initial setup:
- Sign in with the user's email address and password.
- Scan the displayed QR code using the authenticator application.
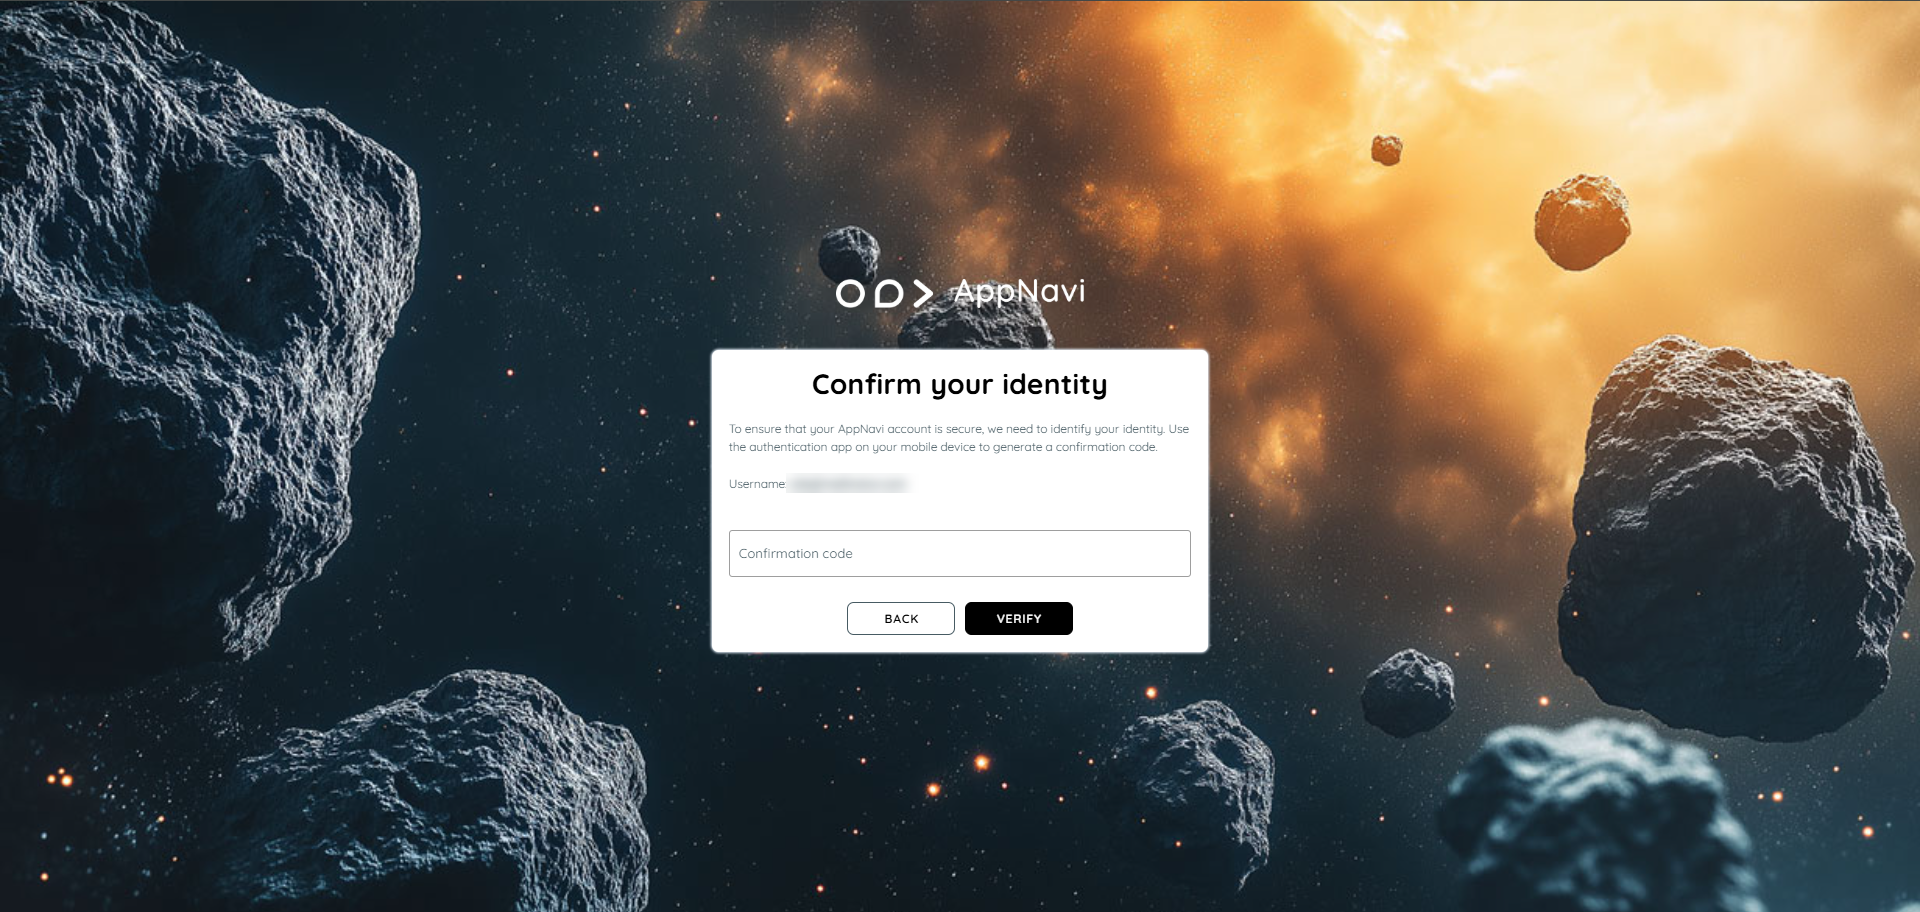
- Enter the verification code generated by the application.
- Complete verification within 60 seconds.
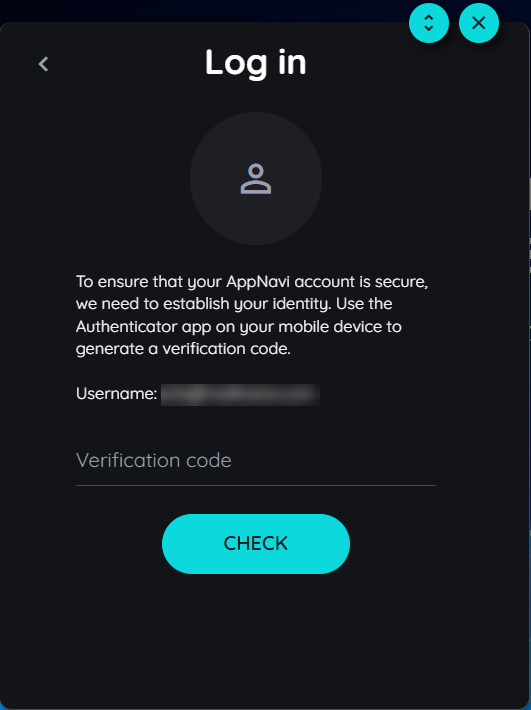
For subsequent Portal logins, the user enters their email address and password and then provides the current verification code. A new code is generated after the current code expires.
Avatar Login
When MFA is enabled for a user, signing in through the Avatar redirects the user to the Portal authentication flow.
The user:
- Enters their email address and password.
- Completes MFA verification in the Portal.
- Returns to the application after successful authentication.
Recovery & Troubleshooting
Verification code expired
Verification codes must be entered within 60 seconds. If the code expires, use the newly generated code from the authenticator application.
User cannot access the authenticator
If a user loses access to their authenticator device or cannot generate a verification code, an authorized administrator should review the user's MFA configuration and follow the organization's account-recovery process.
Do not share verification codes or bypass MFA as a workaround.
MFA options are not available for a user
Check that Enable MFA has first been activated at the tenant level. User-level MFA options are only available after tenant-level activation.
Setup & Verification Checklist
Administrator
- Confirm you have the required tenant and user permissions.
- Enable MFA at the tenant level.
- Enable MFA for the required users.
- Save the configuration.
User
- Install an authenticator application.
- Complete the initial QR-code setup.
- Sign in using email and password.
- Enter the generated verification code.
- Confirm the Portal login succeeds.
- If applicable, confirm Avatar login also succeeds.
Related Documentation
- End User Authentication — Learn how users authenticate with AppNavi.
- Domain Restriction — Restrict access based on user email domains.
- Manage Users — Manage individual user accounts.
- SSO Configuration — Configure single sign-on where applicable.
Updated about 1 month ago