
Domain Restriction
Overview
Domain Restriction controls which email domains can be used to access the AppNavi Portal and Avatar.
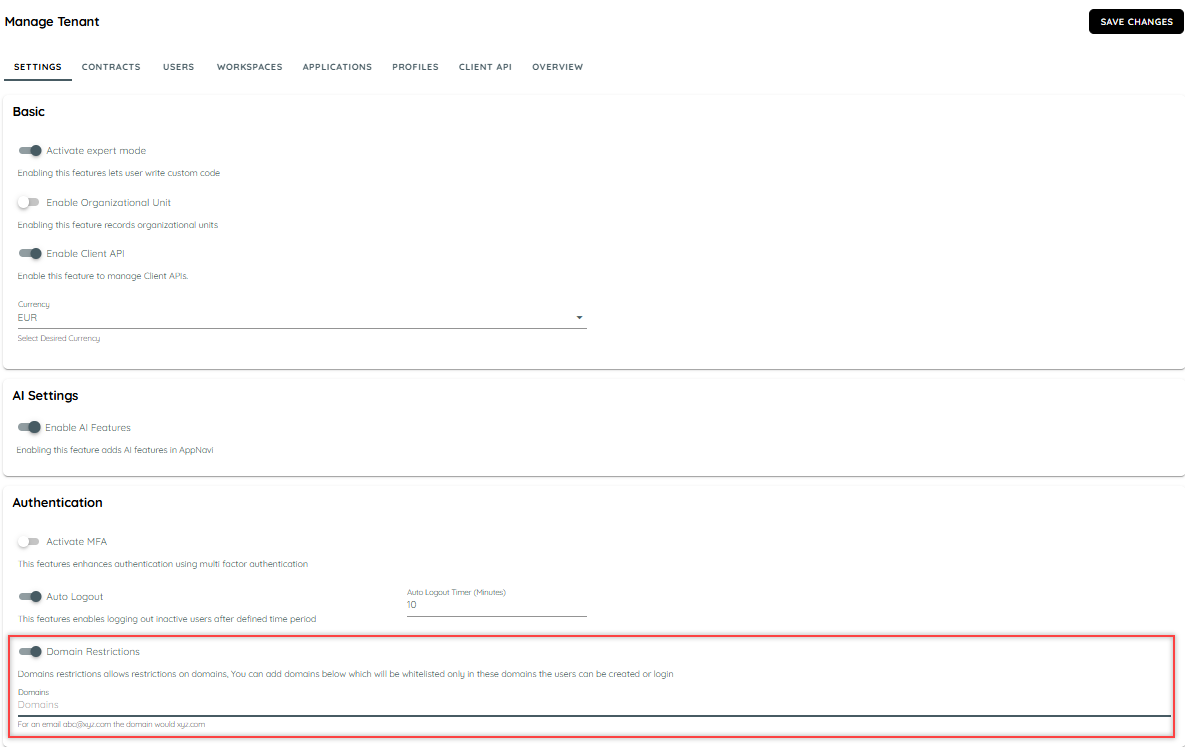
When enabled, only users whose email address matches one of the configured domains can log in or be created.
By default, Domain Restriction is disabled and no domain is restricted. Up to 10 domains can be configured for a tenant.
Prerequisites
You must have permission to manage the tenant settings.
Before enabling Domain Restriction, make sure you know the email domains used by the users who should have access.
Example: If your organization uses
[email protected], configureexample.comas the allowed domain.
Configure Domain Restriction
- Open Manage Tenant.
- Open Settings.
- Locate Domain Restriction.
- Enable the feature.
- Add the domains that should be allowed.
- Save the changes.
- Test access with an authorized and an unauthorized user.
You can configure up to 10 domains at a time.
Supported Domain Values
Enter the domain portion of the user's email address.
| User email | Domain to configure |
|---|---|
[email protected] | example.com |
[email protected] | company.org |
[email protected] | company.co.uk |
Use the exact domain that appears after the @ in the user's email address.
Important: Do not assume that wildcard patterns or partial domain names are supported. Configure the specific domain used by your organization.
Login Behavior
Domain Restriction applies to both the Portal and Avatar, including:
- Username/password login
- Single Sign-On (SSO) login
Users with an email address from a configured domain can access AppNavi.
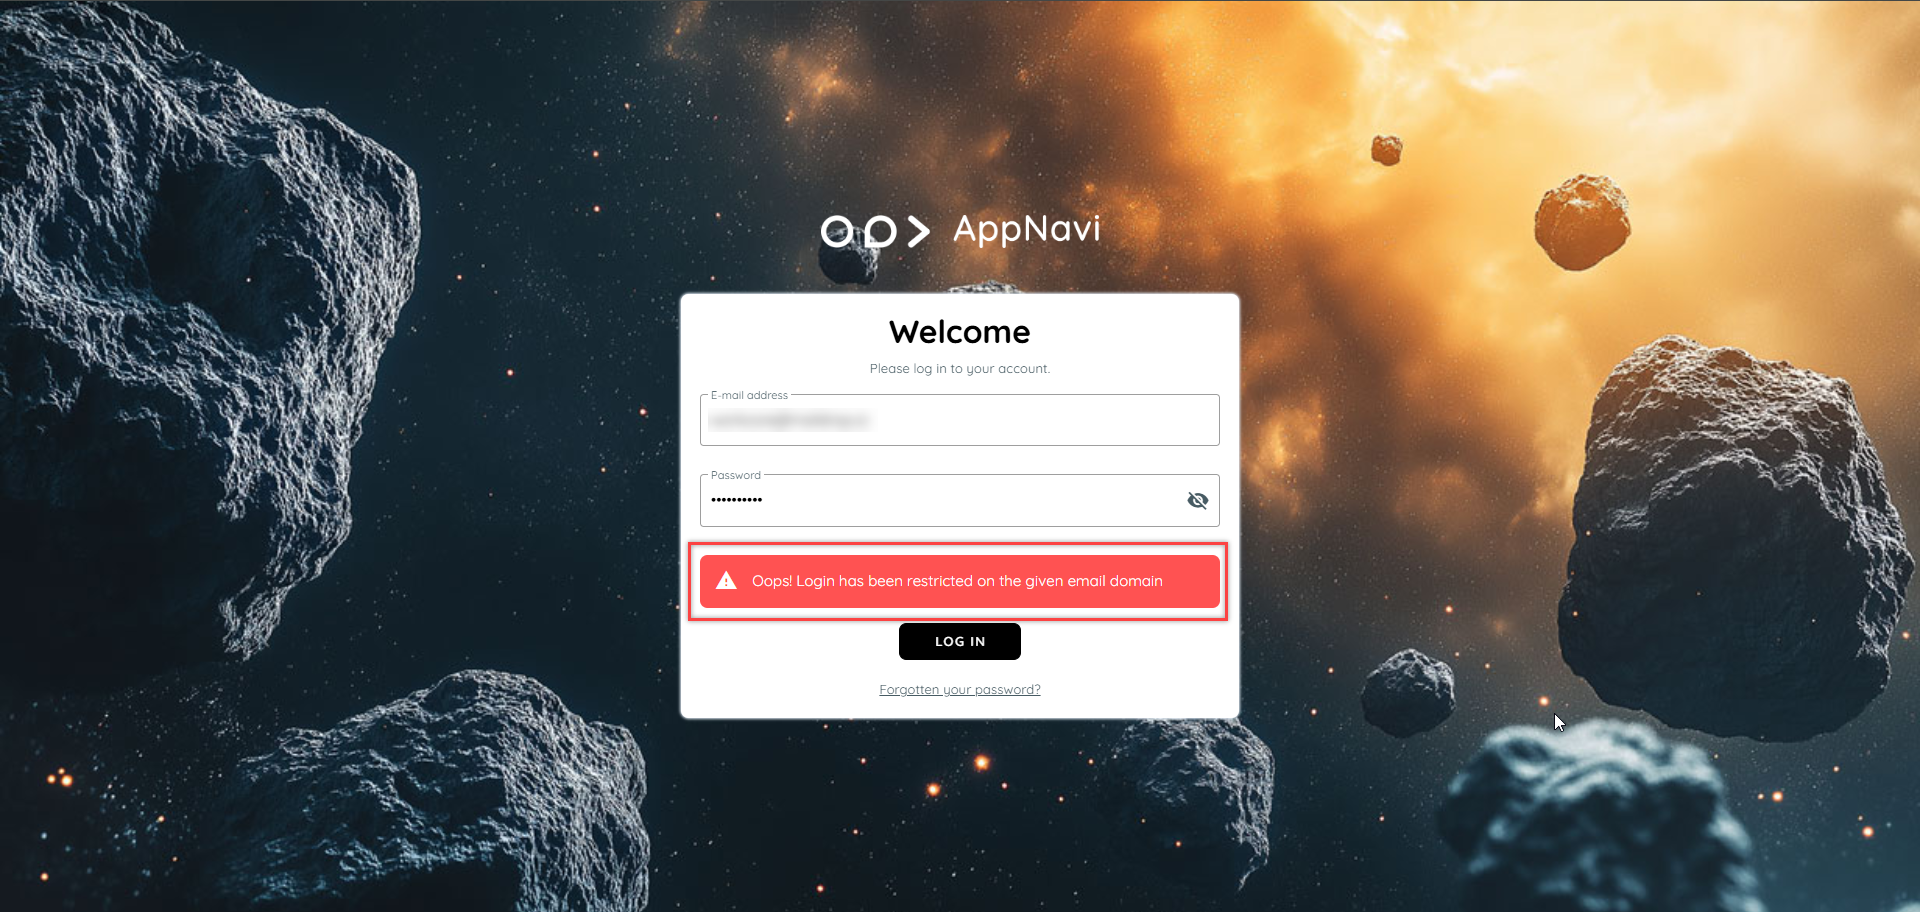
Users whose email address does not match an allowed domain are denied access and receive a domain-restriction message.
User Invitations
Domain Restriction also affects new user creation. When the feature is enabled, a new user can be created only when their email address matches one of the configured domains.
Example: If
example.comis configured,[email protected]can be created, while[email protected]cannot.
SSO Considerations
Domain Restriction works together with SSO. Enabling SSO does not bypass the domain restriction.
The email address used to identify the user through SSO must match one of the configured allowed domains.
For SSO configuration, see Single Sign-On Setup.
Validation
After saving the configuration, verify both allowed and restricted access:
- Log in with a user whose email matches an allowed domain.
- Confirm that Portal access is granted.
- Test the same user through SSO, if SSO is enabled.
- Test Avatar login with the same user.
- Try logging in with a user from a non-configured domain.
- Confirm that access is denied with the domain-restriction message.
- Try creating/inviting a user from an allowed domain.
- Try creating/inviting a user from a non-configured domain.
- Confirm that the configuration remains saved after refreshing the settings page.
Disabling Domain Restriction
If Domain Restriction is no longer required:
- Open Manage Tenant → Settings.
- Disable Domain Restriction.
- Save the changes.
- Verify that users are no longer blocked based on their email domain.
Security recommendation: Keep Domain Restriction enabled when access should be limited to your organization's approved email domains. Review the configured domains whenever your organization's email domains change.
Related Documentation
- Authentication — Overview of AppNavi authentication methods.
- Single Sign-On Setup — Configure SSO.
- 2 Factor Authentication — Configure additional authentication security.
- Manage Tenant — Manage tenant-level settings.
Updated about 1 month ago