
Content Import
Overview
Content Import lets Tenant Owners bring existing Routes from third-party platforms such as WalkMe and Userlane into the AppNavi portal, so you do not have to recreate each Route by hand. You upload a pre-structured Excel file that contains the route steps, tooltips and related information, and AppNavi creates or updates the matching Routes for you.
During the import you select the content provider (for example, WalkMe or Userlane) and the content type. AppNavi checks the file for errors, shows a preview, processes the content, and keeps a detailed log of what was created, updated or failed for each Route.
When to use Content Import
Use Content Import when you are migrating guidance content from WalkMe or Userlane to AppNavi, or when you need to bring a large number of Routes into a tenant at once. Content Import supports Routes only.
Perquisites
Make sure that:
• You are a Tenant Owner and can open Manage Tenant settings.
• You have exported the Routes from the third-party platform as Excel files (.xlsx or .xls) in the structure the provider adapter expects, including all required columns.
Enable Content Import
-
Go to Manage Tenant and open the Settings tab.
-
In the Basic section, switch on Enable Content Import.
-
In Content Providers, select the providers you want to allow, for example WalkMe or Userlane.
-
Click Save Changes.
Result: a new Import tab appears in the Guidance module. You can enable or disable individual content providers here at any time.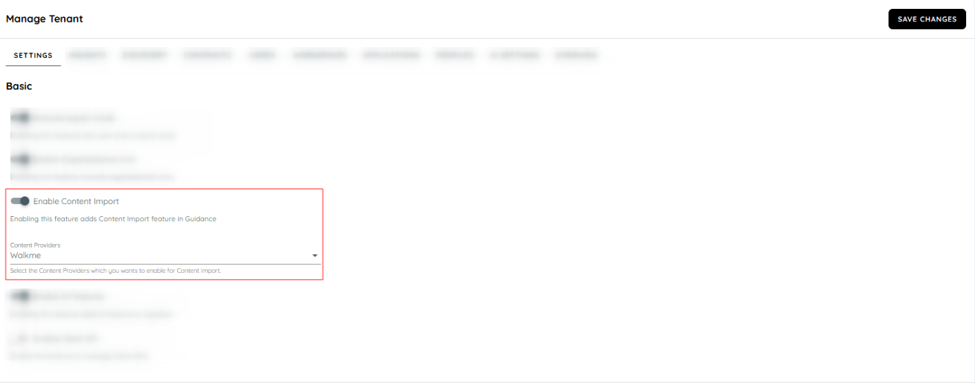
The Enable Content Import toggle and Content Providers setting in Manage Tenant.
Import a file
The import runs in a three-step dialog: Providers, Upload and Preview.
- Go to Guidance and open the Import tab.
- Click the three-dot menu at the top right of the Import Overview and select Import.
- In the Providers step, choose the Content Provider and the Content Type (Routes), then click Next.
- In the Upload step, drag and drop your files into the upload area or click it to select them, then click Next. You can select up to 10 files per import.
- In the Preview step, use Select Routes to check each Route, its languages and its steps.
- Click Import.
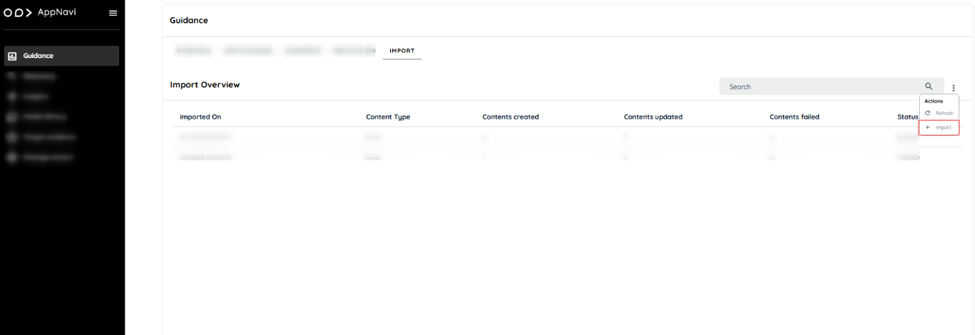
The Actions menu on the Import tab, used to start a new import.
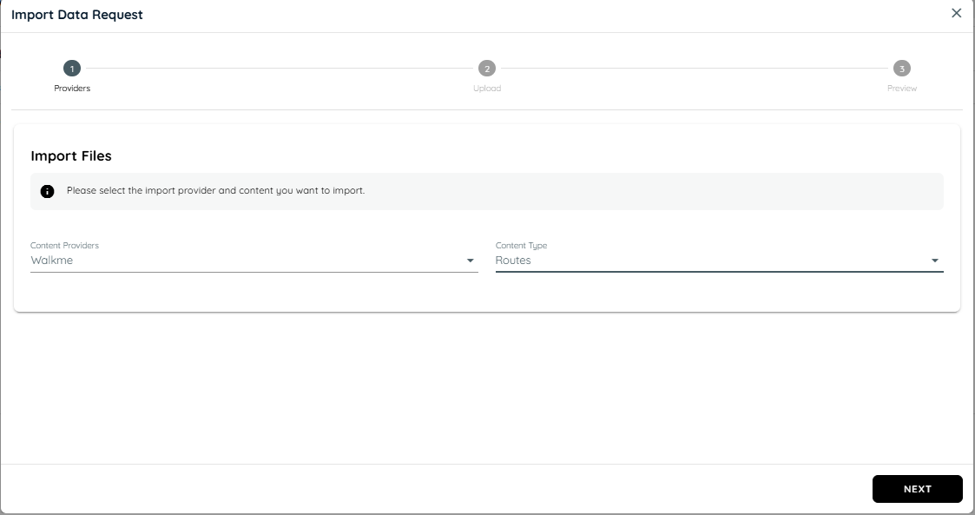
Providers step, where you choose the content provider and content type.
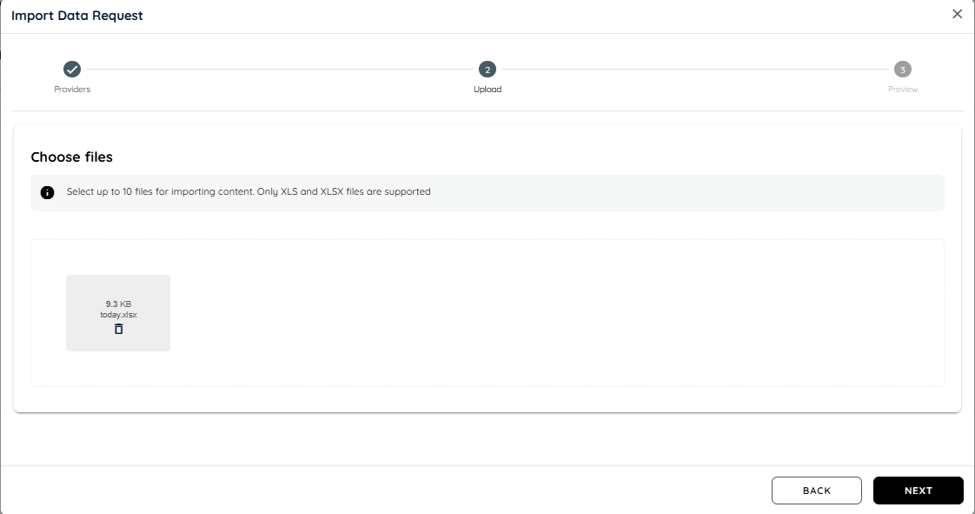
Upload step, where you add the Excel files to import.
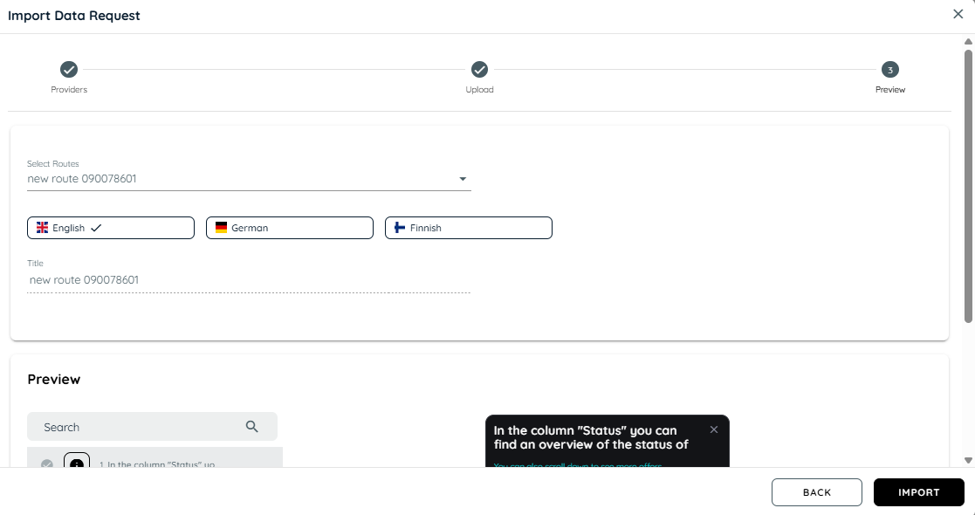
Preview step, where you check each Route and its languages before importing.
File validation and errors
AppNavi validates each file while it prepares the preview. A loading indicator is shown while the file is processed. If a file cannot be used, for example because no processor matches it or a required column is missing, an error message explains what went wrong and the Import button stays disabled. Typical messages include:
• “No processor found for this file type”
• “Unable to create route from the provided file … Text type column is missing. Please ensure required columns are present.”
Fix the file in Excel, then click Back and upload it again.
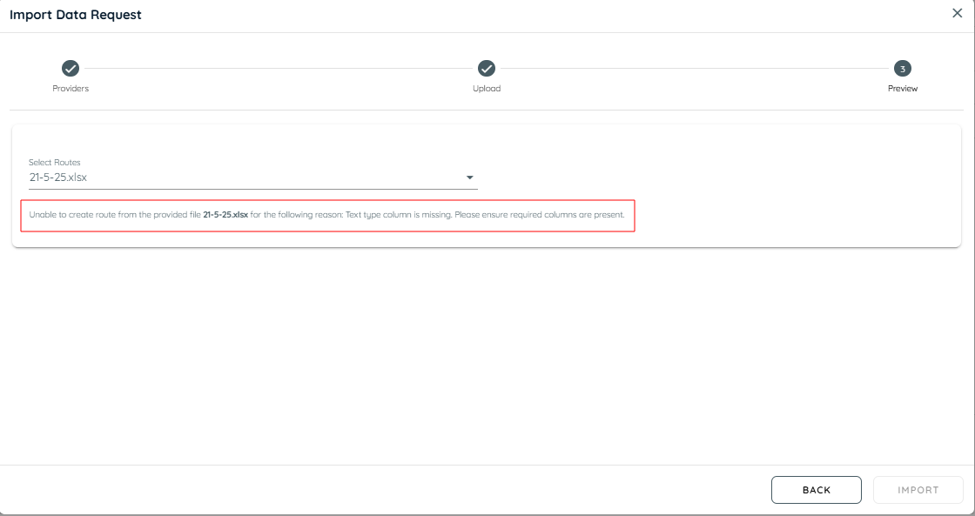
A validation error in the Preview step caused by a missing column.
Review the result
Import summary
Import summary
After processing, AppNavi shows a summary with the number of content items created, updated and failed, plus an error message for each failed item. Use it to see straight away what was imported and what needs to be fixed.
Import log
Every import is listed in the Import Overview on the Import tab, with these columns:
• Imported On: the date and time the import was completed.
• Content Type: the type of content imported, for example Route.
• Contents Created: the number of new Routes added.
• Contents Updated: the number of existing Routes updated with information from the file.
• Contents Failed: the number of items that could not be imported.
• Status: the current state of the import: Queue, Executing, Error or Finished.
Open an imported Route
- Click an import in the Import Overview to open Import Details. It lists each imported Route with its ID, title, languages and status (created or updated).
- Click View next to a Route to open its edit page, where you can check and adjust the imported content.
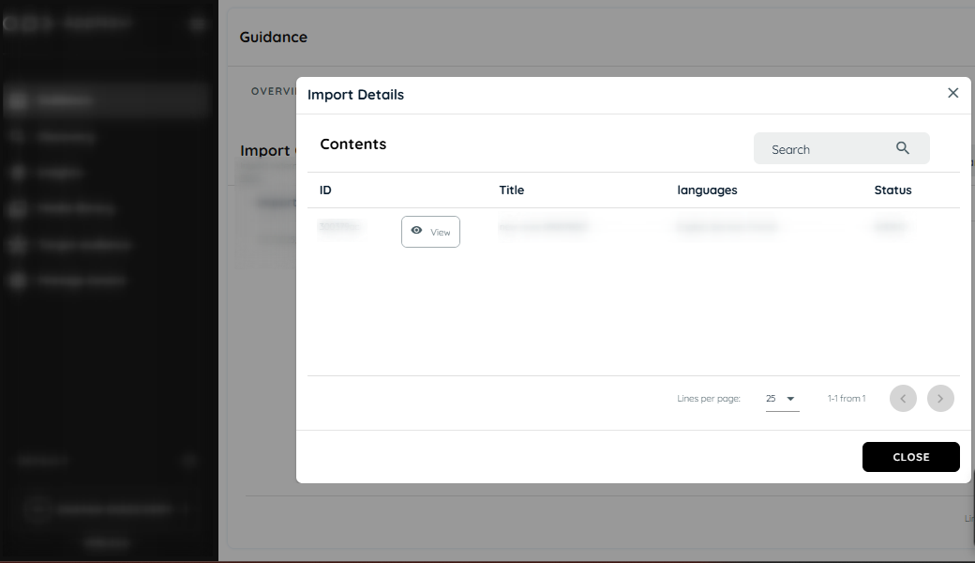
Import Details, listing the Routes from one import.
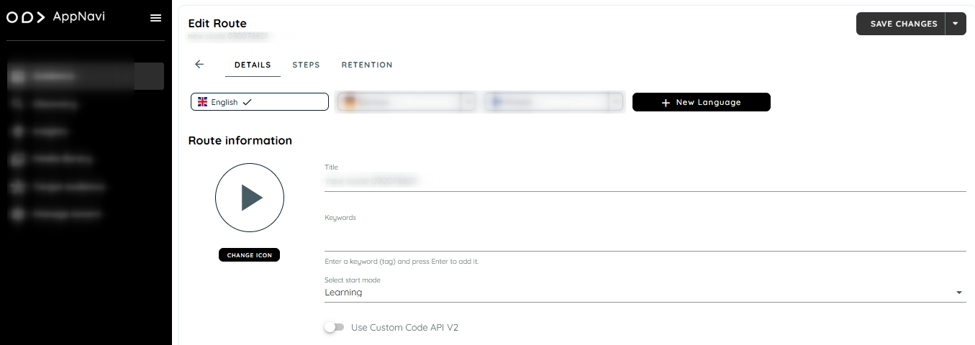
The edit page of an imported Route, opened from Import Details.
Summary
The Content Import feature in AppNavi allows Tenant Owners to seamlessly import Routes from third-party platforms like WalkMe and Userlane using a structured .xlsx file. This eliminates the need to manually recreate guidance content, ensuring a smooth and efficient migration process.
From a business perspective, it helps organizations save time, reduce operational overhead, and accelerate user by reusing existing assets—leading to faster platform adoption and improved productivity.
Related articles
• Guidance
• Guidance Features
• Manage Tenant
• Content Language Translation
• Supported Content Languages
Updated 14 days ago