Content Publication
Overview
Content publishing is a core feature that allows you to control where when and to whom content is displayed.
You can publish different content types (Routes, Posts, Announcements, Collections, and Pins) either at the application level or at the object level, depending on your needs.
Types of Content Publishing
- Application-Level Publishing
- Publish, unpublish, or republish a specific Route, Post, Collection, Announcement or Pin within a single application.
- Best for content that is tied to one app only.
- Object-Level Publishing
- Publish a specific Route, Post, Collection, Announcement, or Pin across multiple applications.
- Best for reusable content that should appear in more than one app.
Accessing Content Management
- Open the side menu and click Guidance.
- Go to the Applications tab.
- The Applications screen appears with a list of available apps.
- Select the desired application.
- Open the 3-dots menu and click Manage Content.
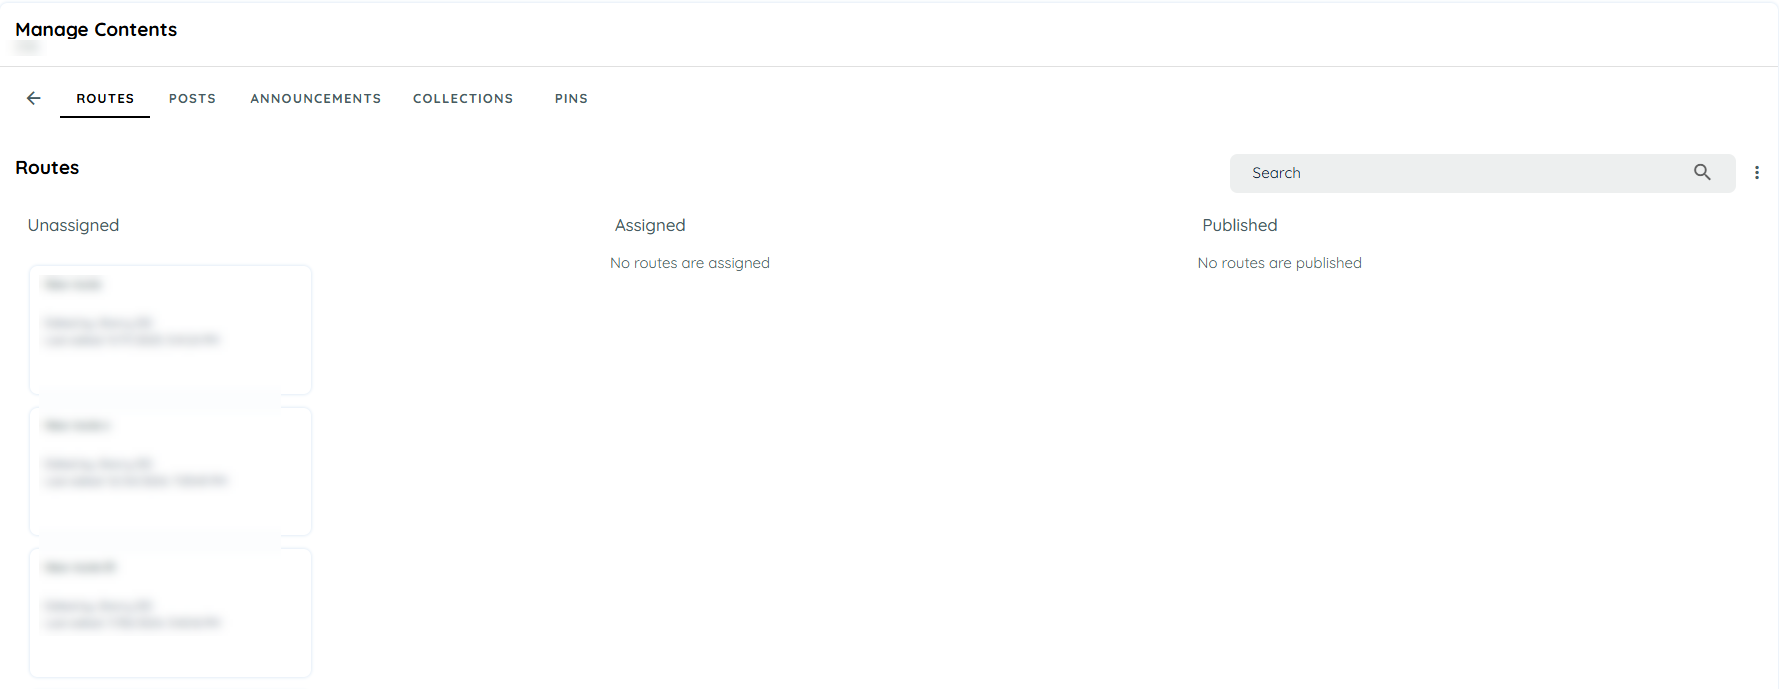
- The screen will display tabs for:
- Routes
- Posts
- Announcements
- Collections
- Pins
Each tab has three columns: Assign, Unassignand Publish.
Publishing Content
Content can be published in two ways:
- Drag and Drop
- From Context Menu
Drag and Drop
- Select the desired tile.
- Drag and drop it into the Published column.
- A Publish dialog will appear.
- Enter the required publish details.
- The content will then move to the Published column.
Using the Options Menu
- Select the desired tile.
- Click the 3-dots menu and choose Publish.
- A Publish dialog will appear.
- Enter the required details and click Publish.
- The content will then move to the Published column.
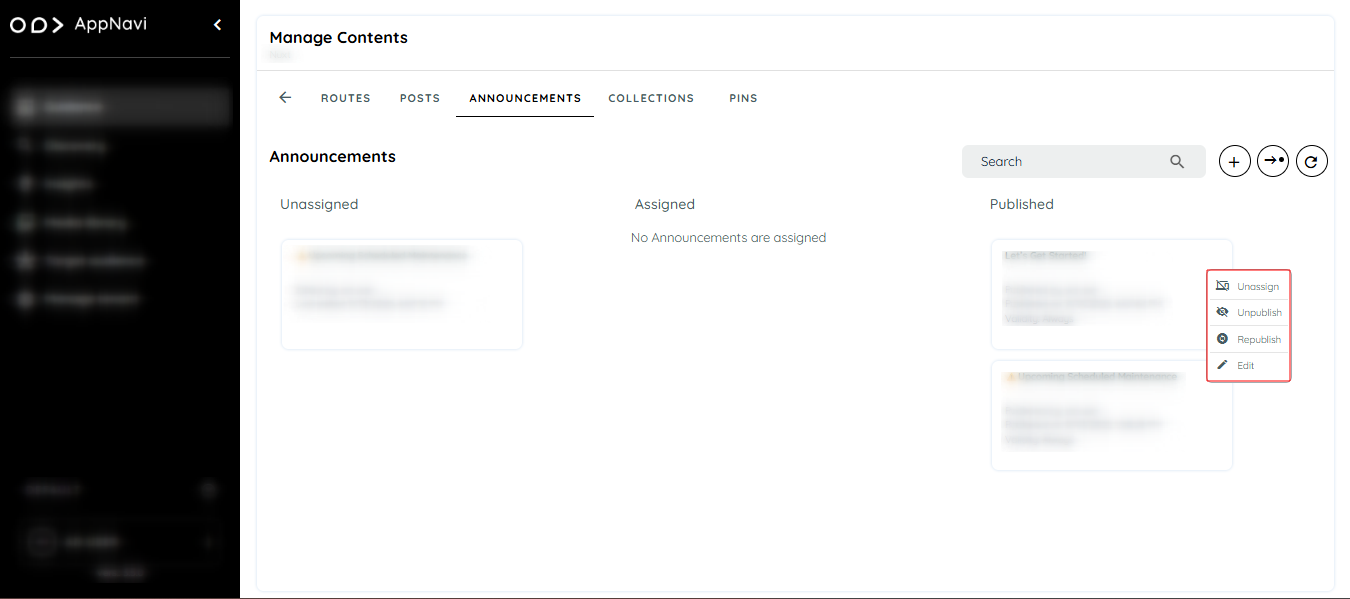
Managing Published Content
By simple drag and drop or by context menu , user can perform following options as well.
- Unpublish: The content will be removed from guest users but remain available to logged-in users within the assigned application. It will move back to the Assigned column.
- Unassign: The content will be removed from the application entirely and will no longer be visible to any users. It will move to the Unassigned column.
- Edit: Allows the user to update or modify existing content.
- Republish: After editing, the content can be republished with updated details. In case of edit, new details will be visible to public users only if content is republished.
Details of Publish Dialog
When publishing, users will see the following options in the dialog:
- Restrict Display → Show content only under specific conditions on applications.
- Pinned → Keep content fixed at the top.
- Date Range → Define start and end dates for visibility.
- Hide in Avatar → Prevent content from appearing in the Avatar for guest users.
- Target Audience → Choose which user groups can access the content.
- Language Edit → Add translations or language-specific edits.
- Retention → Define how long the content stays available.
Versioning
- Latest Version → Changes saved but not published.
- Published Version → The last version visible to users.
With Save and Publish, the latest version becomes the published version immediately.
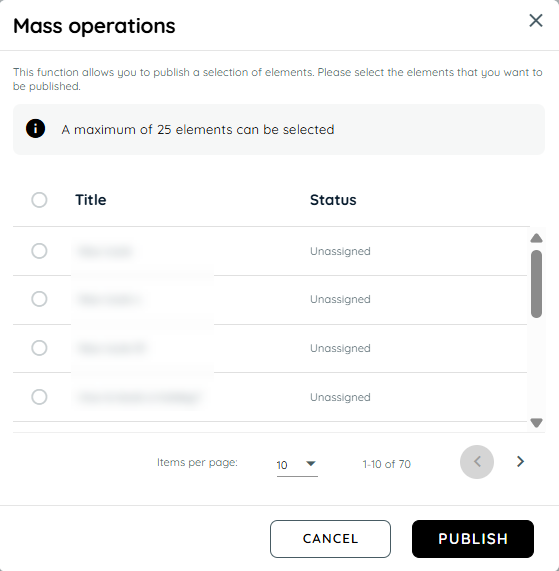
Object Level based Content Publishing (Mass Publishing)
The Publishing Assistant allows you to publish multiple items at once (up to 25).
Steps:
- Go to the Guidance tab from the main menu.
- Open Applications and select an app.
- Open Manage Content.
- Select a content tab (e.g., Routes).
- Click the Publishing Assistant icon.
- A dialog appears showing available content.
- Select up to 25 items.
- Click Publish → all selected content will be published to the chosen application.
Restrict Display
Restrict Display allows you to control where specific content (Routes, Posts, Announcements, Collections, and Pins) is shown by defining URL-based patterns. This ensures that content only appears on relevant pages instead of being displayed globally (e.g., on the homepage).
This feature is especially important for Single Page Applications (SPAs), where navigation often happens through URL fragments (#) and dynamic routes rather than full page reloads.
How Restrict Display Works
When publishing content, you can define URL patterns that determine where the content should be visible.
Key Capabilities
- Add new patterns using the plus (+) button
- Activate / Deactivate patterns without deleting them
- Delete patterns that are no longer needed
- Configure up to 5 URL patterns per content item
- Use wildcards (*) for flexible matching
Patterns are evaluated against the full URL, including:
- Pathname
- Query parameters (?key=value)
- Fragment identifiers (#section)
Understanding Wildcards (*)
The wildcard (*) represents any sequence of characters (including none). It is the most important concept for making restrictions work reliably, especially in SPAs.
Why * at the Beginning and End Matters
In many cases, URLs contain additional dynamic parts before or after the section you want to match. If your pattern is too strict, it may not match the actual runtime URL.
Example:
/reference/reactThis matches only if the URL is exactly /reference/react. In SPAs, the actual URL often looks like:
https://example.com/ui#/reference/react?mode=editBecause of this, the restriction may fail and the content may appear on the homepage.
Recommended Pattern:
*/reference/react*This ensures the content is displayed wherever /reference/react appears—regardless of what comes before or after it.
SPA (Single Page Application) Considerations
In SPAs:
- Page navigation does not reload the browser
- Routes are often stored in the URL fragment (#)
- Dynamic parameters are frequently appended
Because of this, patterns must usually:
- Include # when matching SPA routes
- Use wildcards (*) to handle dynamic segments
Examples of Supported Patterns:
| Pattern Example | Description |
|---|---|
/*admin*/settings | Matches any path with "admin" in it before "settings" |
#role_*admin | Matches fragment identifiers like #role_superadmin |
?userrole=the*role | Matches query strings with values like the_admin_role |
xx*=1*2 | Matches keys or values containing 1 followed by 2 |
Examples for SPA
Target URLs
https://abc.xyz.cloud.app/ui#PurchaseRequisition-createSSP&/home
https://abc.xyz.cloud.app/ui#PurchaseOrder-manage&/C_PurchaseOrderTP(...)
https://abc.xyz.cloud.app/ui#BusinessPartner-manage&/
Recommended Patterns
*#PurchaseRequisition-createSSP*
*#PurchaseOrder-manage*
*#BusinessPartner-manage*
These patterns ensure Contents are shown only on the relevant SAP application screens and not on the homepage.
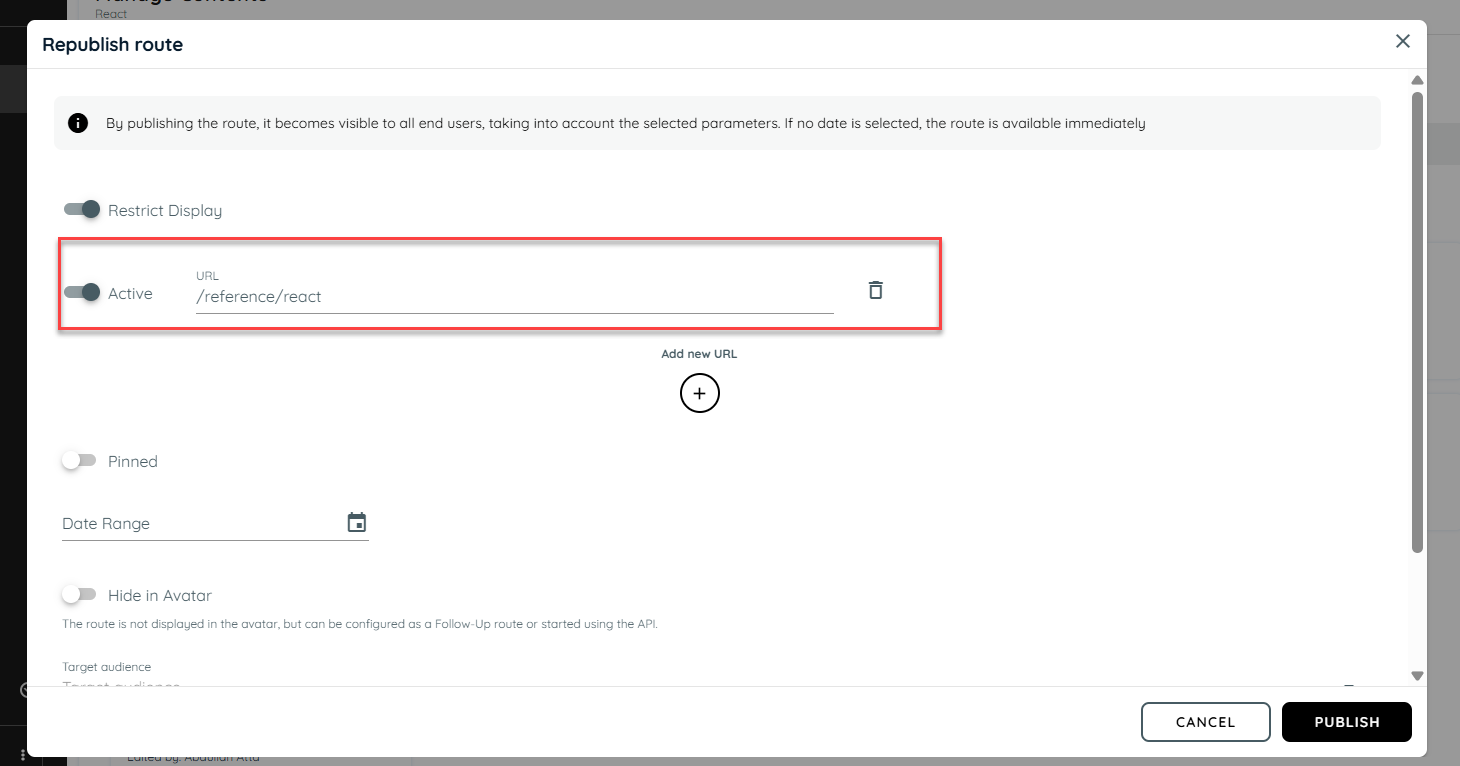
Restrict Display Configuration Example
Let's take an example of a Route Restrict display while publishing.
When publishing a route in AppNavi, you can restrict its display by adding a specific URL pattern. This ensures that the route is only visible on designated pages of application and hidden elsewhere.
- Add a Pattern While Publishing
- During the publishing process, define a specific URL pattern for the route.
example define pattern : /reference/react - This pattern determines where the route will be displayed.
- Check on the Avatar Side
On the avatar interface, the route appears only when the user is on a page matching the defined pattern. - Restricted on Other Links
For example, if you navigate to a /community or /reference page or any other URL that does not match the pattern, the route will not be displayed there on avatar.
URL-Based Display Rules for Content Visibility
This section explains how the "Restrict Display On" setting affects the visibility of content (e.g., Routes, Posts, or Announcements) based on URL configurations and their activation status.
- Restrict Display ON → No URL Configured
- Result: Content is displayed on all pages.
- Explanation: Since no URL pattern is defined, the restriction has no effect and the content is shown everywhere.
- Restrict Display ON → One URL Configured (Inactive)
- Result: Content is displayed on all pages as URL is inactive.
- Explanation: An inactive URL is ignored. As there are no active URLs, the restriction is effectively bypassed.
- Restrict Display ON → Two URLs Configured (One Active, One Inactive)
- Result: Content is displayed only on the active URL.
- Explanation: The restriction applies only to active URL patterns. The inactive one is ignored.
- Restrict Display OFF → URLs Configured (Active or Inactive)
- Result: Content is displayed on all pages.
- Explanation: The "Restrict Display" toggle is off, so the system does not consider any URL patterns regardless of their status.
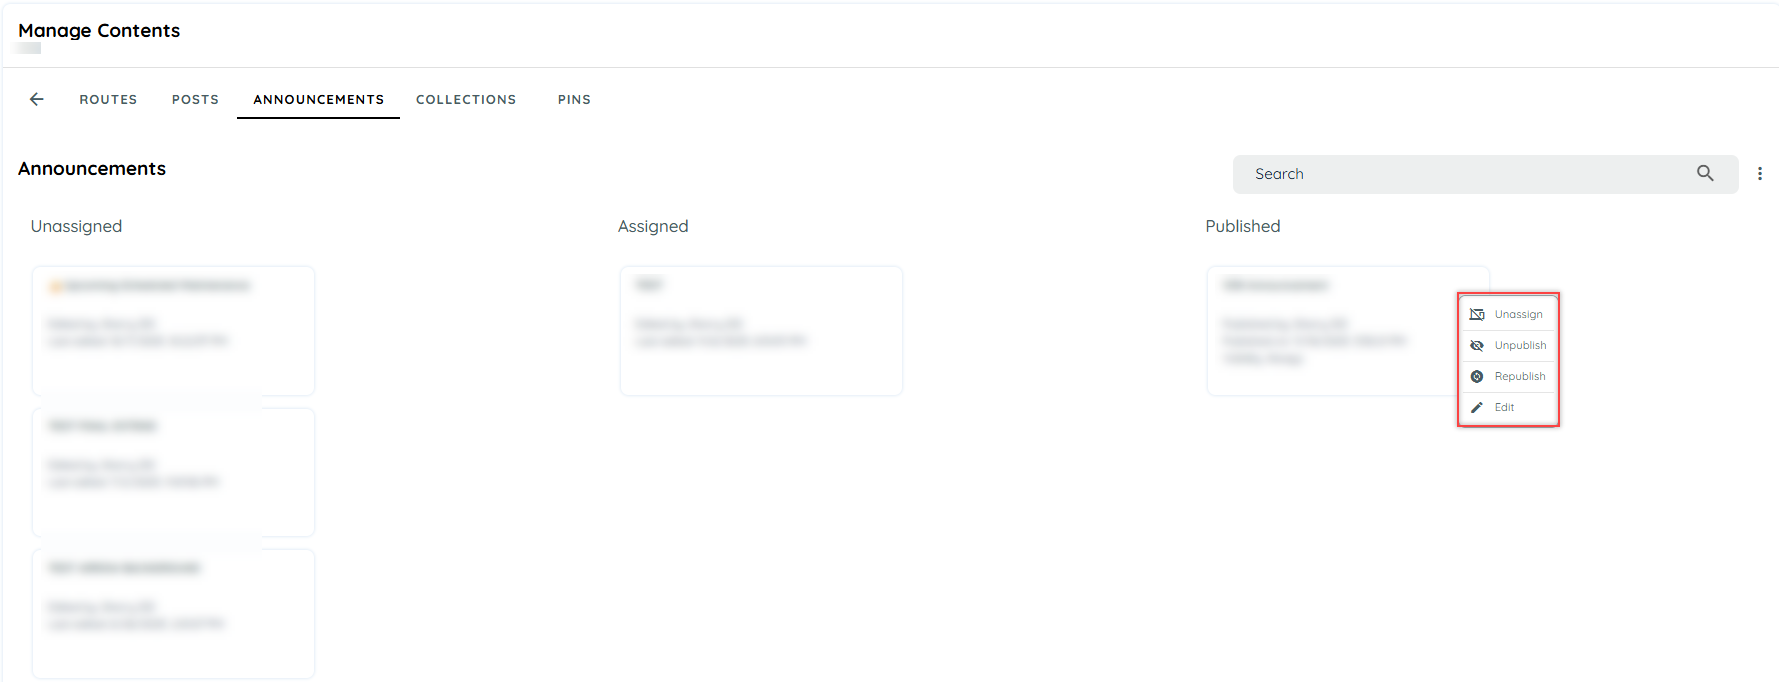
Announcement Display Rules
For announcement user can manage its occurrence on client side, means if user want announcement to appear frequently he may set a rule for daily announcement. There are three rules that user can set:
- One Time: It will display only once in the whole life time.
- Everyday: It will be displayed once every 24 hours.
- Weekly: It will display once a week.
- EveryTime: It functions on every new session.
- API only: It functions only when called through a custom code on any application.

Users can also Unpublish , Unassigned, Republish or Edit.
- Un Publish: Content will be removed for guest users and will only available for logged in users on
specified application. It moves to assigned column. - Un Assign: Content will be removed from that application and will no longer be available for logged in or anonymous users. Content will be moved to Not Assigned tab.
- Edit Content : This option will be used If user wants to change or update existing content.
- Republish: This will be used if user wants to republish a content with new details after editing same content.
Retention
The retention feature helps users to delete un-necessary data that has been made for any application over a period of time such as routes, pins, posts, collection and announcements. This feature can be found in the edit page of any content on the portal. Each content has a retention tab on its right and user can add the retention.

The users can create any type of content and add a retention period to the content. The standard retention period are as follows:
- Routes: 3 Years
- Posts: 1 Year
- Announcements: 180 Days
- Collections: 3 Years
- Pins: 1 Year
The users can also change the retention period of any content by selecting the standard retention's from the drop down. Once the user saves the retention, from the current day till its retention time the content will exist on the assigned application and then get deleted and move to the recycle bin only if it is assigned or unassigned in that period of time. The content will not be deleted if it is still published even if the retention period has been met.
Updated 3 months ago